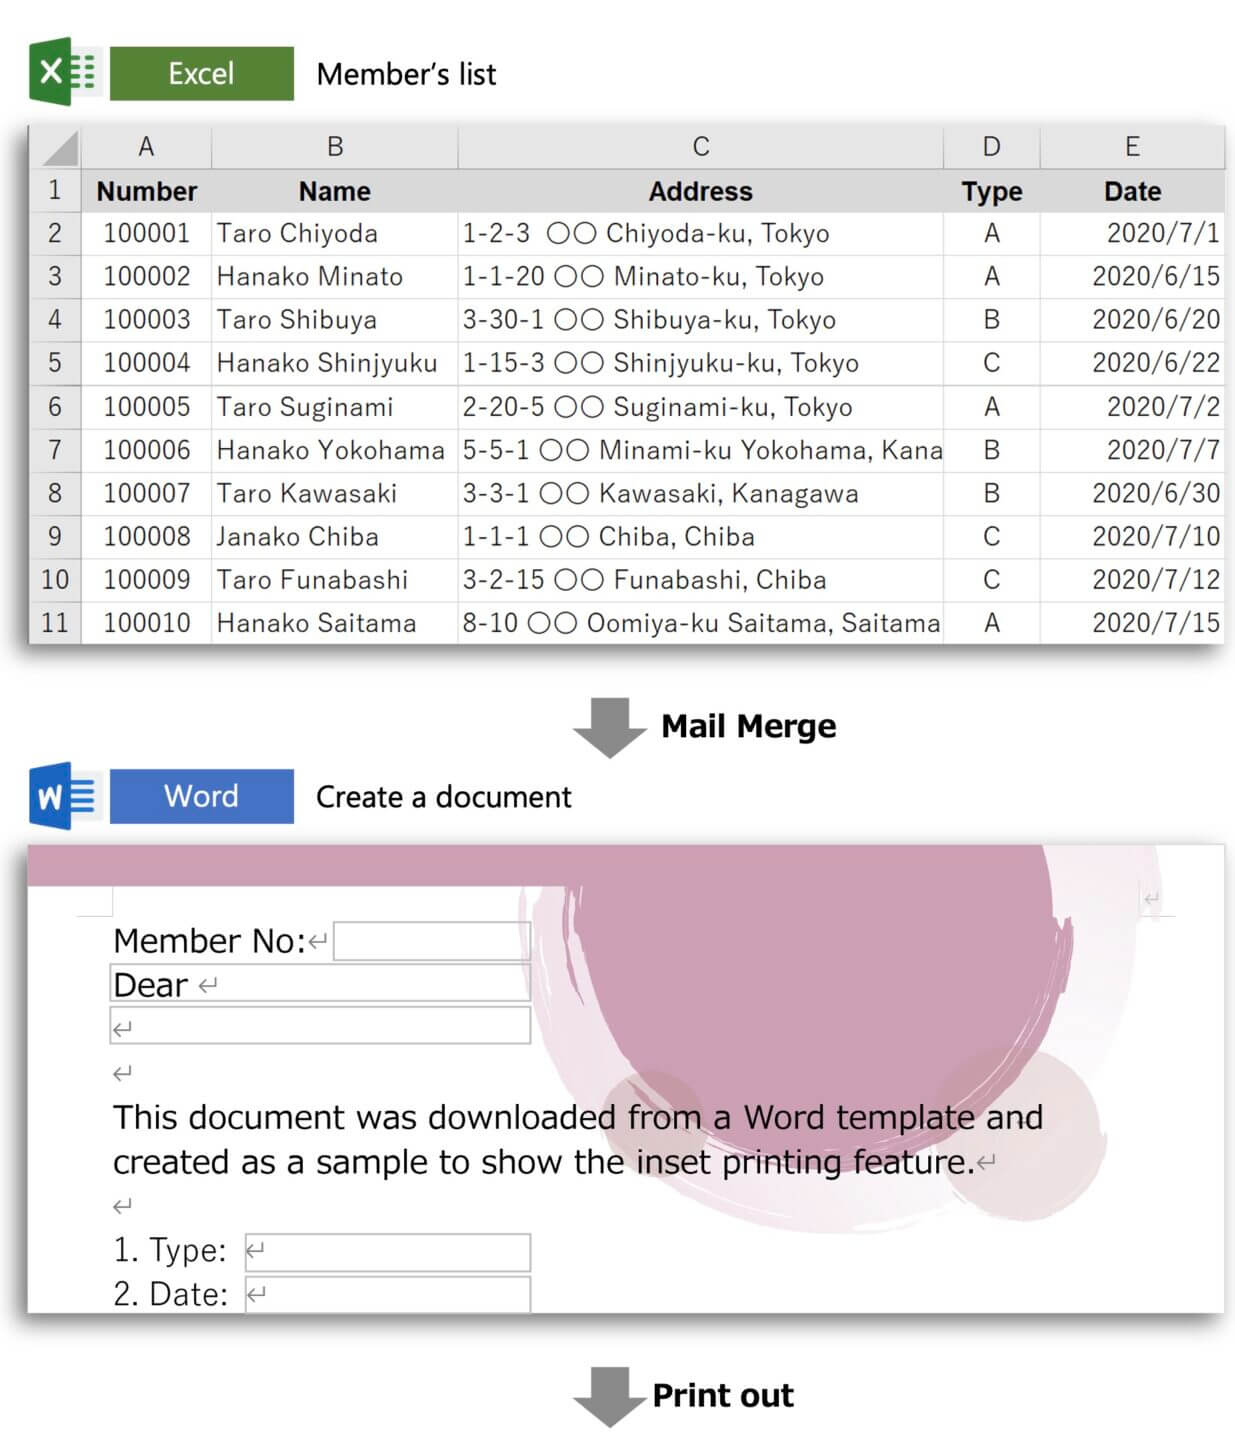
If you want to print out and send documents with names and addresses to multiple members, you can use Mail Merge, a Microsoft Word feature. The mail merge process combines a Word document with a data source to create letters that feel personal.
Here is how to create a document with the mail merge. You can learn the mail merge process using data in an Excel spreadsheet.
Language: English Japanese
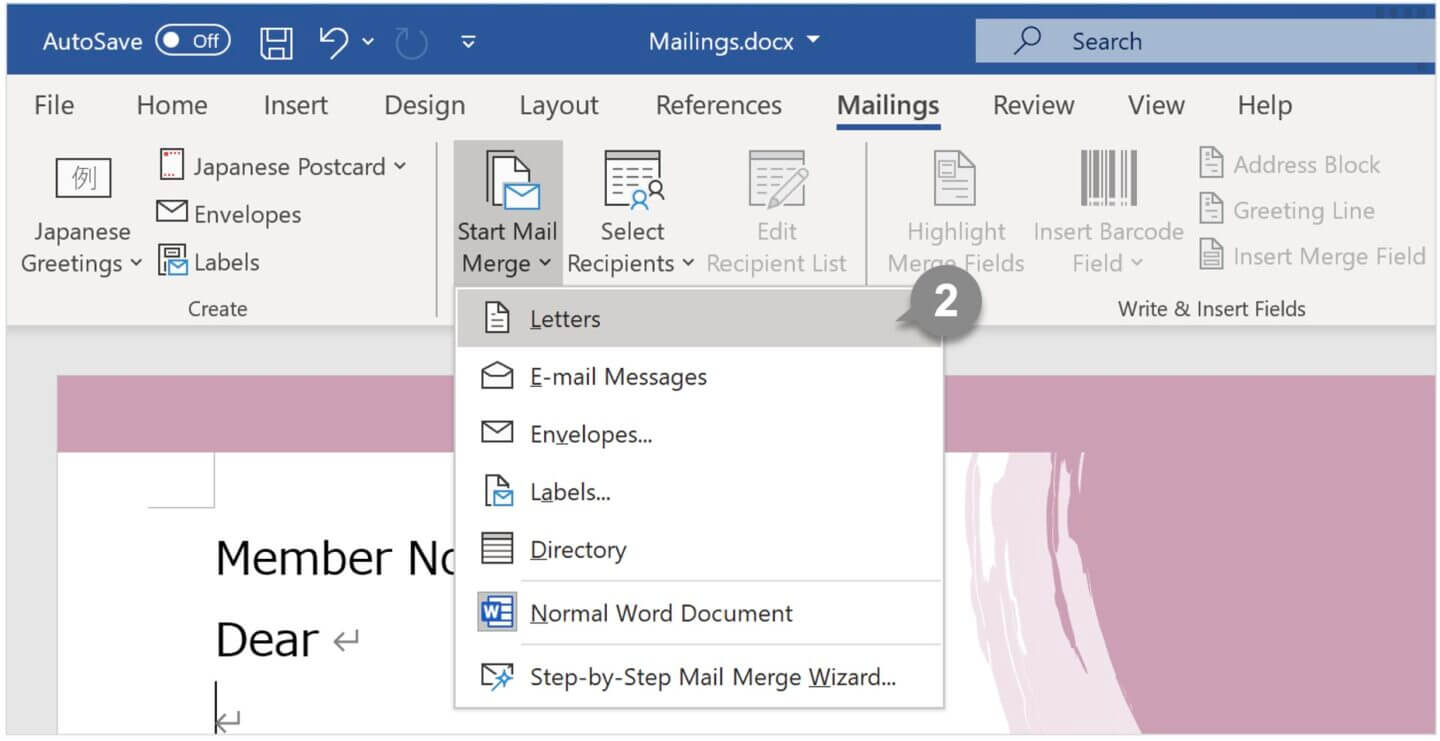
STEP1 : Start Mail Merge
You first need to choose what sort of document you want to create. Specify a type of document for the mail merge.
1 Open a document and select the Mailings tab.
2 Under the Start Mail Merge, click on Start Mail Merge and select Letters.
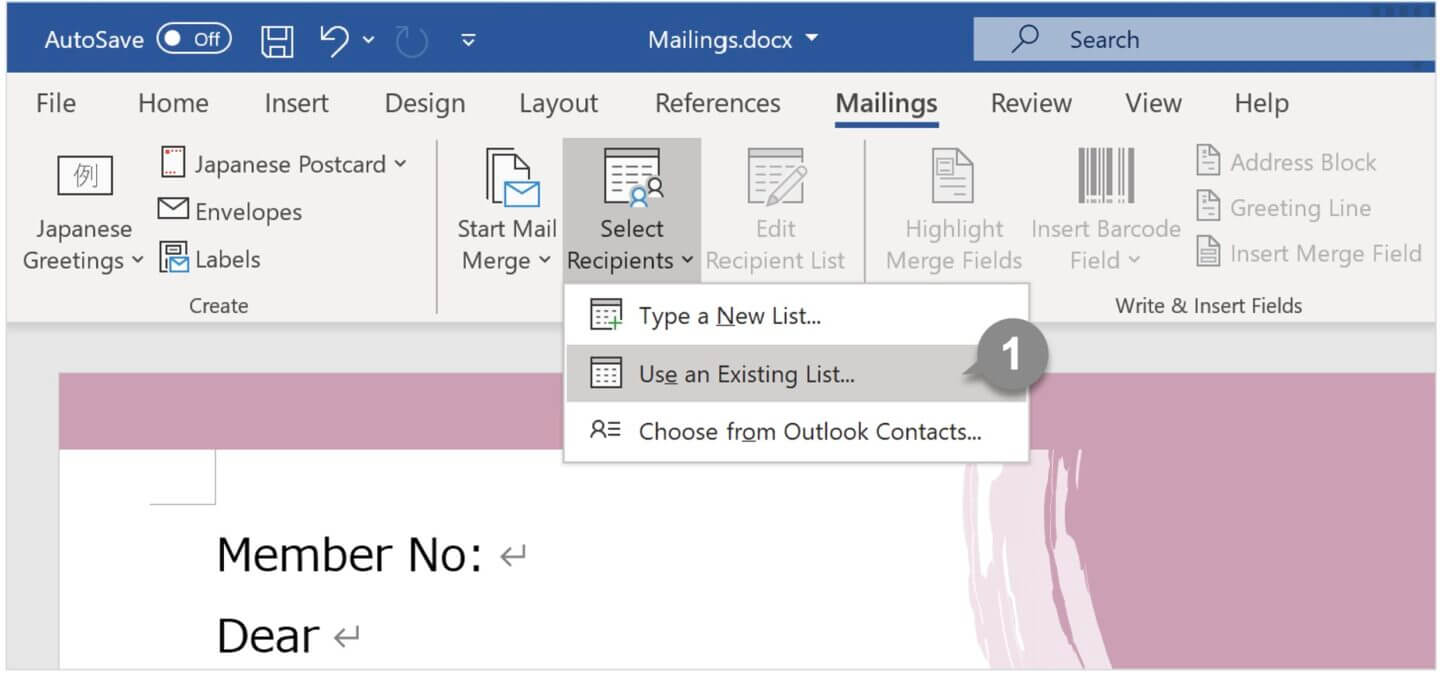
STEP2 : Select Recipients
You will need to choose where you’ll get your list of addresses from. This example uses an existing list from an Excel spreadsheet. Set Sheet1 in book Member List.xlsx for the mail merge recipients.
1 Under the Start Mail Merge group, click on Select Recipients and select Use an Existing List.
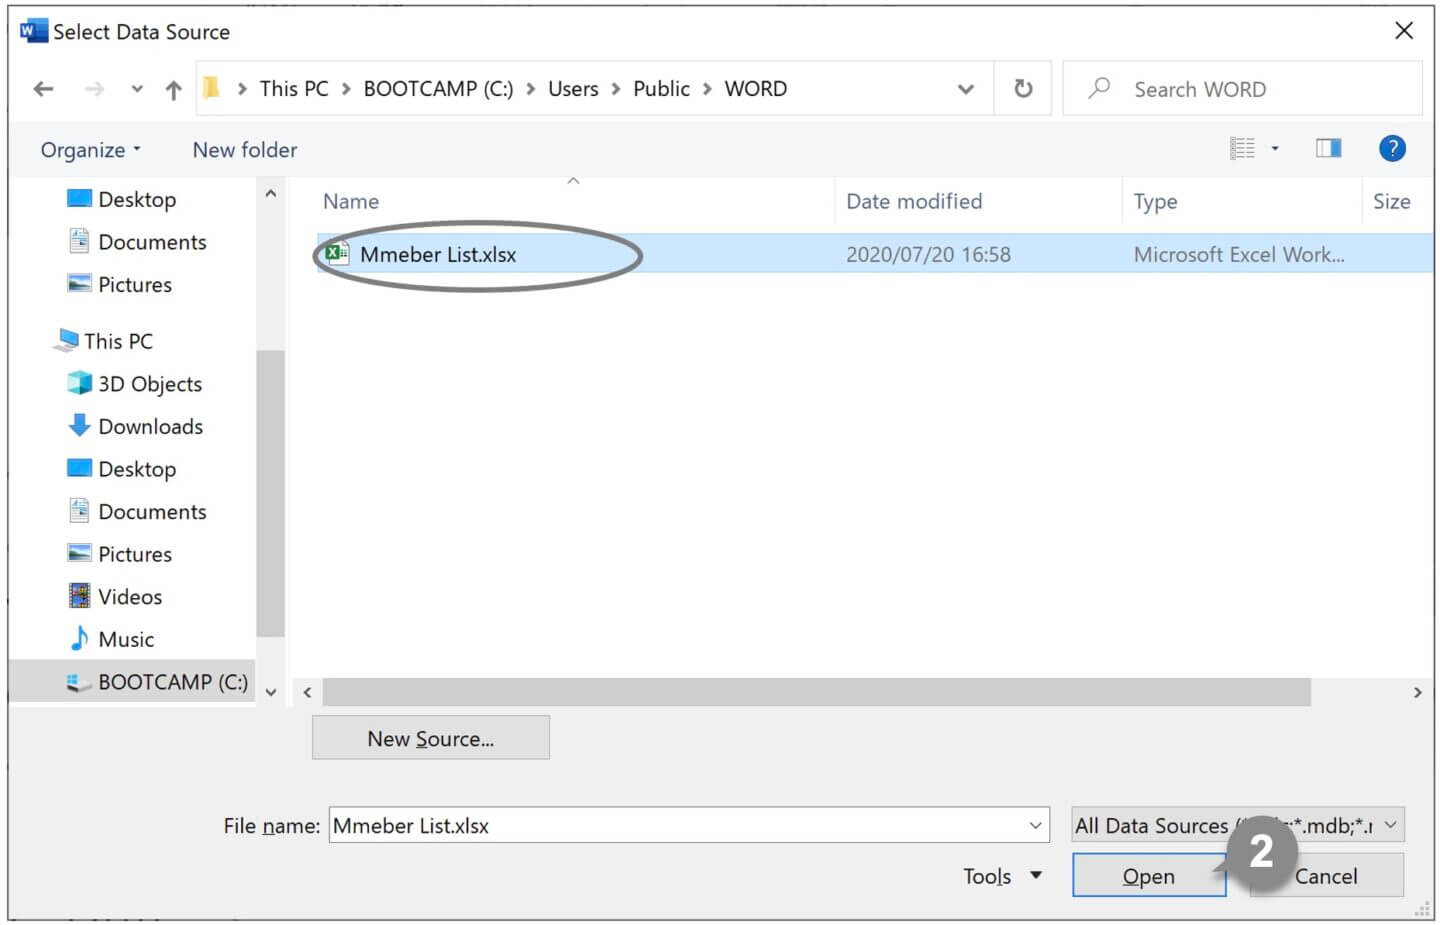
2 The Select Data Source dialog box appears. Select [ Member List.xlsx ] file and click Open.
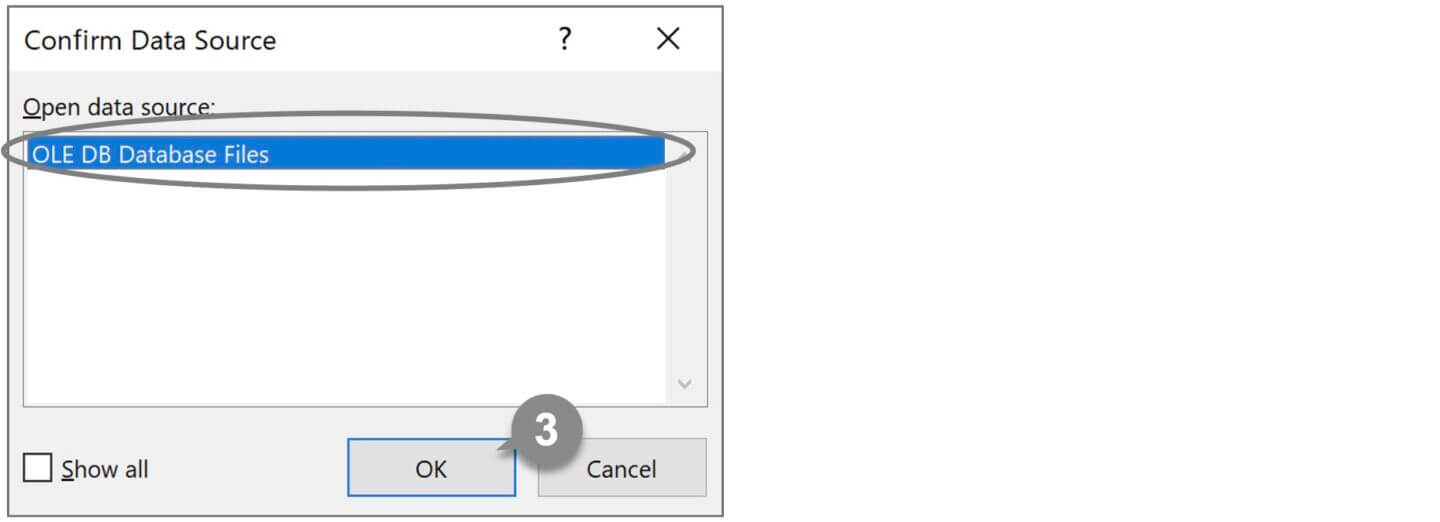
3 The Confirm Data Source dialog box appears. Make sure that [ OLE DB Database Files ] is selected and click OK.
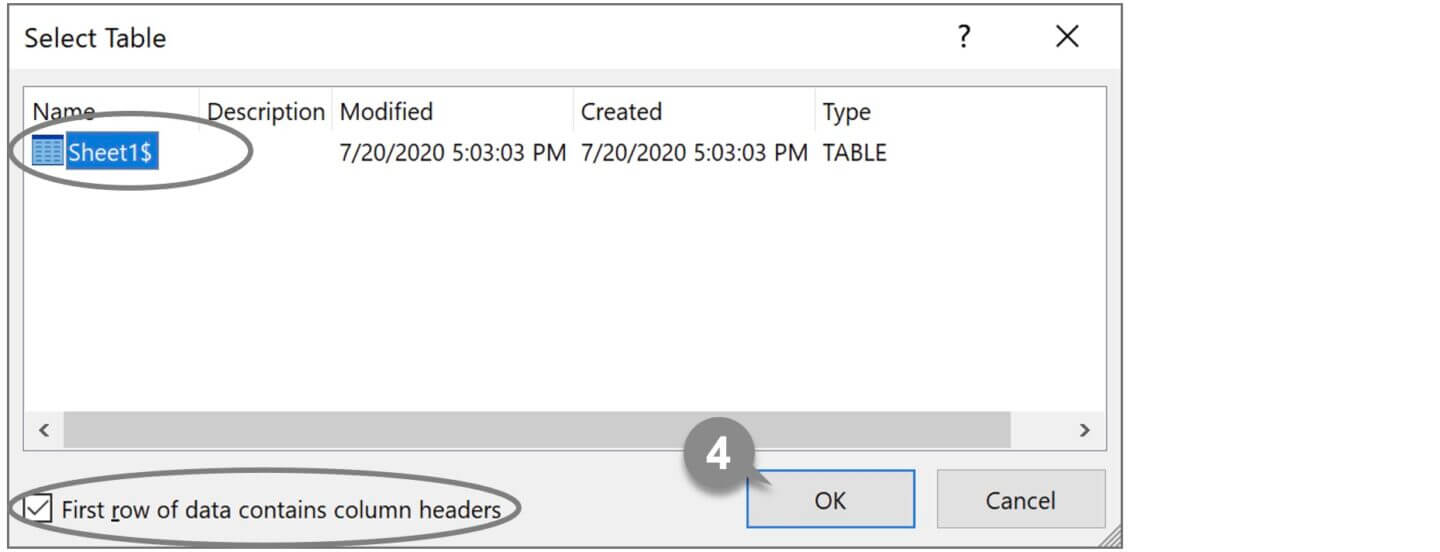
4 The Select Table dialog box appears. Select [ Sheet1 ] and check the box First row of data contains column headers, then click OK.
STEP3 : Insert Merge Field
After the main document is set and the recipient list is connected, you are ready to insert the merge fields in the document. Insert Number, Name, Address, Type, and Date in the document.
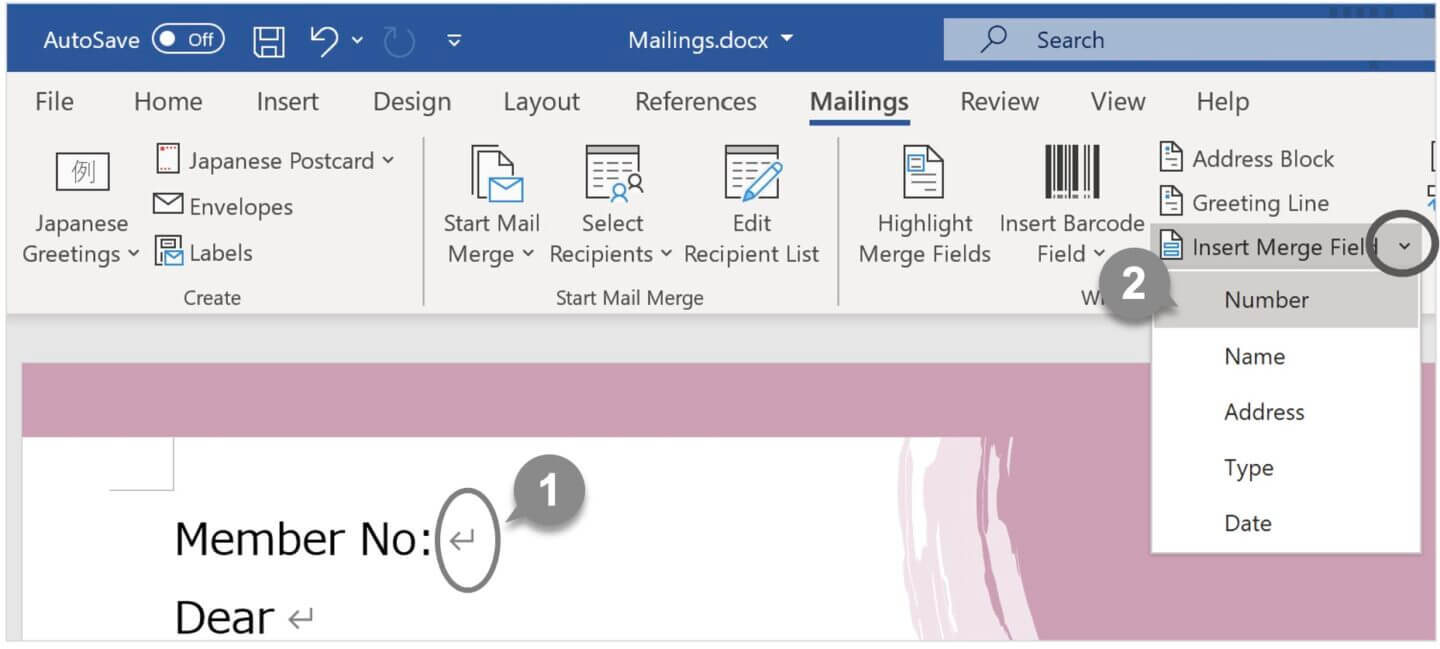
1 Move the cursor after [ Member No: ].
2 Under the Write & Insert Fields group, click on the down arrow in Insert Merge Field and select Number. The merge field for Number is entered.
3 Insert merge field for Name, Address, Type, and Date with the same procedure as above.
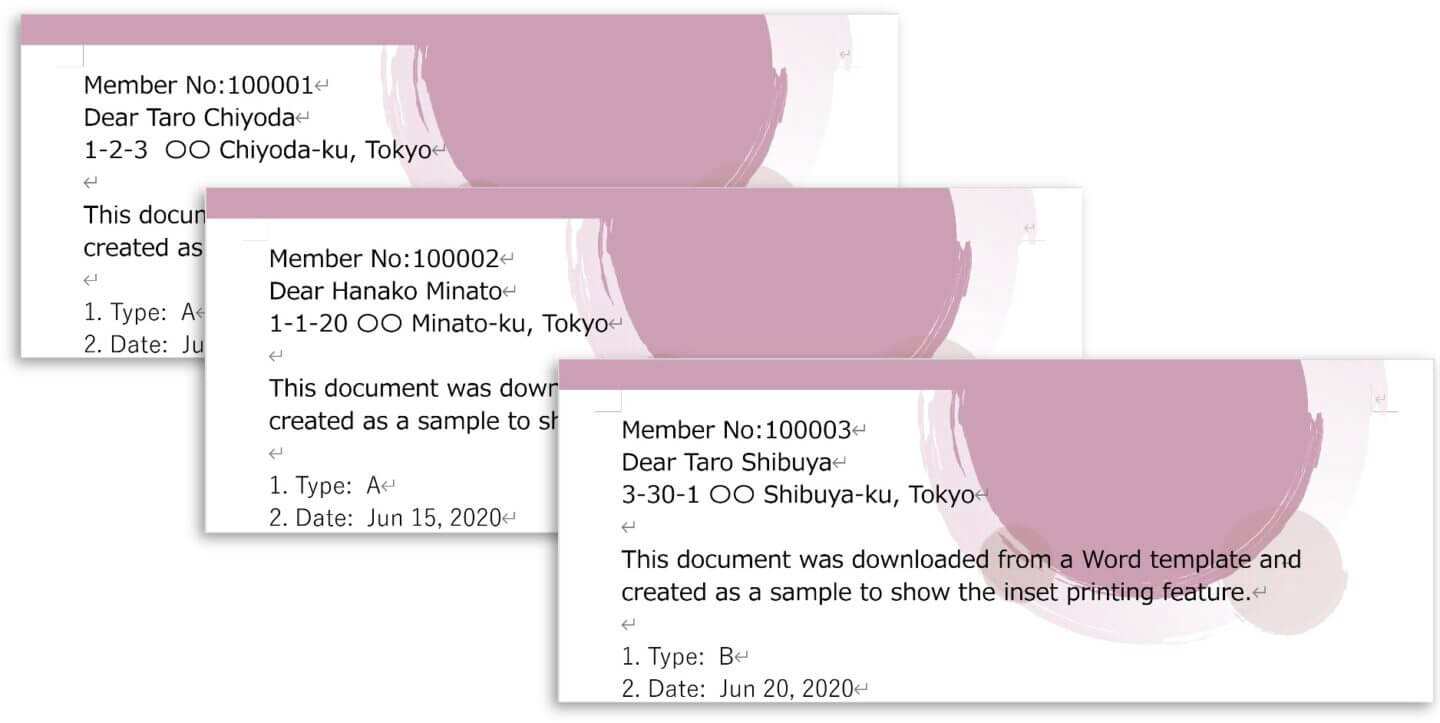
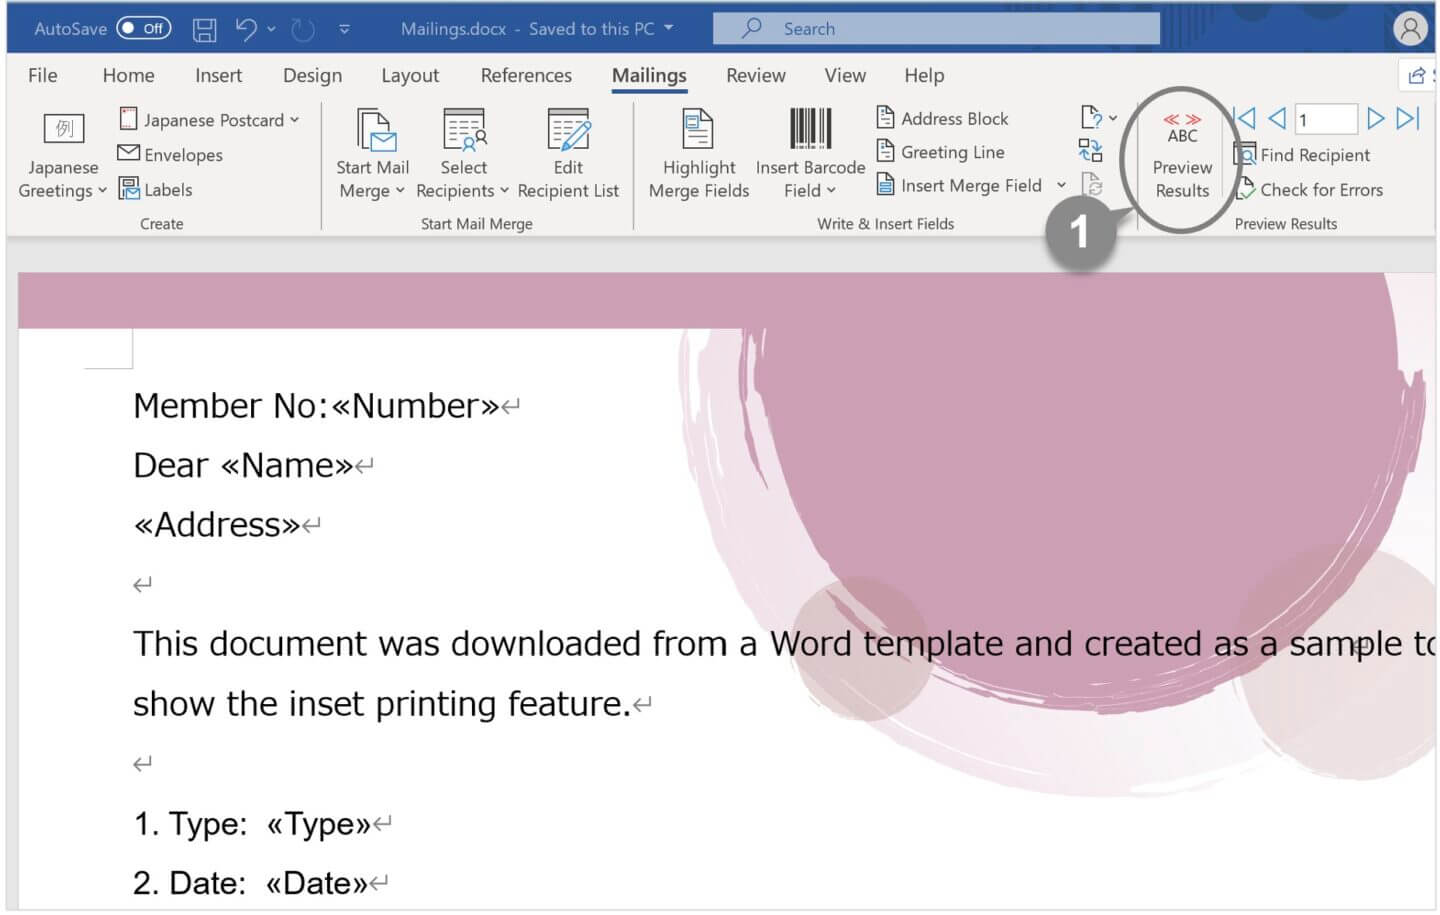
STEP4 : Preview Results
You can easily preview how the mail merge will appear. It is helpful to see what the data will look like once it has been inserted into a document.
1 Under the Preview Results group, click Preview Results.
2 It shows the first member information in the document.
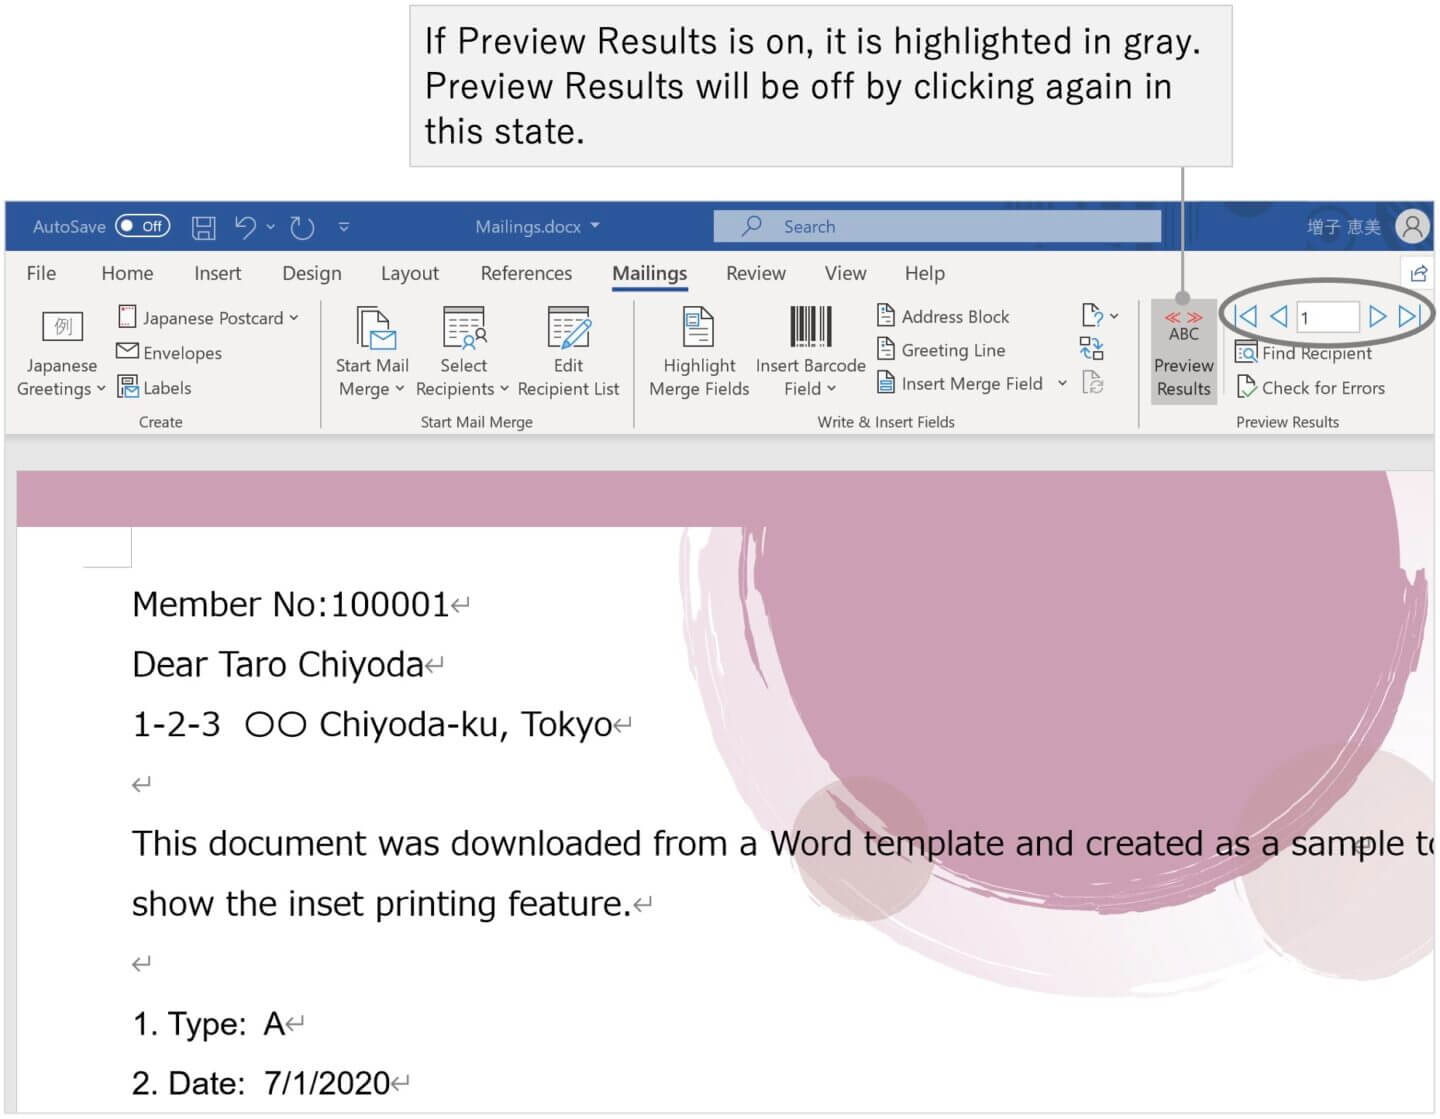
3 You can see the second member information by clicking the Next Record button.

STEP5 : Print out
Merge the data and print the document.
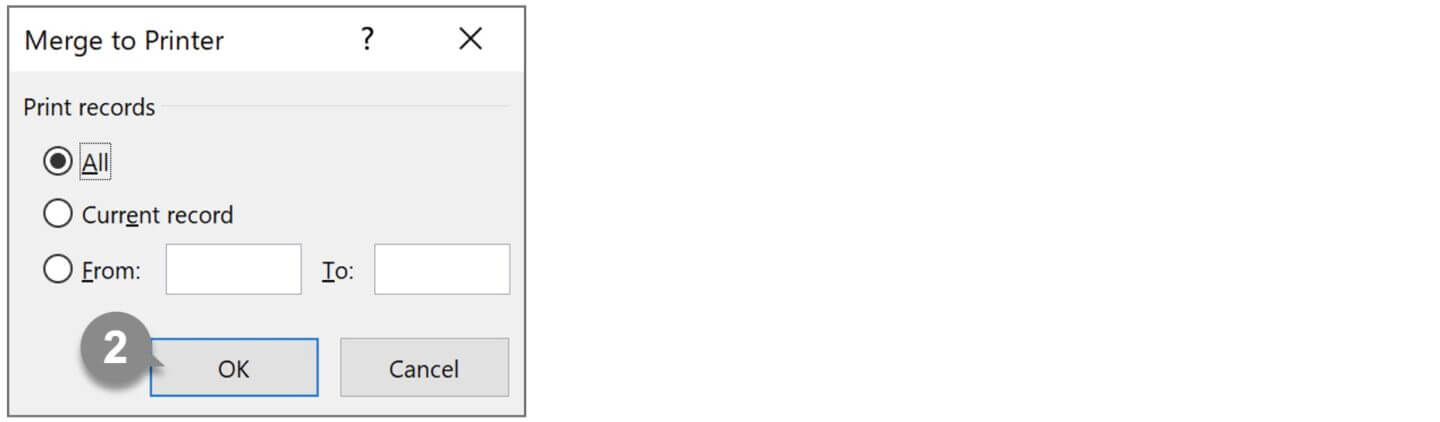
1 Under the Finish group, click on Finish & Merge and select Print Documents.

2 The Merge to Printer dialog box appears. Under the Print records, select an option and click OK.
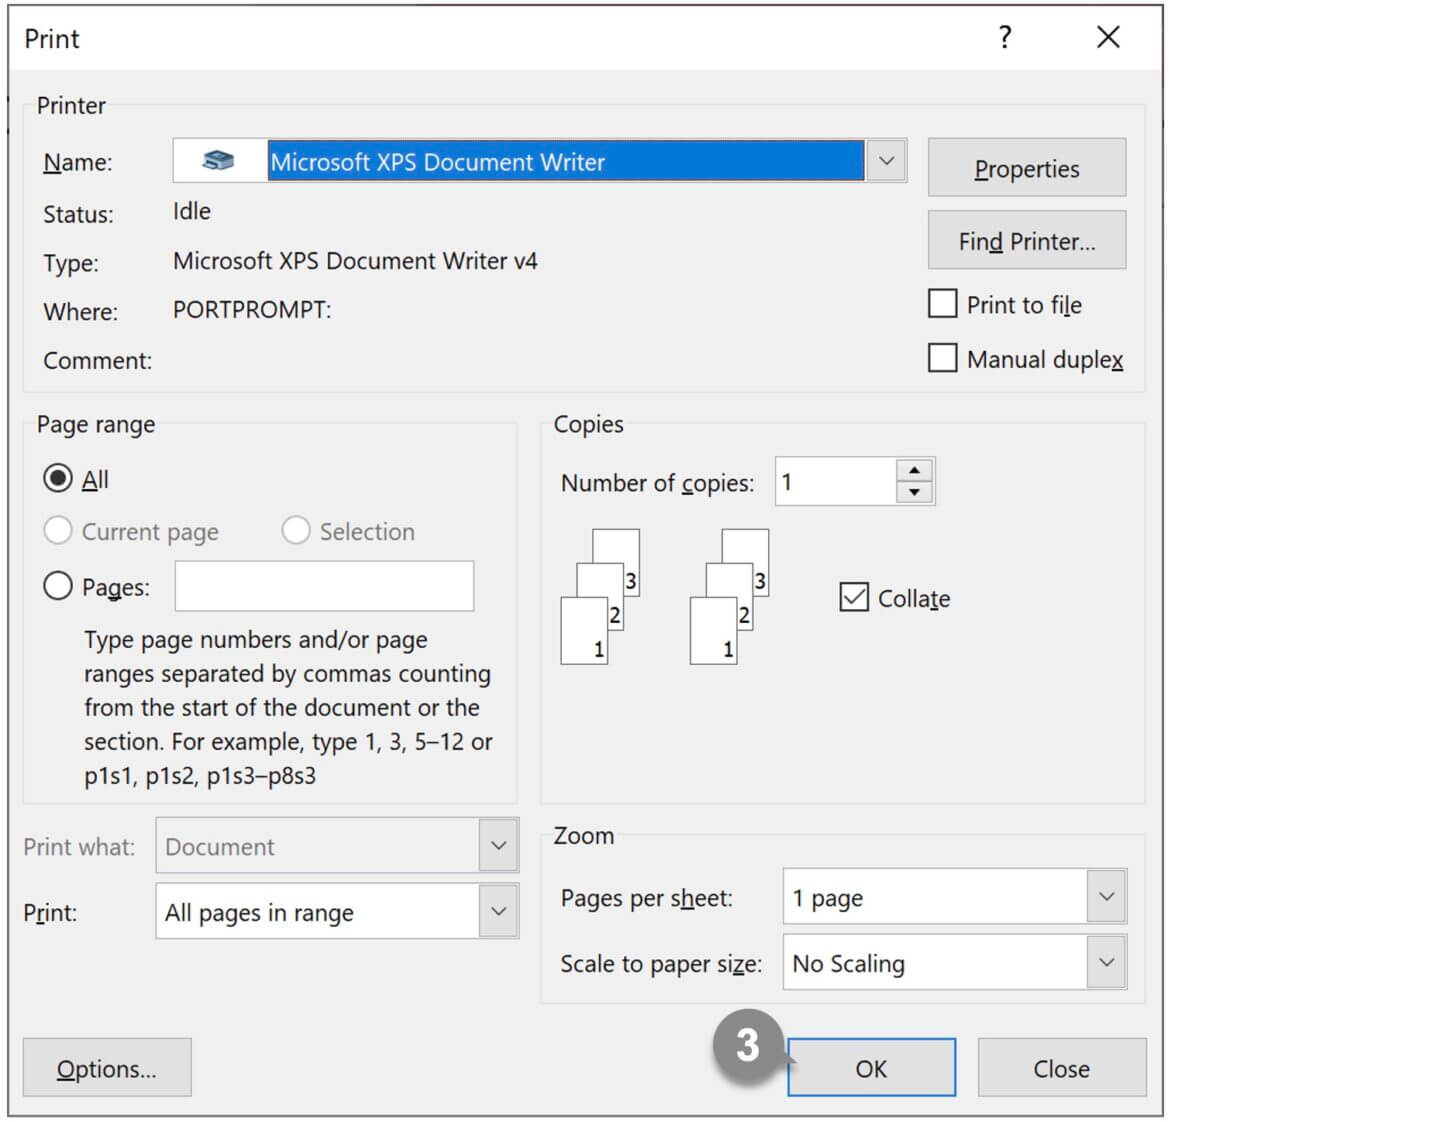
3 The Print dialog box appears. After setting up for printer, click OK.
–
You can merge data and print documents with these steps above.
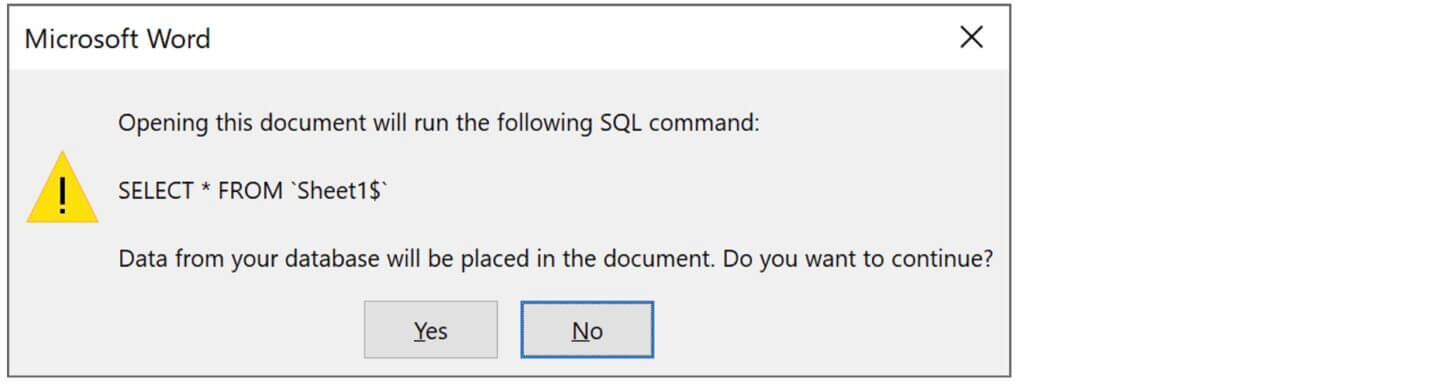
When you open a document that has been set on the mail merge, the following message will appear. Click Yes to allow you to use the mail merge feature. If you click No, data will not merge into the document.
How to extract and print specific data
You can extract and print specific data by specifying criteria, such as members with addresses in Tokyo or type “A”. Here, I show you how to extract and print members with addresses in Tokyo.
1 Click the Mailings tab, under the Start Mail Merge group, click Edit Recipient List.
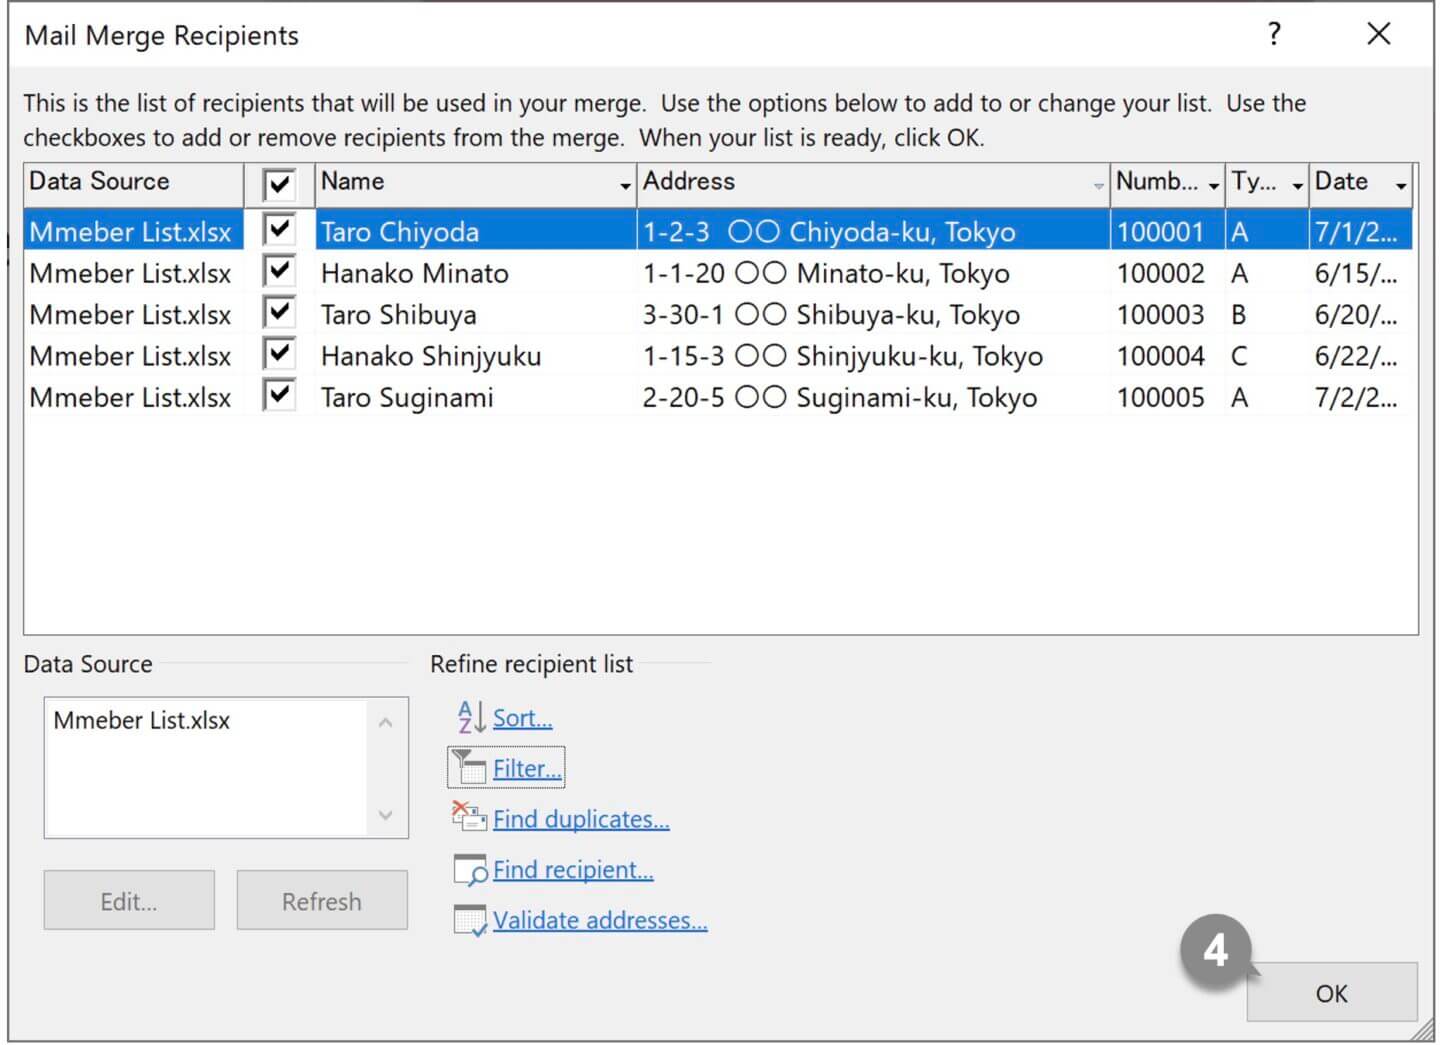
2 The Mail Merge Recipients dialog box appears. Under the Refine recipient list, click Filter.

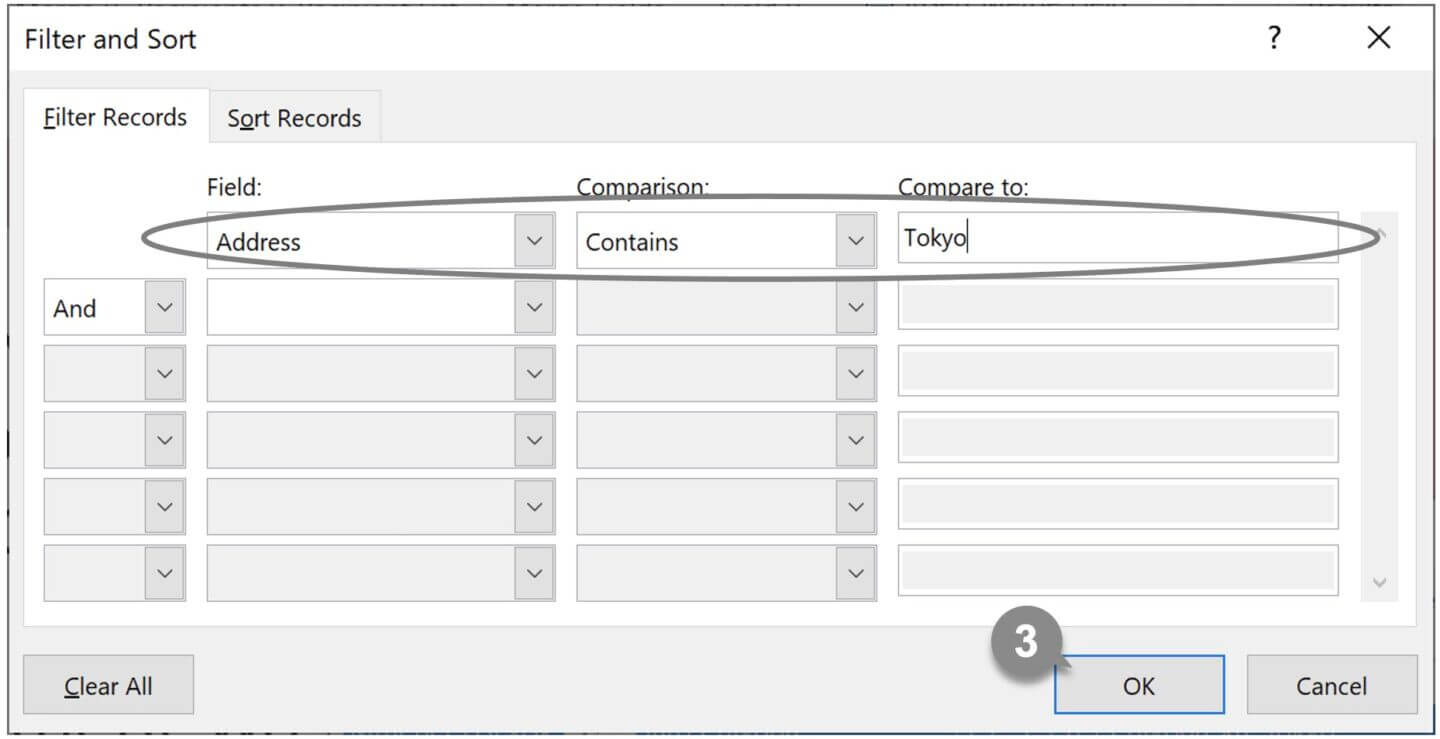
3 The Filter and Sort dialog box appears. Choose [ Address ] in Filed, [ Contains ] in Comparison, and enter [ Tokyo ] in Compare to, then click OK.
4 Make sure that the members whose addresses are in Tokyo have been extracted and click OK.
5 Under the Preview Results group in the Mailings tab, click Preview Results to see the data.
To off the filter, click Clear All in the Filter and Sort dialog box.
–
Related Articles
The WOEMAIL tool allows you to insert the recipient’s name and messages into an email like the mail merge feature of Word, and send them to several email addresses at once.

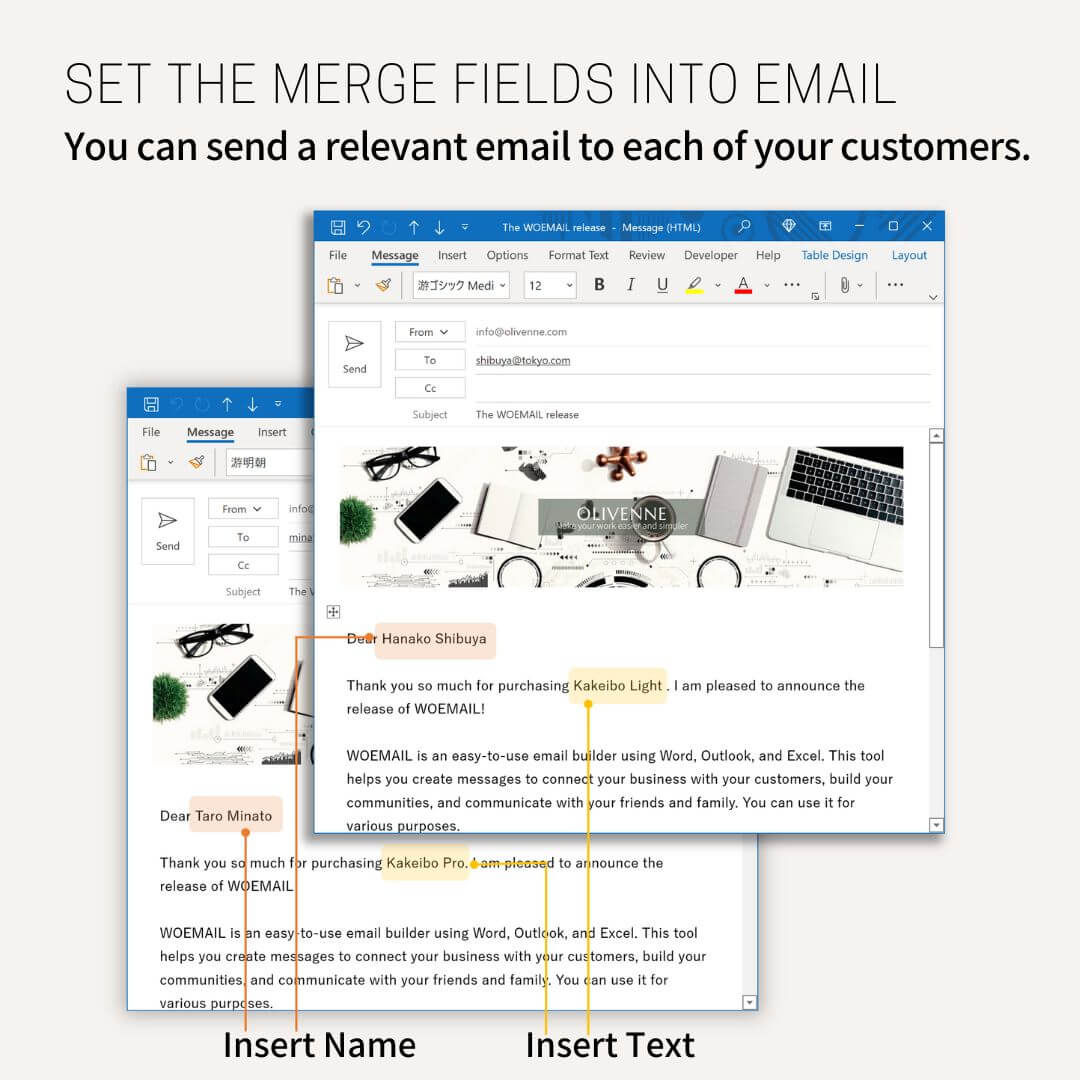
This tool allows you to write the body of an email in Word, auto-create emails in Excel, and send them in Outlook. It allows you to use the word document for the body of an email as a template. You can use it many times for more than one purpose and save time for writing an email from scratch.

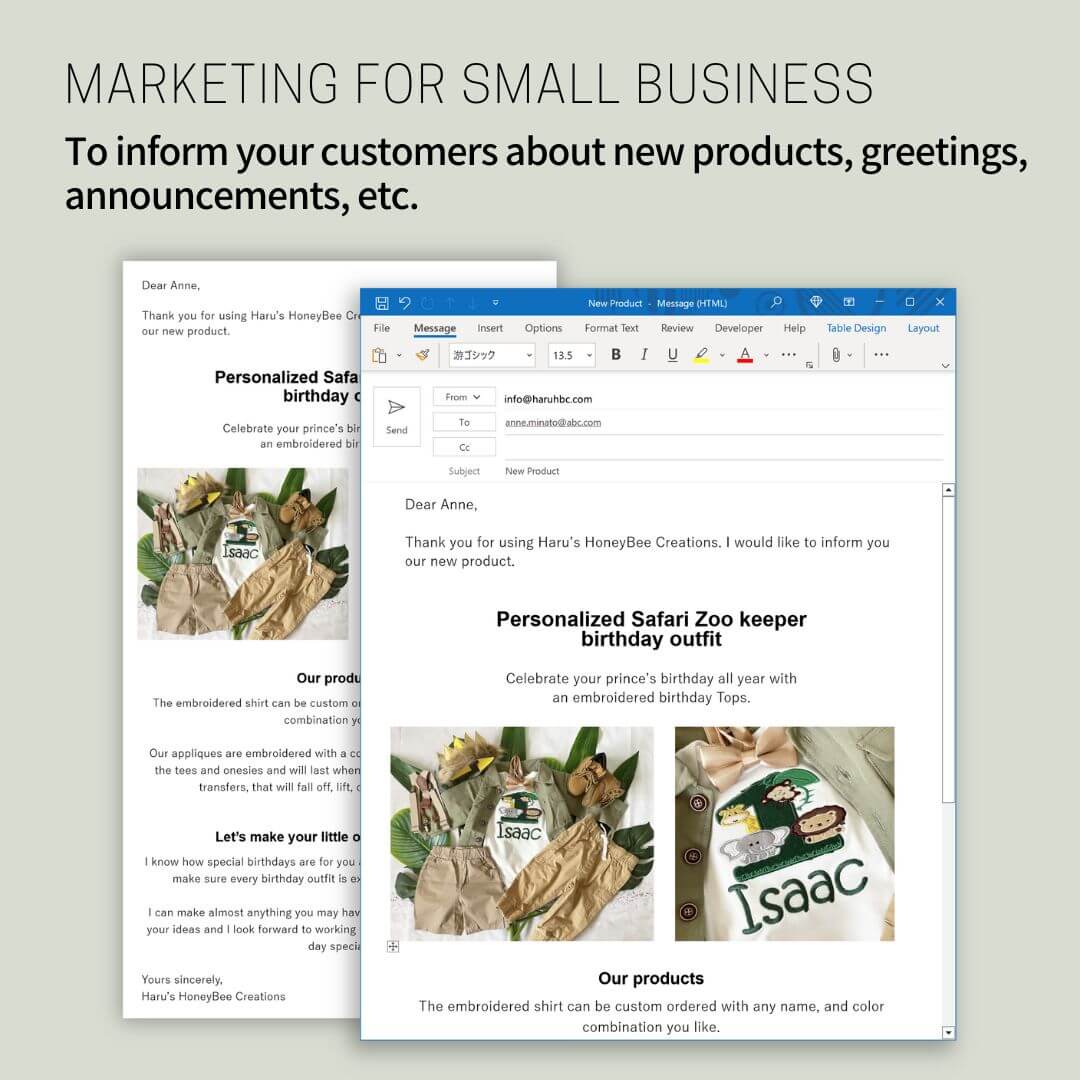
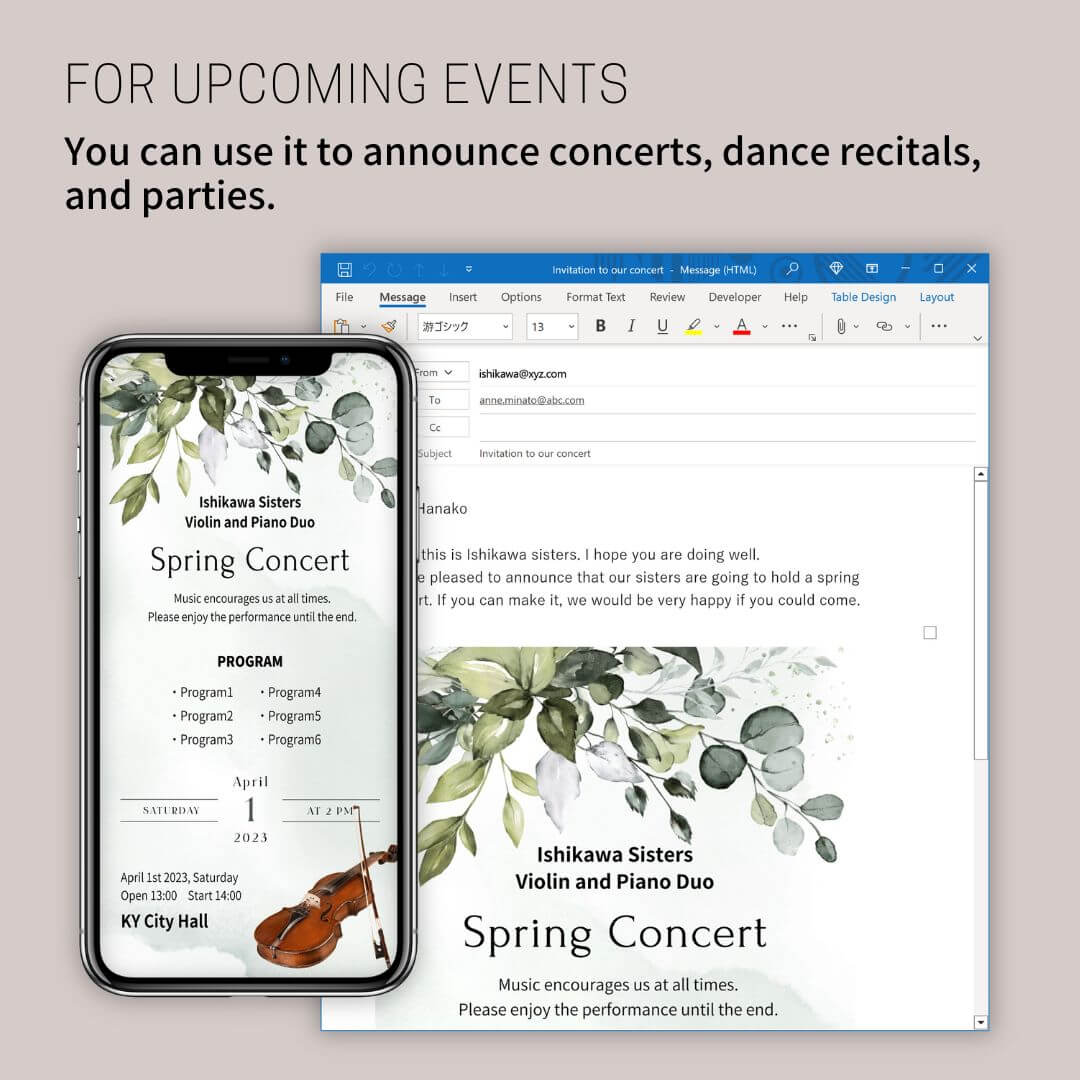
It helps you compose messages to connect your business with your customers, build your communities, or communicate with your friends and family. You can use it for various purposes.


–