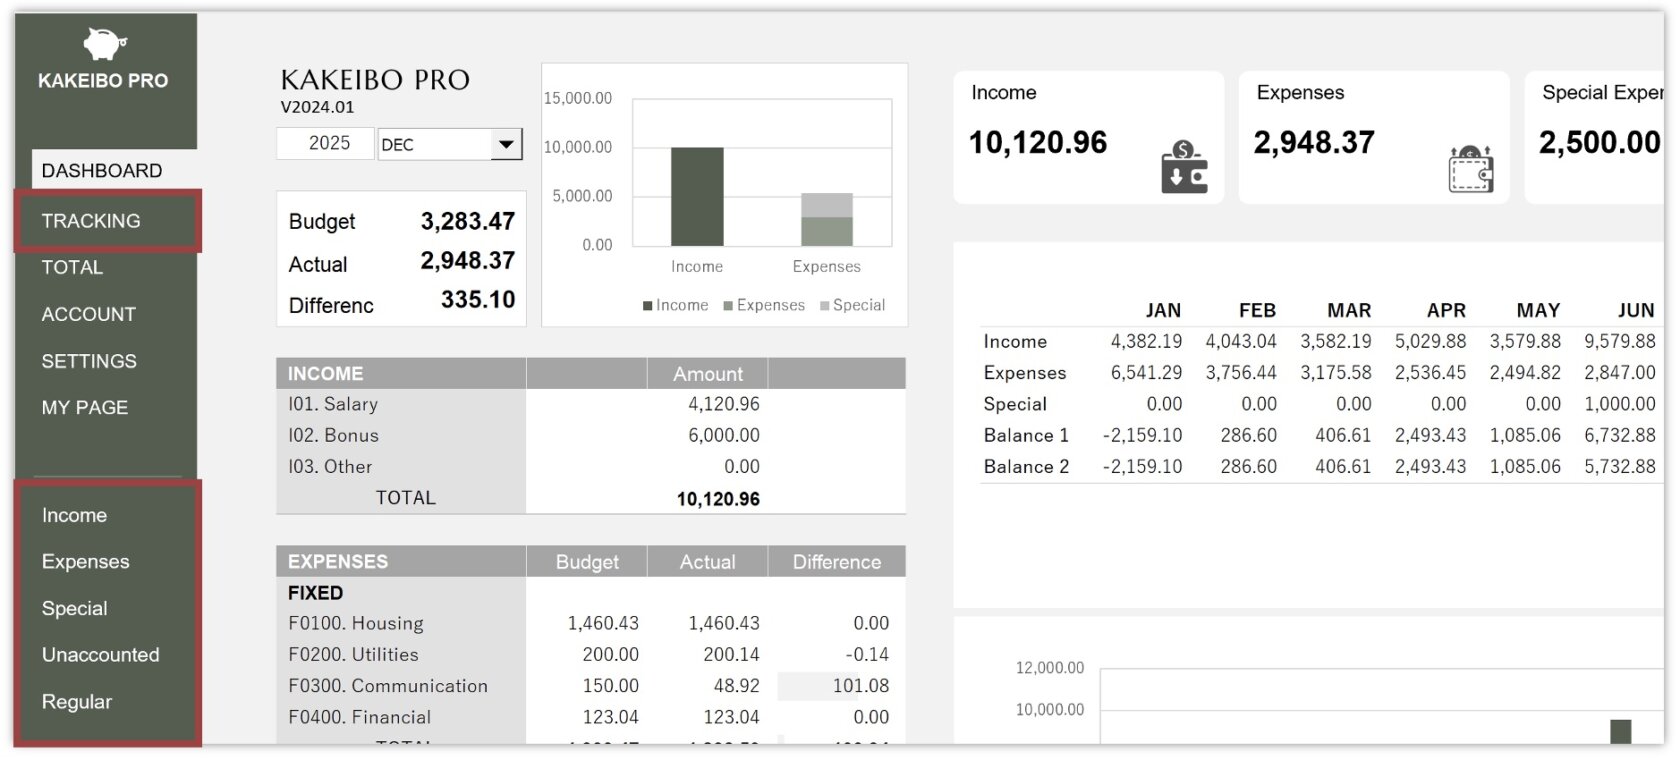
KAKEIBO PRO and KAKEIBO LiGHT include four sheets for entering detailed income and expenditure data: Income, Expenses, Special, and Unaccounted. You will enter income details on the Income sheet and daily expenditure details on the Expenses sheet. The Special sheet allows you to record non-ordinary expenses, such as travel expenses, car costs, or property-related expenses. The Unaccounted sheet is for expenses that you don’t want included in the monthly and annual totals.
The tool simplifies entering daily income and expense data by allowing you to enter text and click buttons. No Excel skills are required. This guide explains how to enter income and expense data.
Language: English Japanese
1. Entering Income Data
On the Income sheet, you will enter detailed income data. Follow these steps:
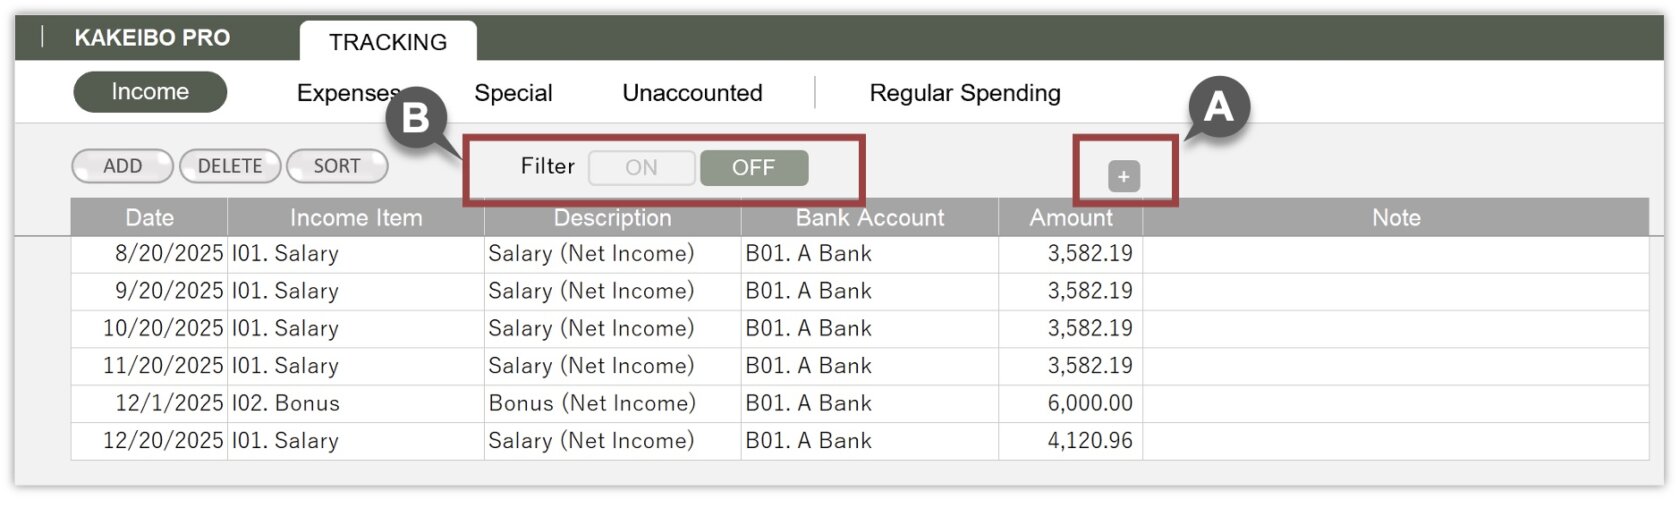
1 Click TRACKING in the main menu, then select Income under the TRACKING group. You can also click Income on the sidebar.
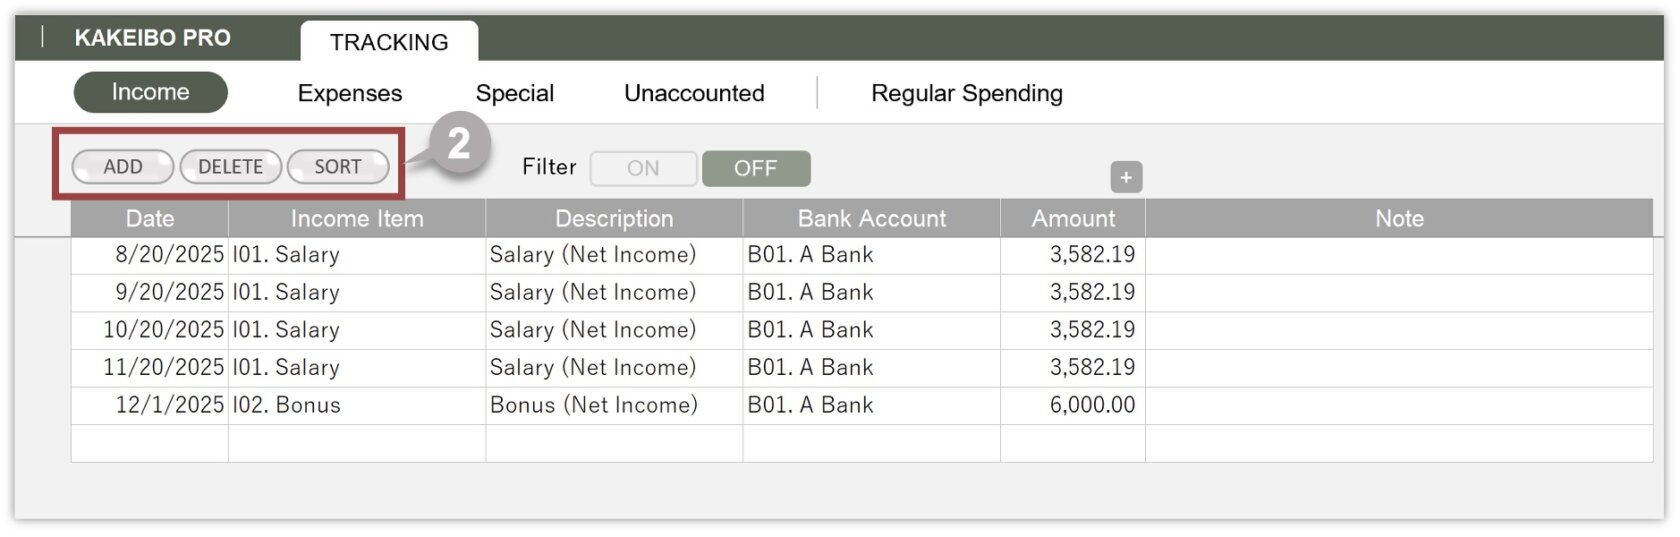
2 To add new data, click the ADD button. To delete the last entry, click the DELETE button. To sort the data, click the SORT button. It sorts the data in ascending order based on 1:Date and 2:Income Item.
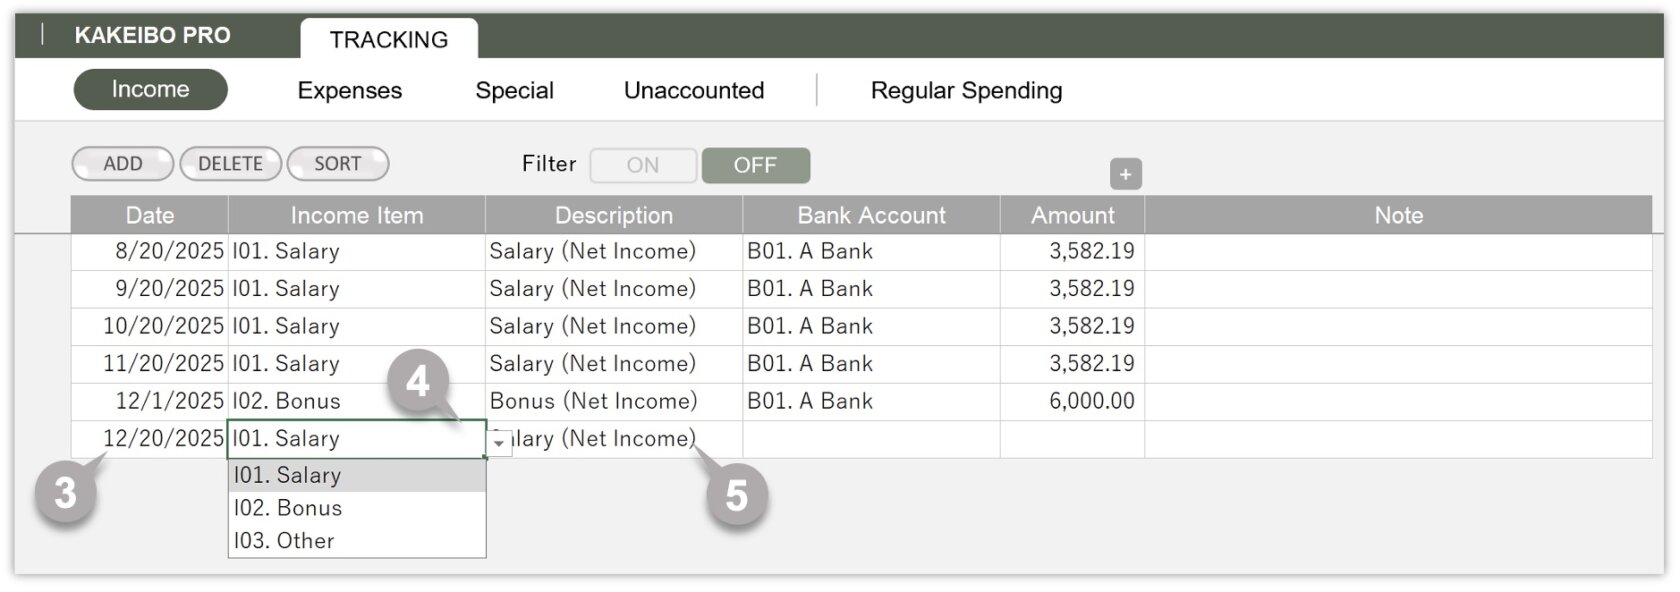
3 Enter the deposit date in the Date column.【 REQUIRED 】
4 Select the relevant income item from the drop-down list in the Income Item column.
【 REQUIRED 】
5 Enter the description of the income in the Description column.
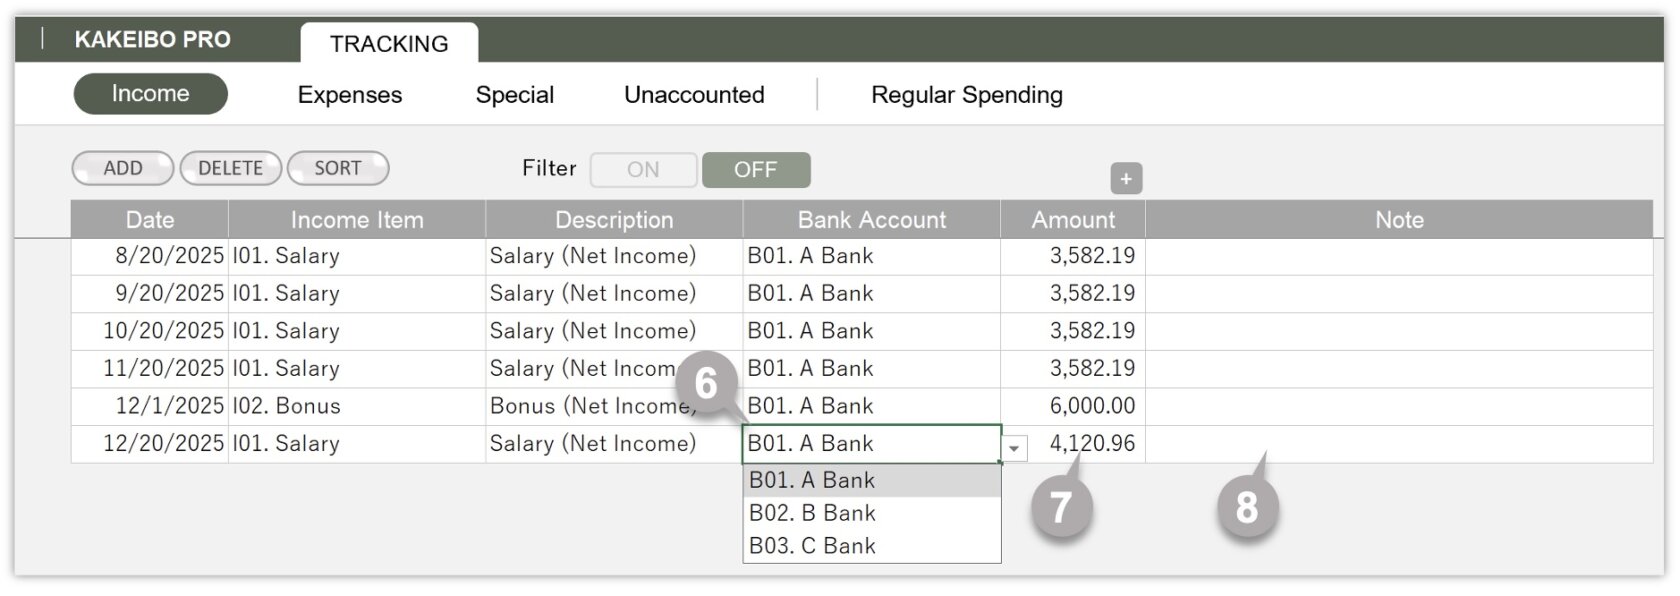
6 Select the relevant bank account from the drop-down list in the Bank Account column.
7 Enter the income amount in the Amount column. 【 REQUIRED 】
8 Optionally, enter any notes in the Note column.
A Entering foreign currency
If you click [+], the foreign currency input columns appear. Enter the foreign amount in the Foreign Curr column and the exchange rate in the Rate column. If you click [-], the columns hide.
B Filter Function
Click ON to enable the filter function. Click OFF to disable it.
2. Entering Expense Data
On the Expenses sheet, you will enter daily expenditure details. Follow these steps:
1 Click TRACKING in the main menu, then select Expenses under the TRACKING group. You can also click Expenses on the sidebar.
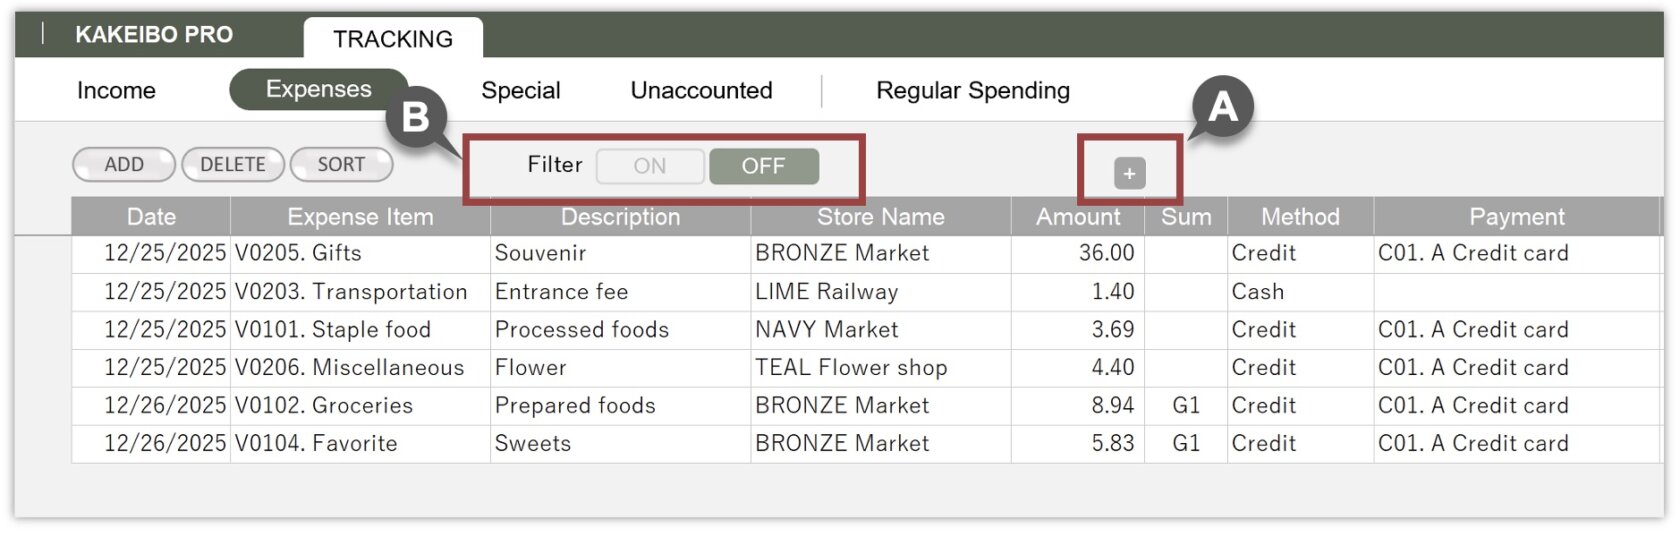
2 To add new data, click the ADD button. To delete the last entry, click the DELETE button. To sort the data, click the SORT button. It sorts the data in ascending order based on 1:Date 2:Store Name 3:Sum 4:Expense Item.
3 Enter the purchase date in the Date column. 【 REQUIRED 】
4 Select the relevant expense item from the drop-down list in the Expense Item column.
【 REQUIRED 】
5 Enter the details such as the purchased items in the Description column.
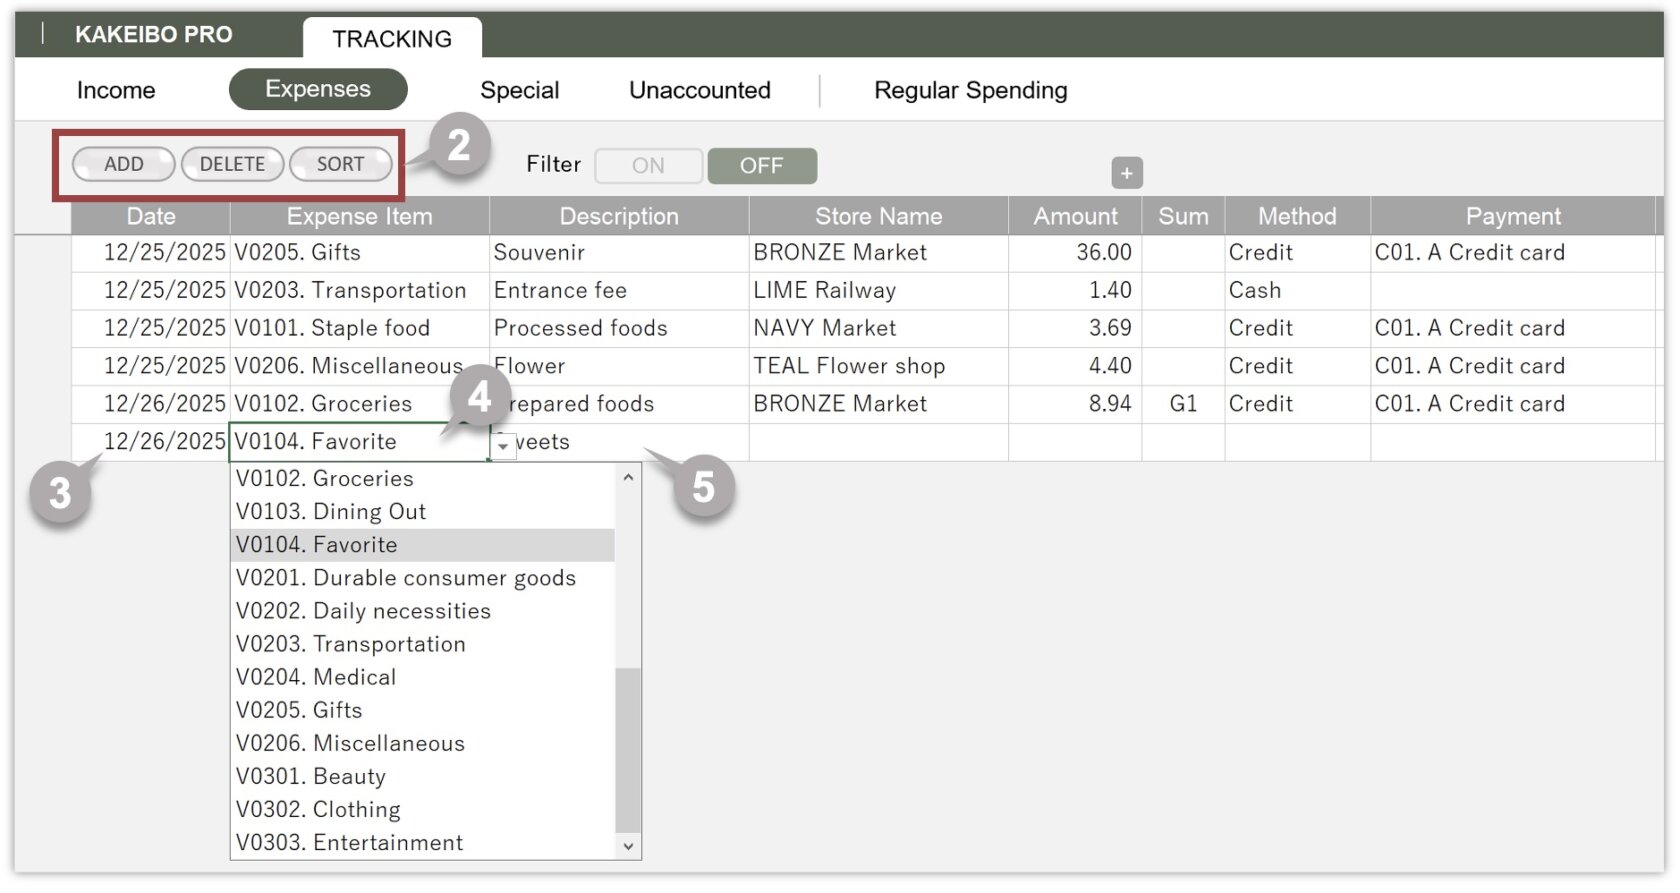
6 Enter the store name or the payee in the Store Name column.
7 Enter the purchase amount in the Amount column. 【 REQUIRED 】
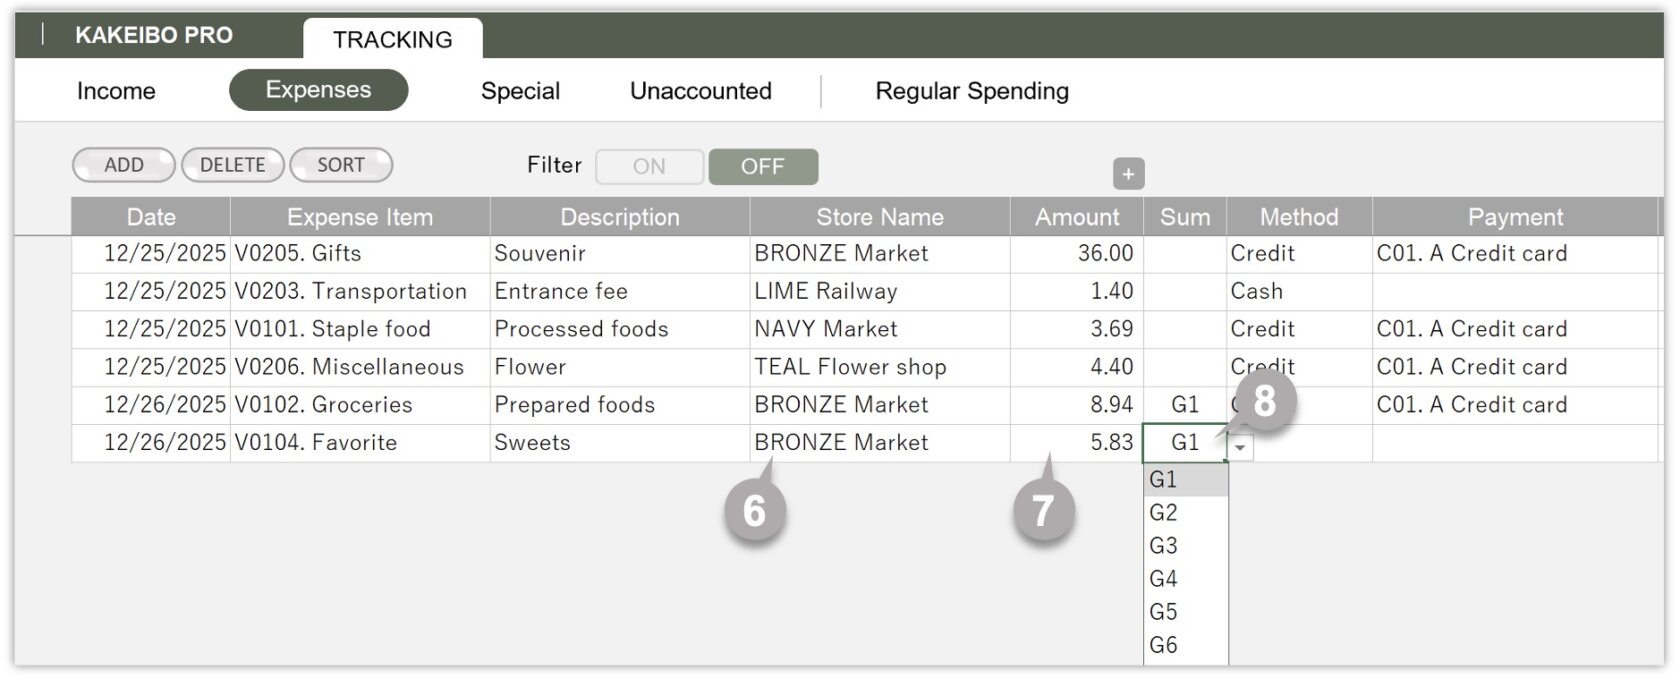
8 By specifying “G*” in the Sum column, separately entered amounts will be combined and reconciled for credit payment reconciliation. If you paid by credit card and entered data in multiple fields, select “G*” from the drop-down list.
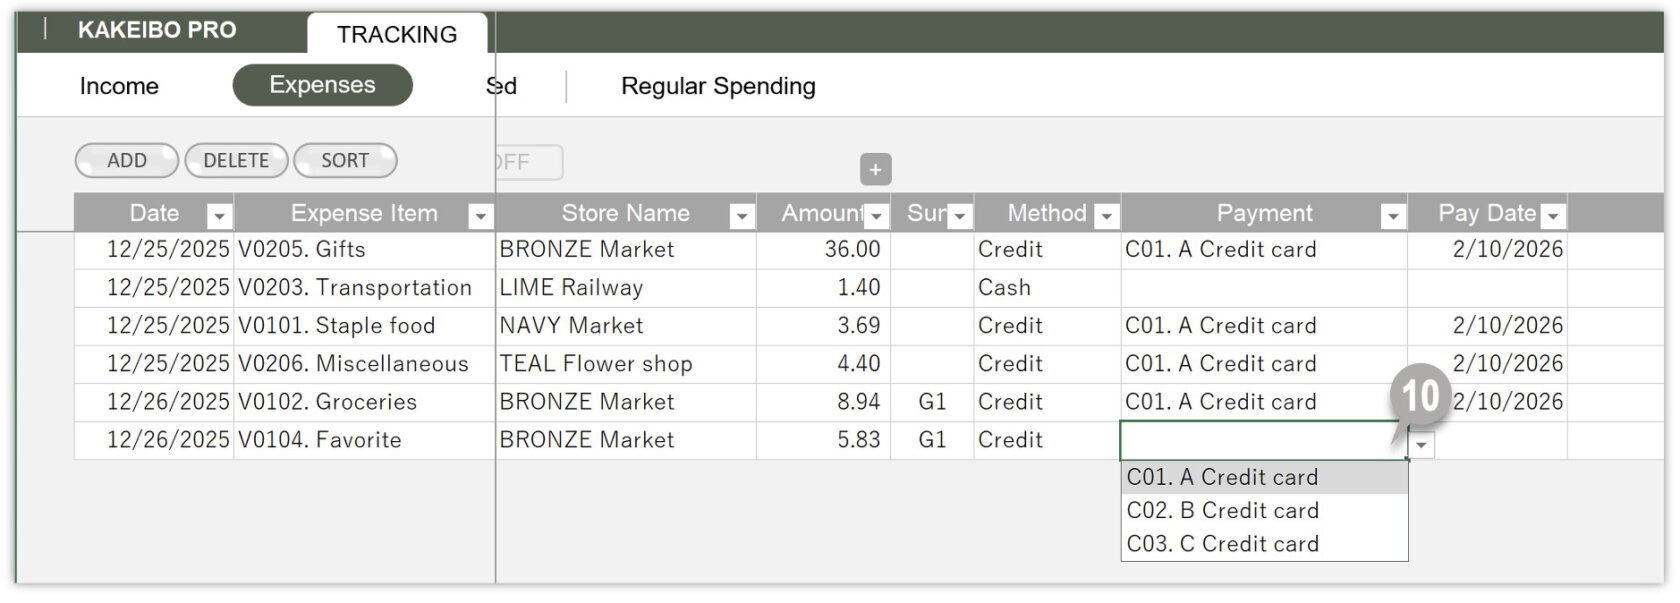
9 Select the payment method from the drop-down list in the Method column.
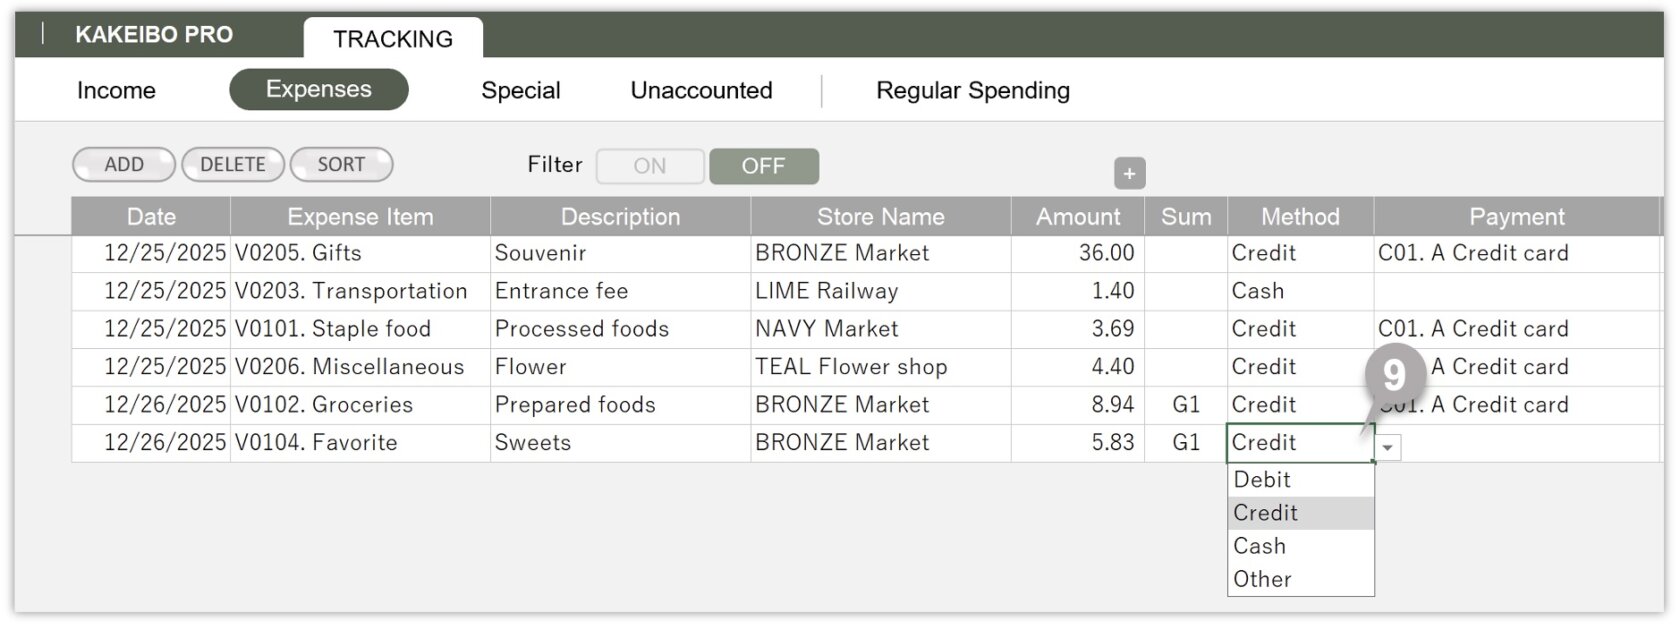
10 If you select “Debit” as the payment method, the list of bank accounts will appear in the Payment column. If you select “Credit“, the list of credit cards will appear. Choose the relevant option from the drop-down list. If you select “Other“, manually enter the payment method, such as a prepaid e-money card.
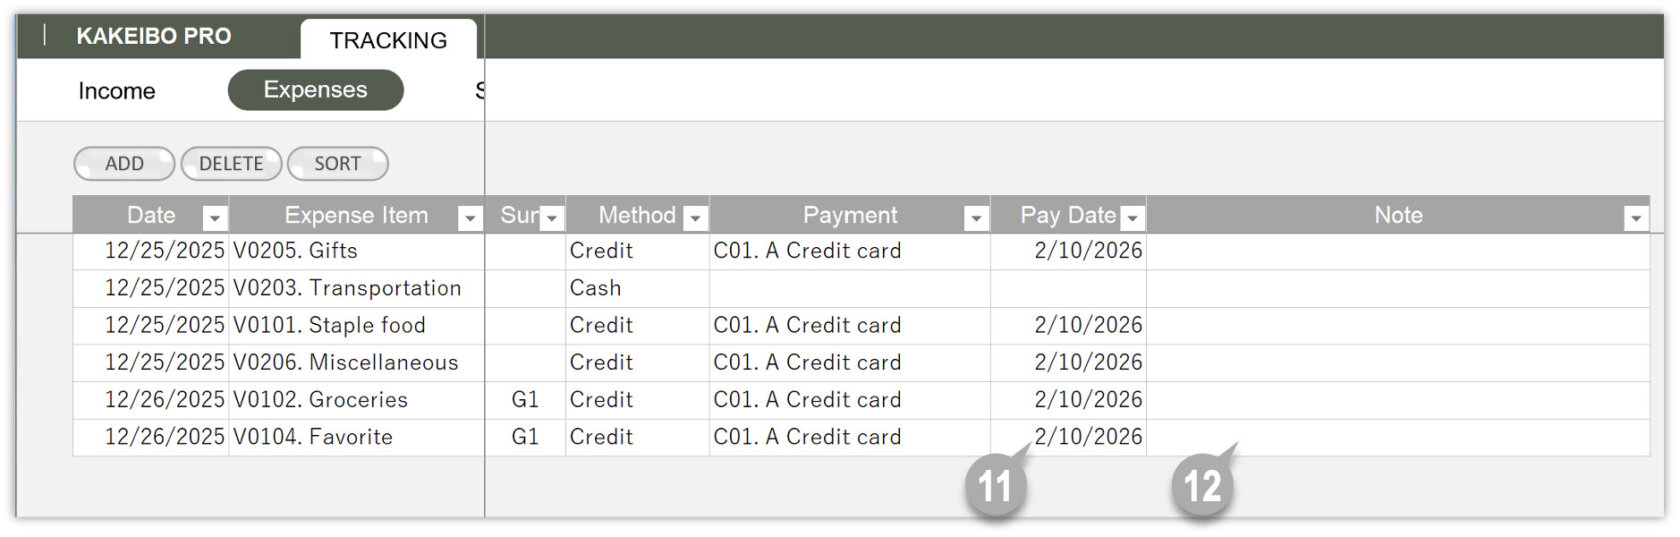
11 Enter the pay date in the Pay Date column. If you pay with a credit card, enter the settlement date for the credit card usage.
12 Optionally, enter any notes in the Note column.
A Entering foreign currency
If you click [+], the foreign currency input columns appear. Enter the foreign amount in the Foreign Curr column and the exchange rate in the Rate column. If you click [-], the columns hide.
B Filter Function
Click ON to enable the filter function. Click OFF to disable it.
3. Entering Special Expenses
On the Special sheet, you will enter special or one-off expenses, such as travel expenses, cars, or property. Follow these steps:
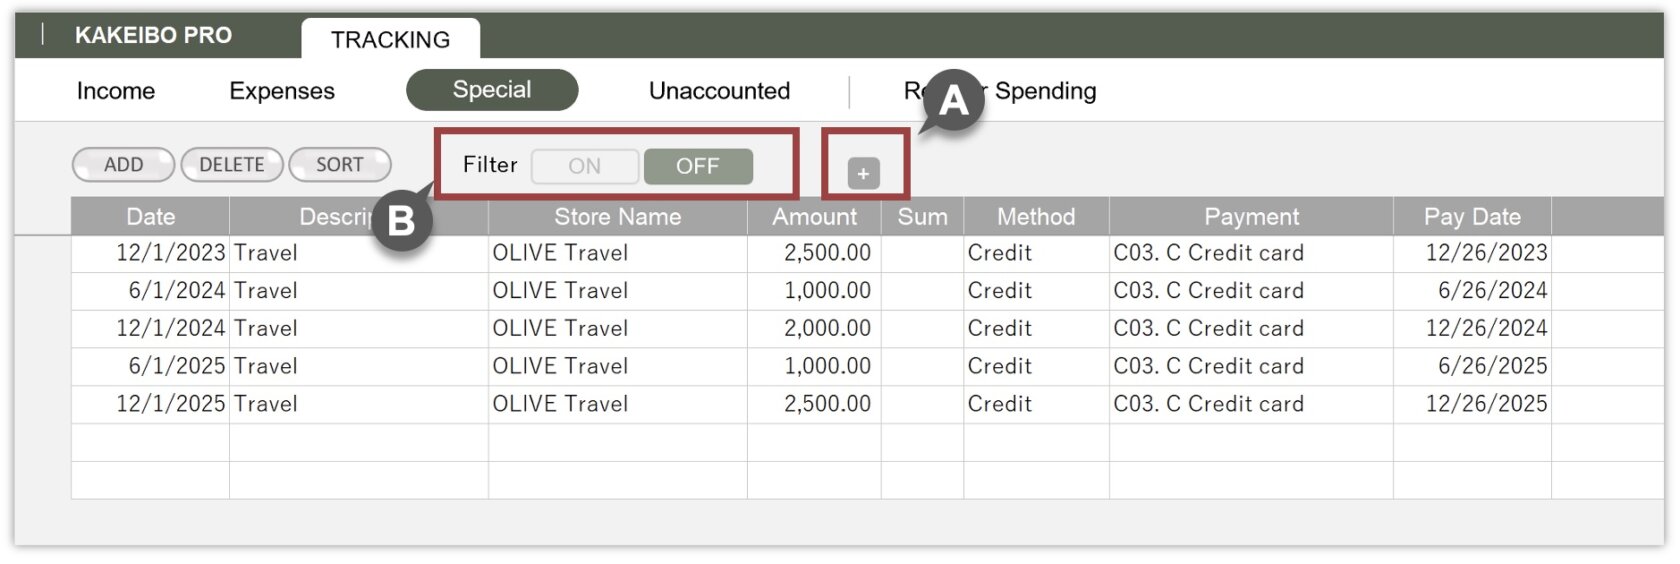
1 Click TRACKING in the main menu, then select Special under the TRACKING group. You can also click Special on the sidebar.
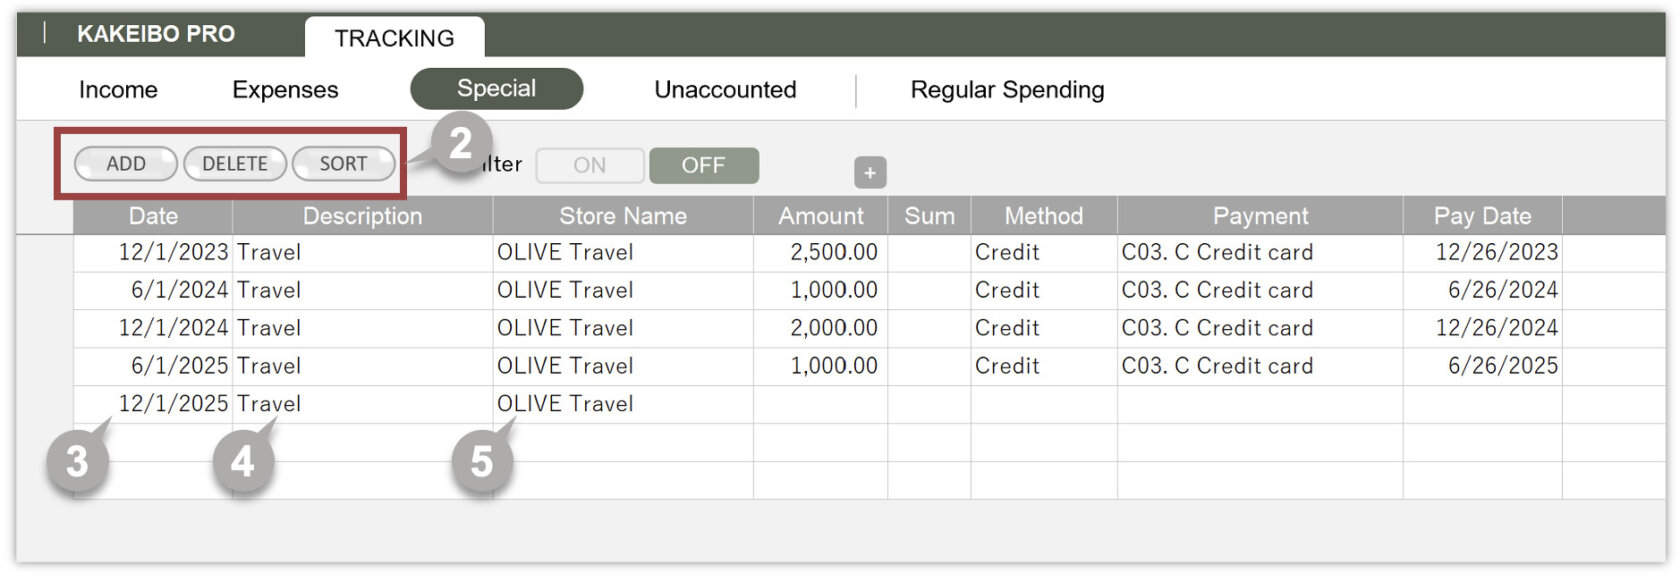
2 To add new data, click the ADD button. To delete the last entry, click the DELETE button. To sort the data, click the SORT button. It sorts the data in ascending order based on 1:Date 2:Store Name 3:Sum.
3 Enter the purchase date in the Date column. 【 REQUIRED 】
4 Enter the details such as the purchased items in the Description column.
5 Enter the store name or the payee in the Store Name column.
6 Enter the purchase amount in the Amount column. 【 REQUIRED 】
7 By specifying “G*” in the Sum column, separately entered amounts will be combined and reconciled for credit payment reconciliation. If you paid by credit card and entered data in multiple fields, select “G*” from the drop-down list.
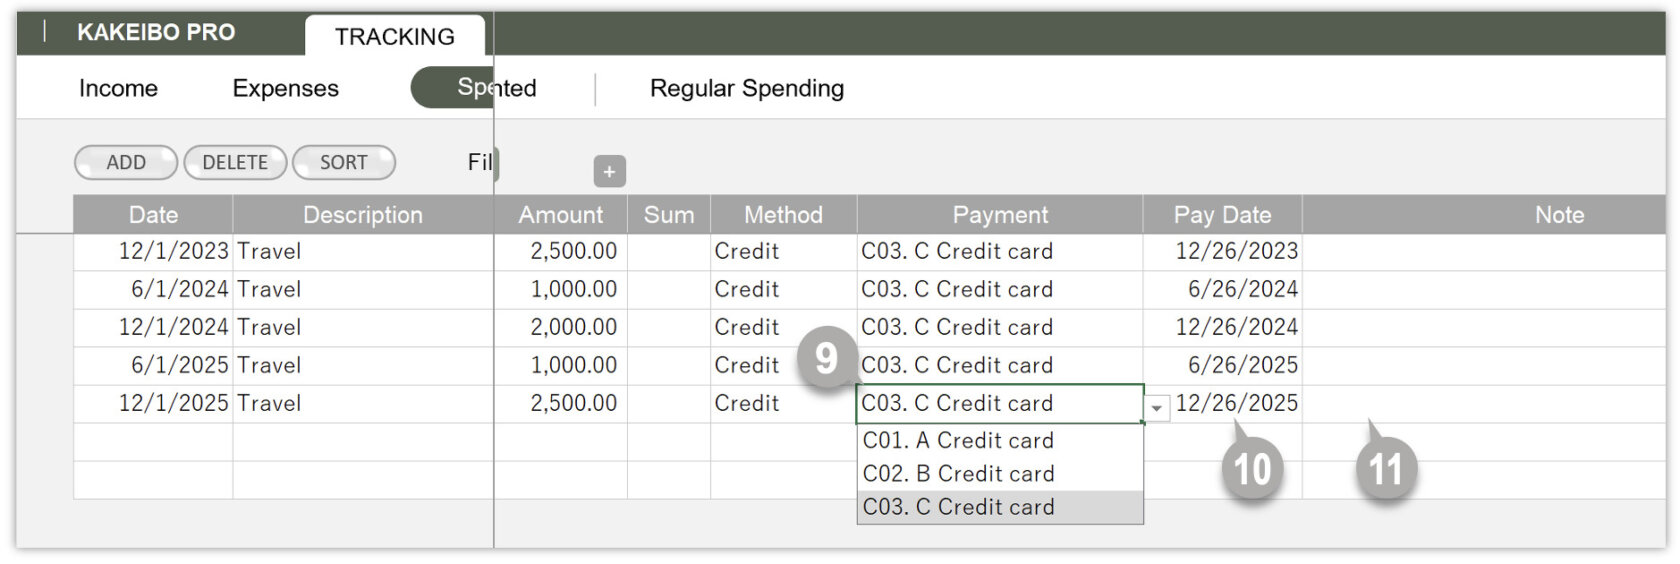
8 Select the payment method from the drop-down list in the Method column.
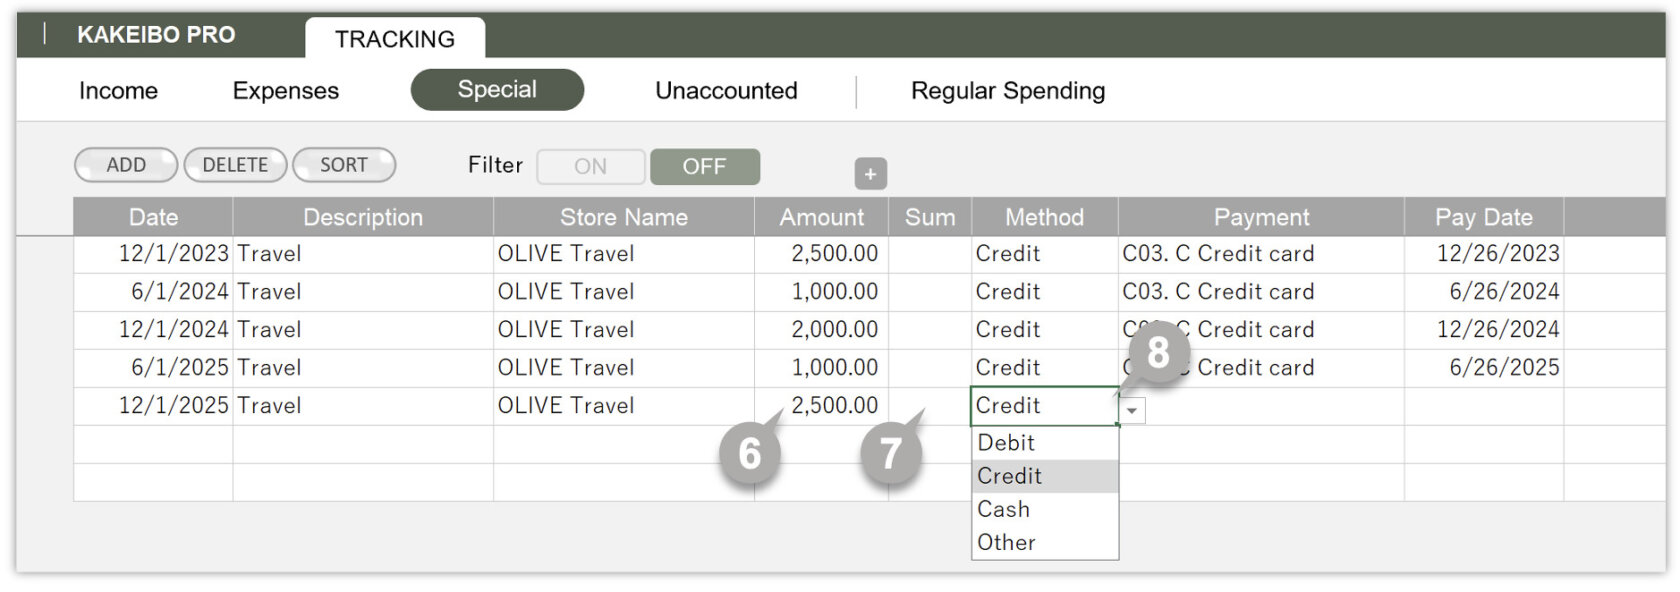
9 If you select “Debit” as the payment method, the list of bank accounts will appear in the Payment column. If you select “Credit“, the list of credit cards will appear. Choose the relevant option from the drop-down list. If you select “Other“, manually enter the payment method, such as a prepaid e-money card.
10 Enter the pay date in the Pay Date column. If you pay with a credit card, enter the settlement date for the credit card usage.
11 Optionally, enter any notes in the Note column.
A Entering foreign currency
If you click [+], the foreign currency input columns appear. Enter the foreign amount in the Foreign Curr column and the exchange rate in the Rate column. If you click [-], the columns hide.
B Filter Function
Click ON to enable the filter function. Click OFF to disable it.
4. Entering Unaccounted Expenses
On the Unaccounted sheet, you will enter expenses that you want to keep as a record but don’t want to include in the tally, such as temporary advances of money or loans to others. The data entered on this sheet will not be included in the monthly or annual totals. Follow these steps:
1 Click TRACKING in the main menu, then select Unaccounted under the TRACKING group. You can also click Unaccounted on the sidebar.
Steps 2 to 11 are the same as in [3. Entering Special Expenses] .
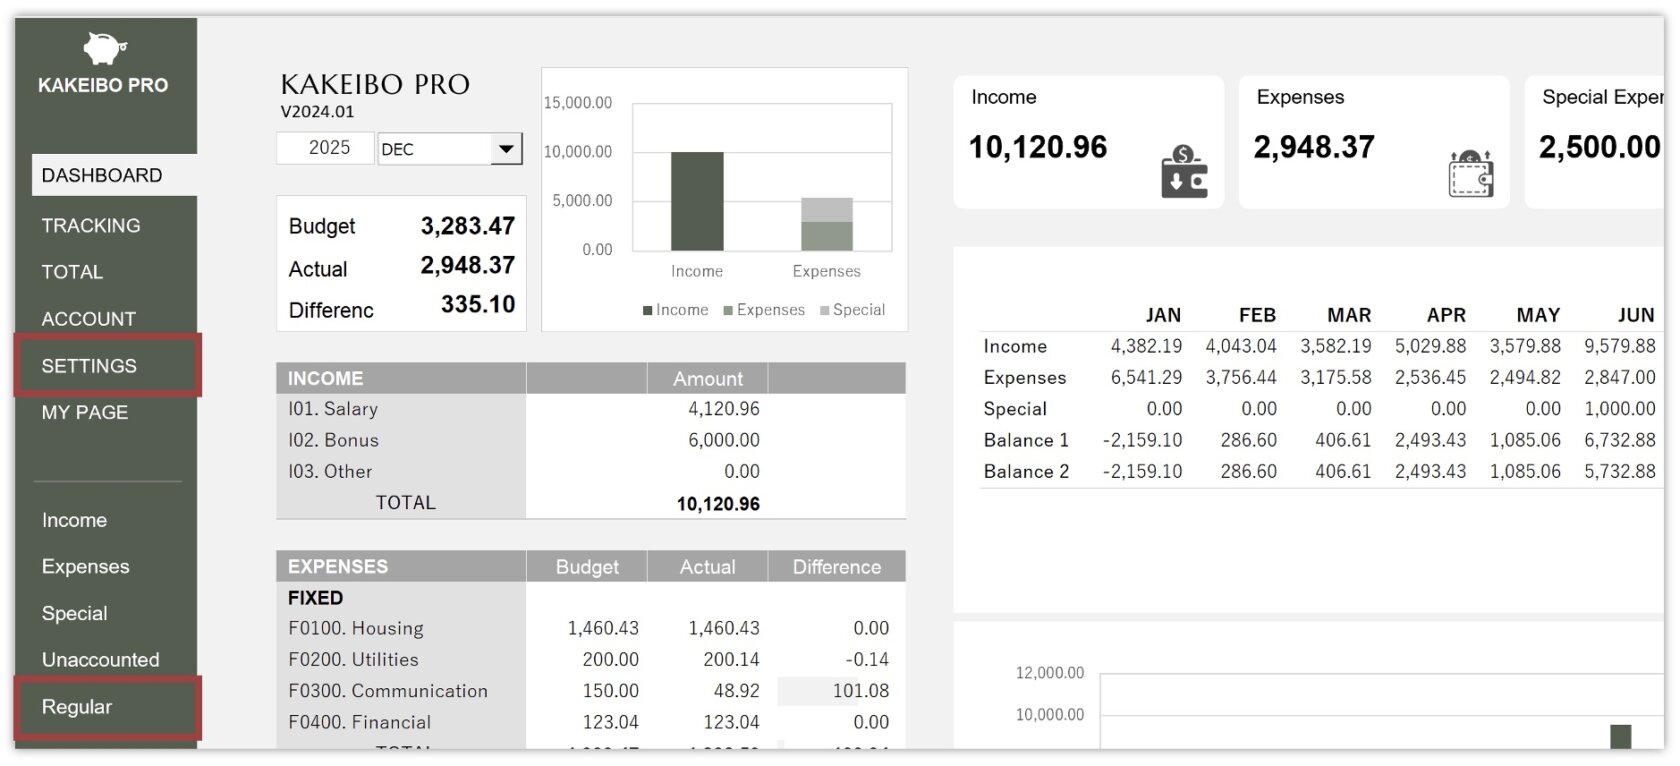
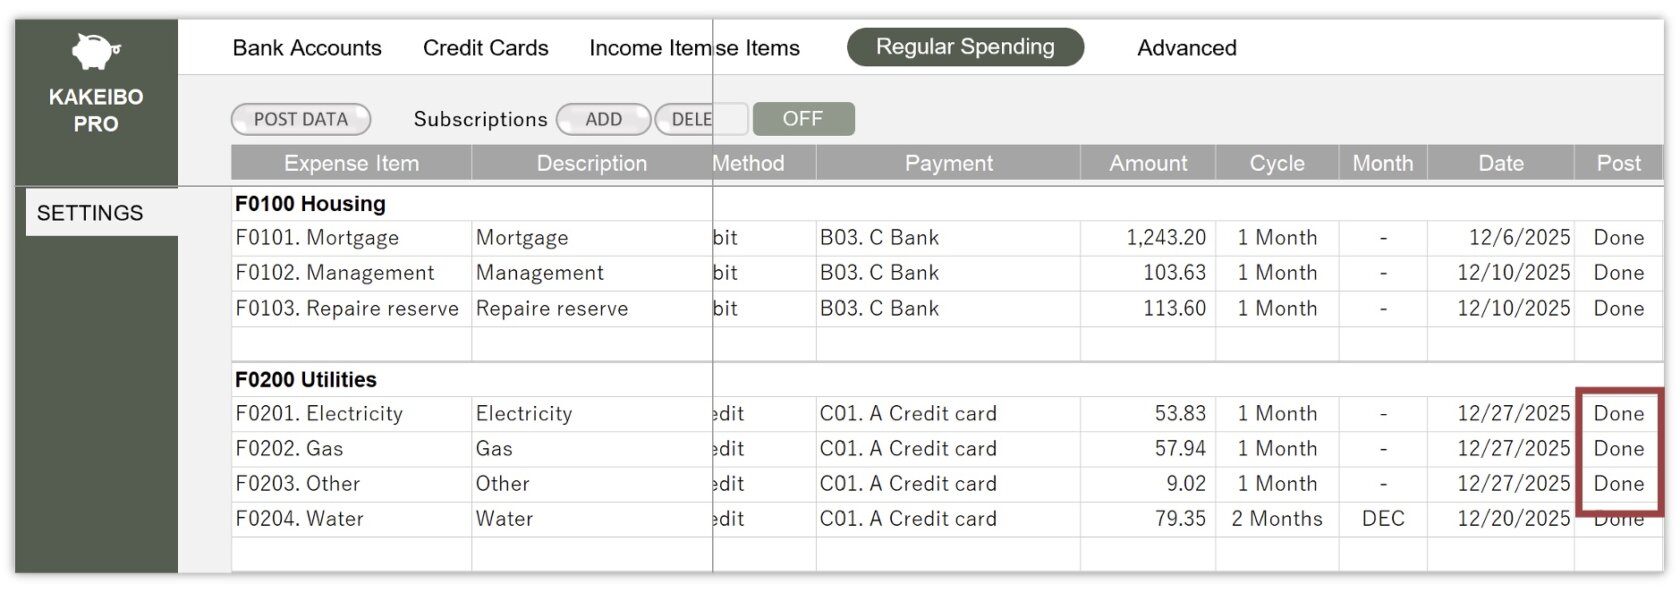
5. Automatic Posting Regular Expenses
You can automatically post your regular expenses entered on the Regular Spending sheet to the Expenses sheet. Using this function can save time and be very convenient. Here are the steps to post regular expenses:
1 Click on SETTINGS in the main menu, then Regular Spending under the SETTINGS group. You can also click Regular on the sidebar.
2 Ensure that details, such as Expense Item, Amount, and Date, are entered for the target item and enter “Y” in the Post column.
3 Click the POST DATA button.
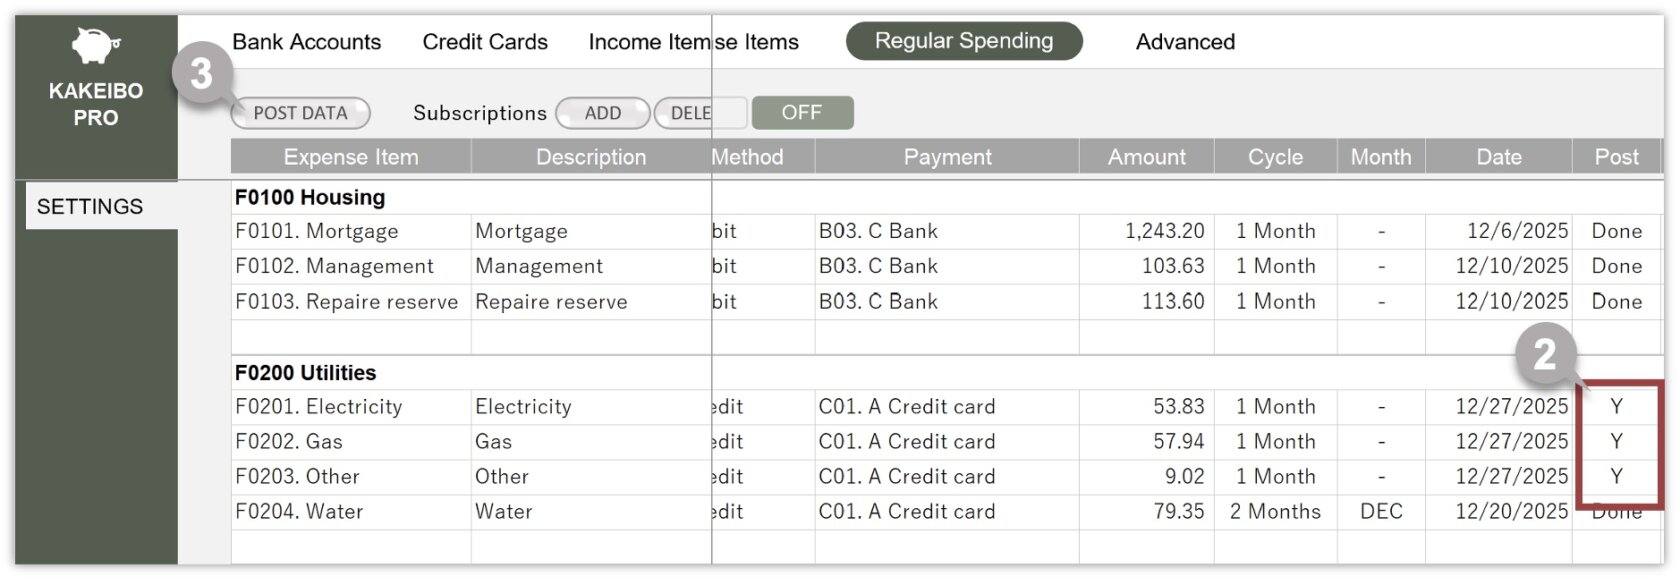
4 A confirmation message will appear. Click OK.
5 The Expenses sheet will appear. You can see that the details of the specified expense items have been posted.

When the posting of data is completed, “Done” will be entered in the Post column of the Regular Spending sheet.
Filter Function
Click ON to enable the filter function. Click OFF to disable it.
CONTENTS