The date on the mail merge document appears as 7/1/2020. It does not reflect the date format that you have set up in Excel for the mail merge document. This article provides two ways to help you format the date that you want and get the date to uppercase month in the mail merge.
Language: English Japanese
–
1. Add a formatting switch to the merge field
Here is how you can add a formatting switch into the merge field to get the date format you want and get the uppercase month with the full name.
1-1. Format date as “Jul 1, 2020”
1 Click on the merge field of date. The field is grayed out.
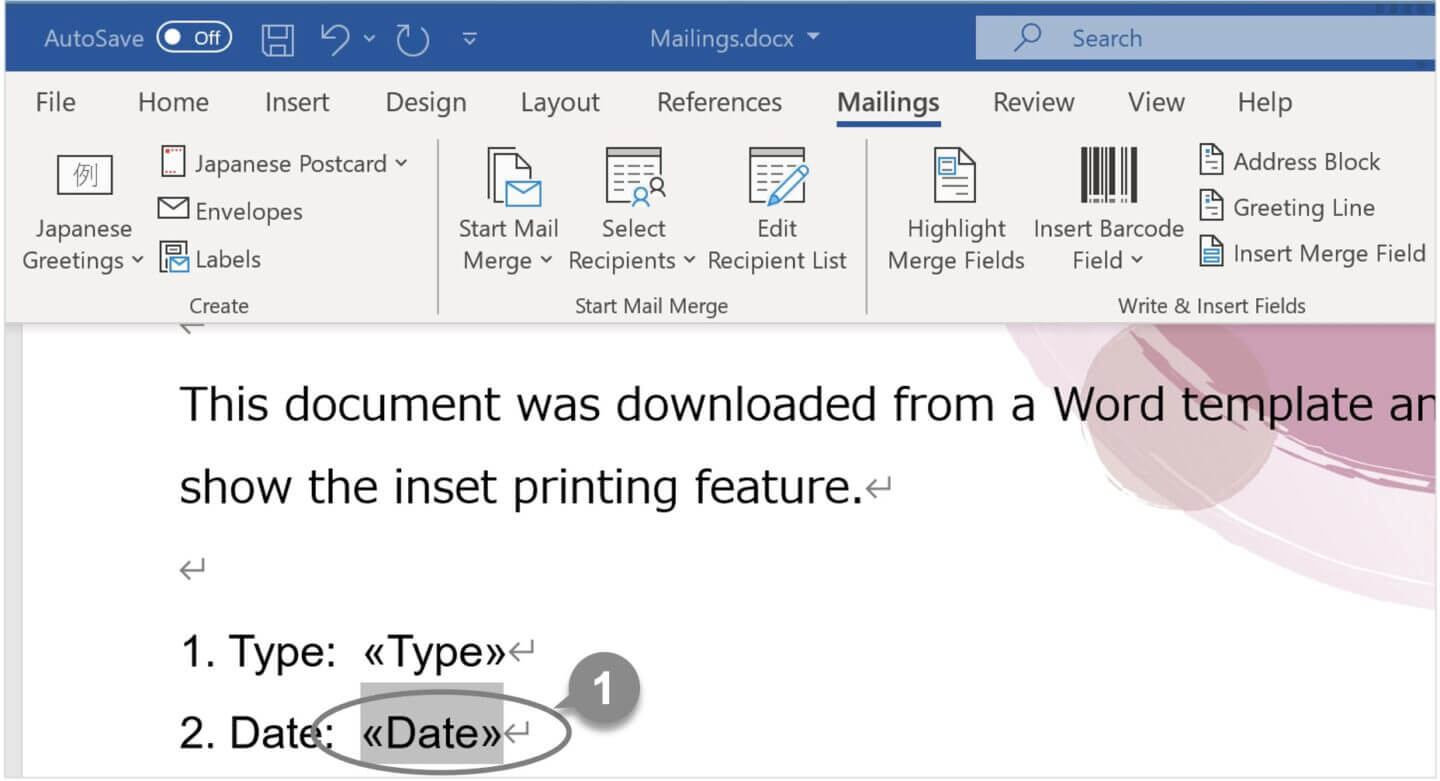
2 Press [ Shift ] + [ F9 ] to expose the field coding.
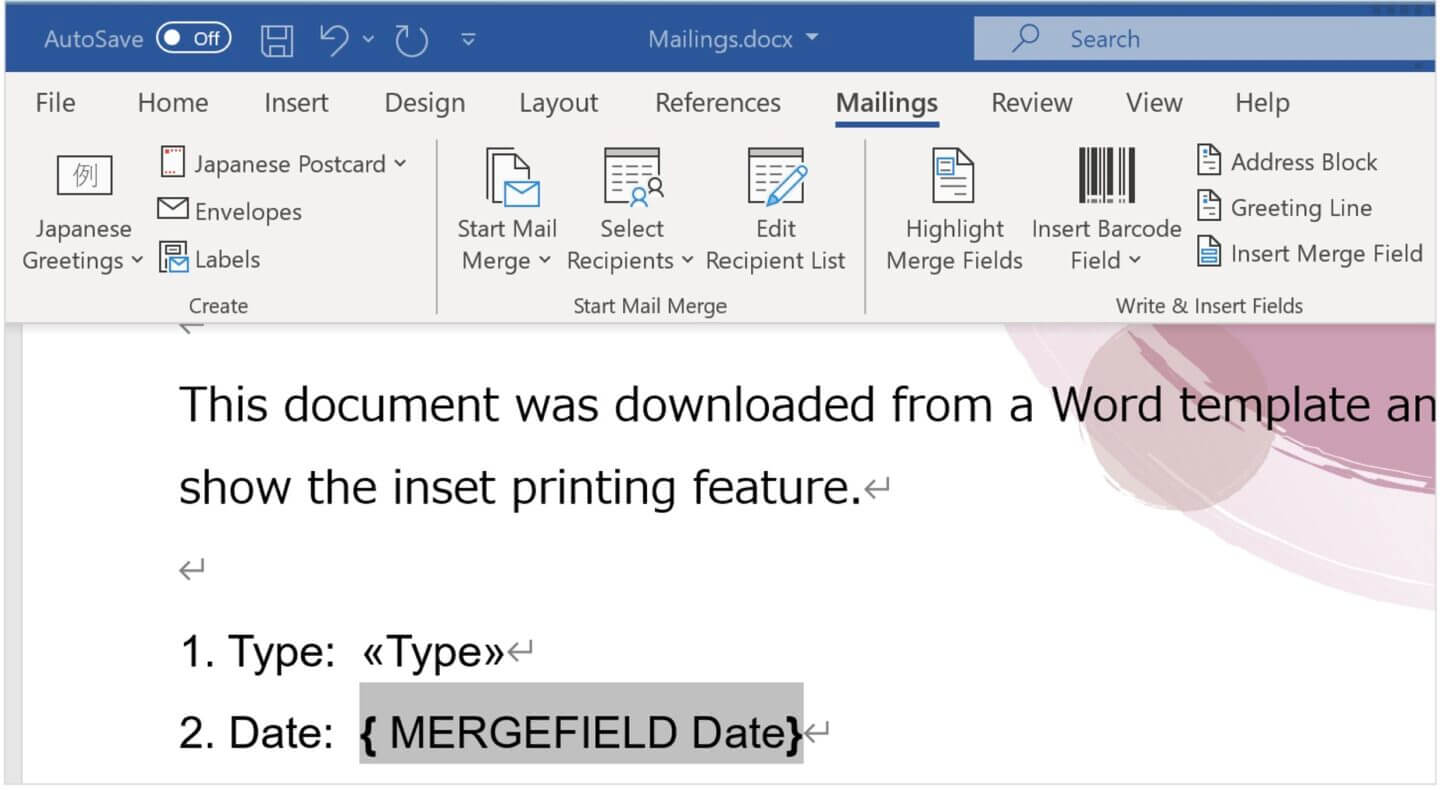
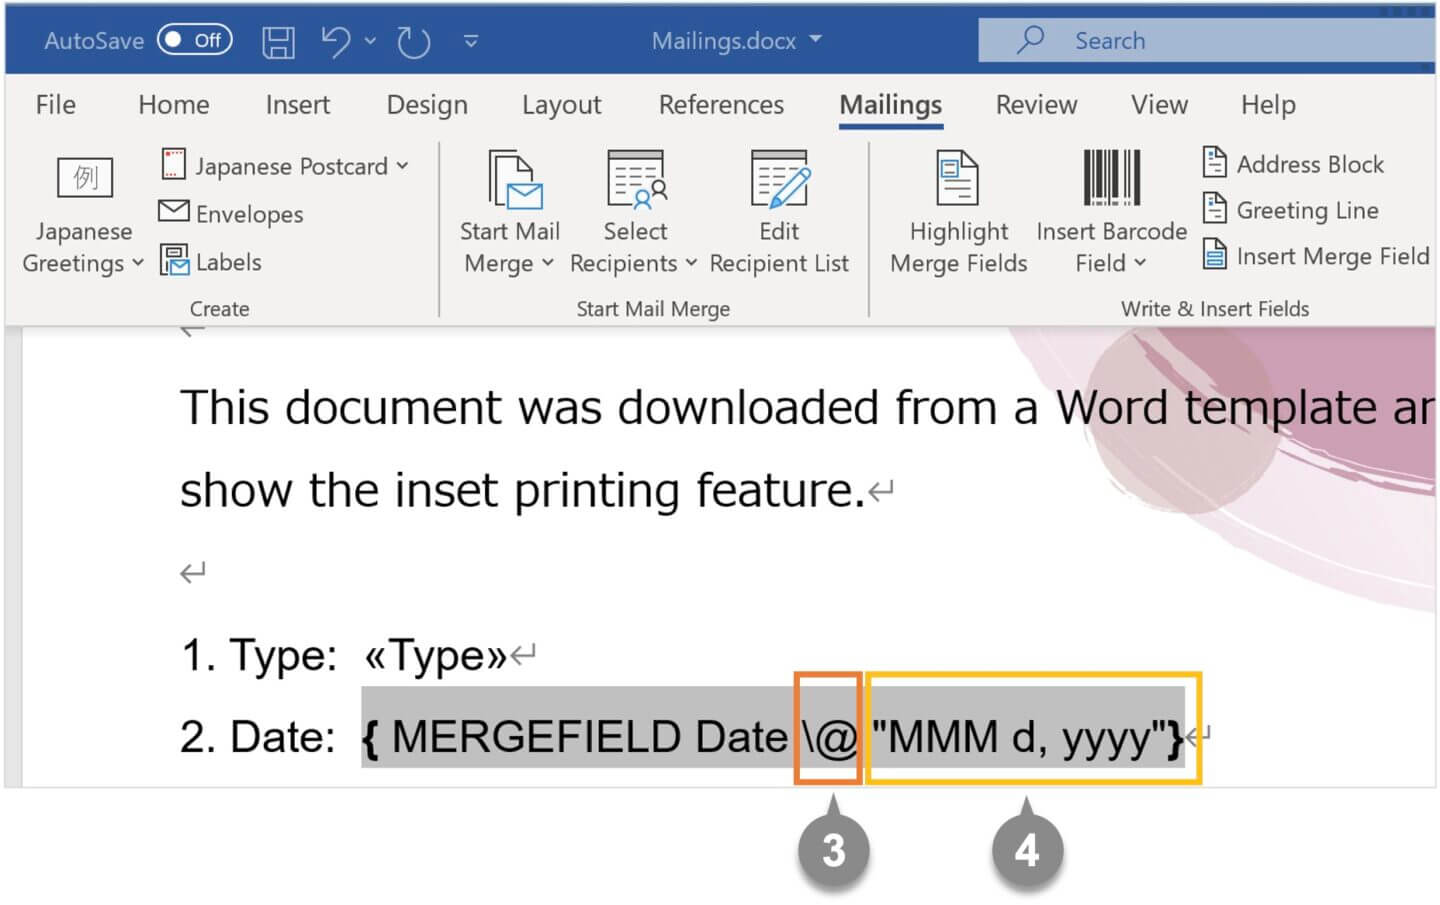
3 Click in front of [ } ] in the field code and enter the date format switch [ \@ ].
4 Enter the date format you want such as [ “MMM d, yyyy” ] after the switch.
Enter only M in uppercase. The uppercase M is used for a month, and the lowercase m is used for a minute.
5 Under the Preview Results group in the Mailings tab, click Preview Results to see the date has been applied as your format. If the date has not been applied, press [ F9 ] to update it.
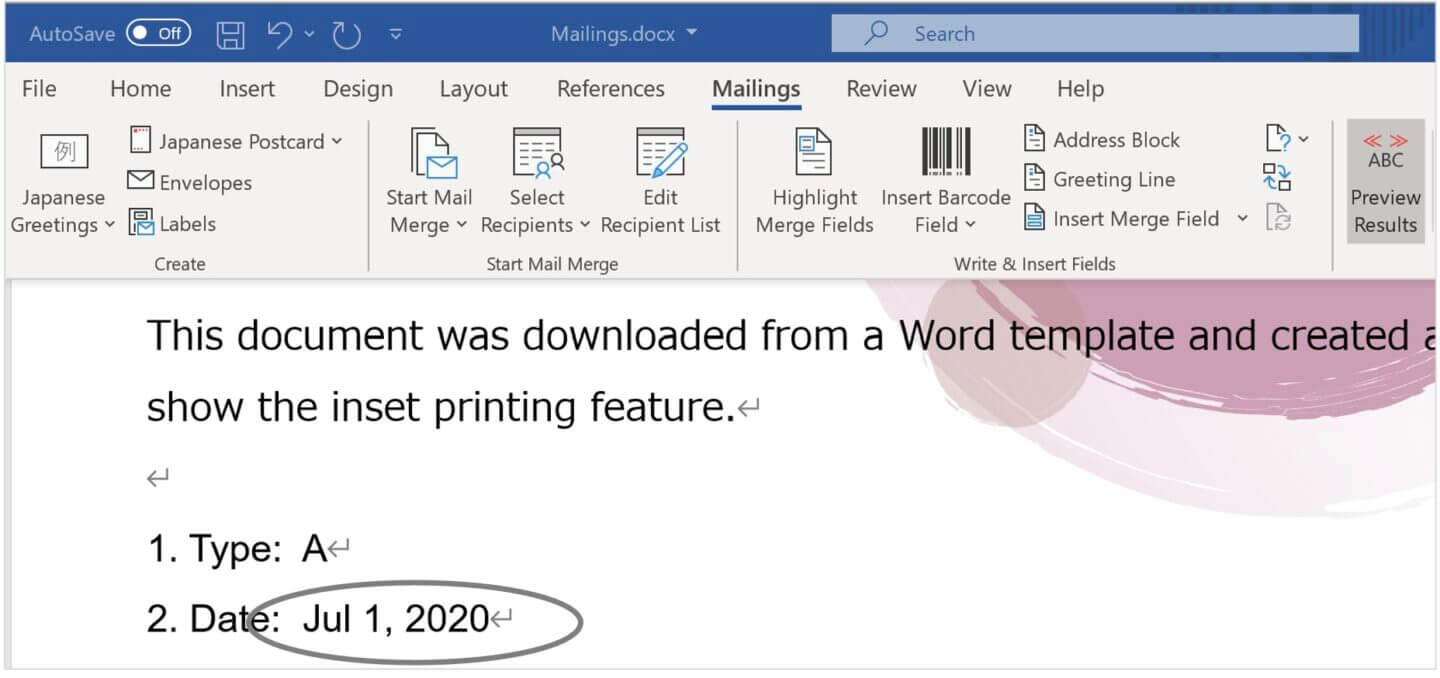
1-2. Format date to uppercase month
To get the date to uppercase month, insert a switch code [ \*UPPER ].
1 Click on the merge field of date and press [ Shift ] + [ F9 ] to expose the field coding.
2 Insert [ \*UPPER ] after [ \@ “MMM d, yyyy” ] as below.
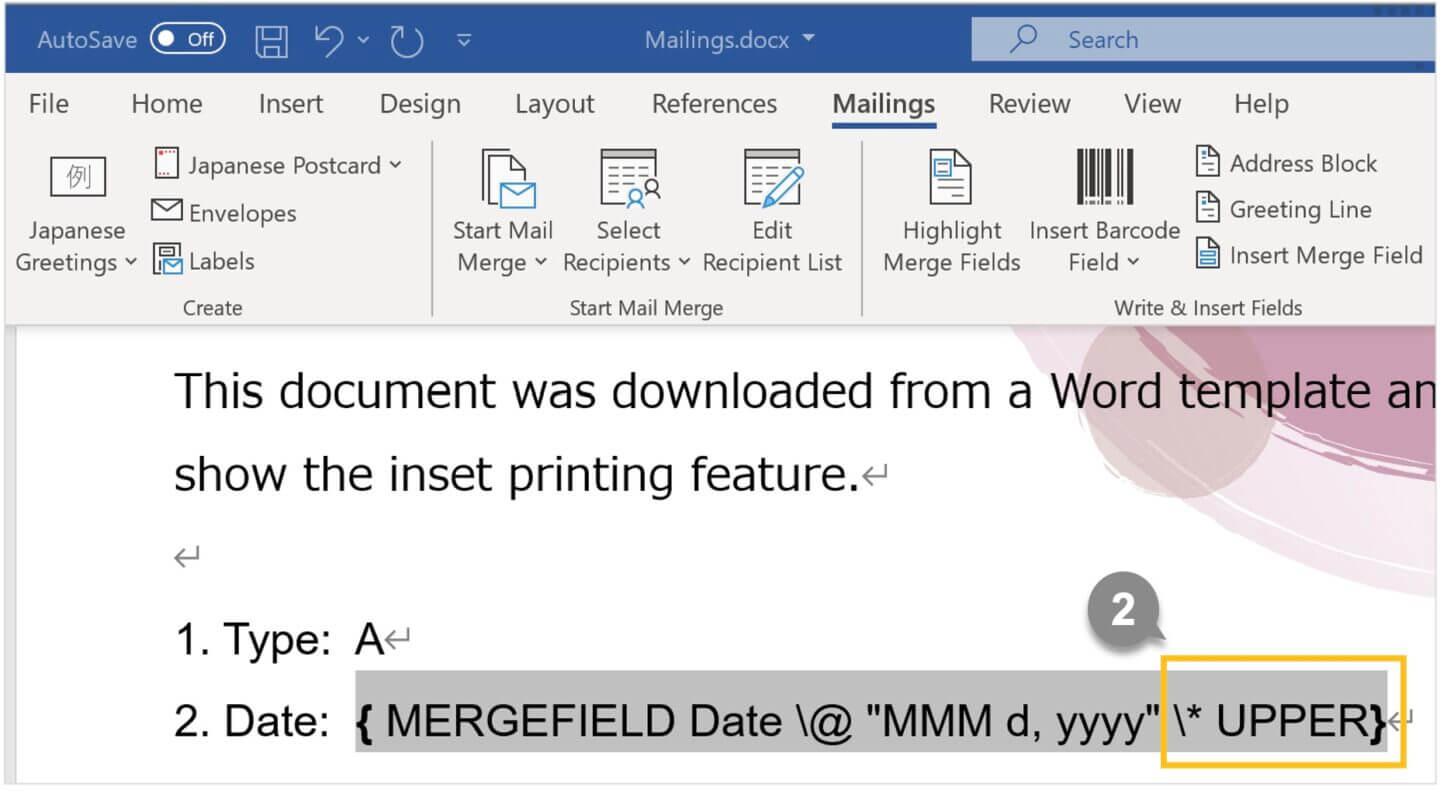
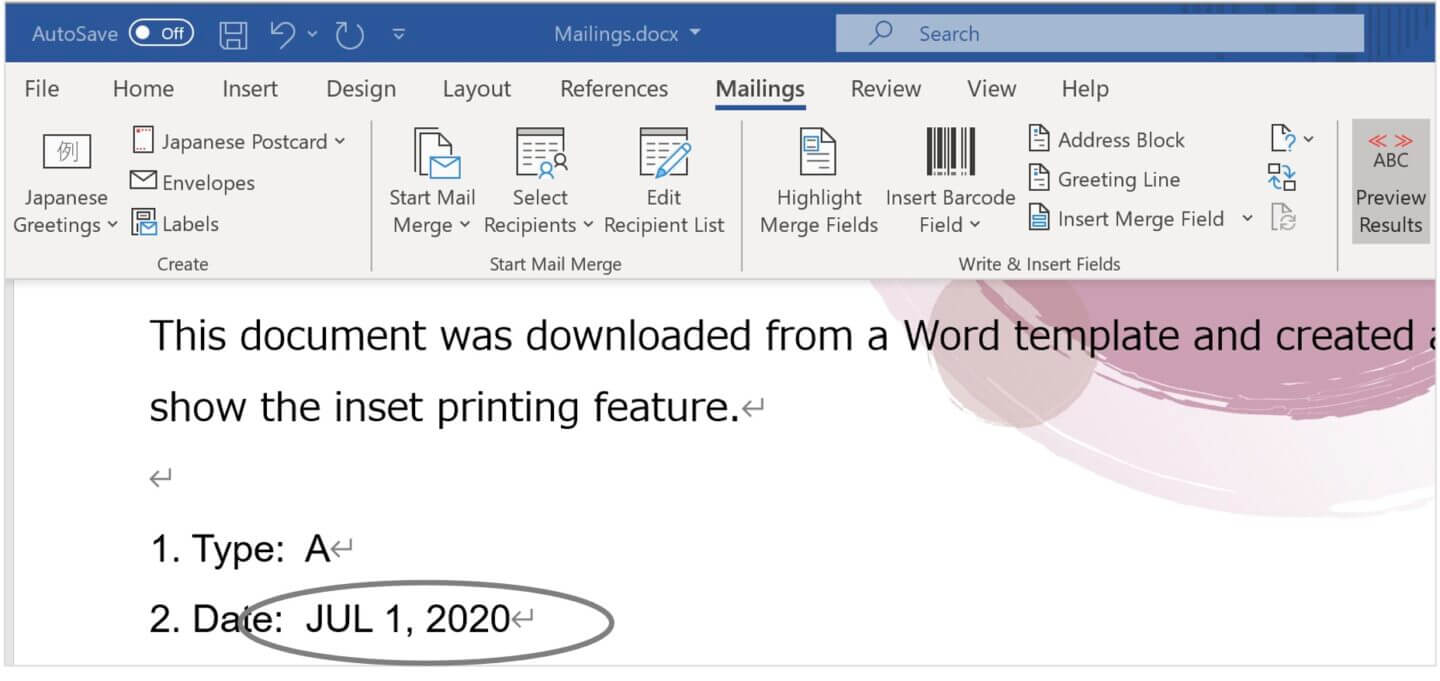
3 Under the Preview Results group in the Mailings tab, click Preview Results to see the date has been applied as your format. If the date has not been applied, press [ F9 ] to update it.
Function Key
| [ Shift ] + [ F9 ] | On and off for one field coding |
| [ Alt ] + [ F9 ] | On and off for all field coding |
| [ F9 ] | Update the change |
Sample of format
| 7/1/2020 | {MERGEFIELD Date \@ “M/d/yyyy”} |
| 07/01/2020 | {MERGEFIELD Date \@ “MM/dd/yyyy”} |
| July 1, 2020 (Wednesday) | {MERGEFIELD Date \@ “mmmm d, yyyy (dddd)”} |
| Jul 1, 20 (Wed) | {MERGEFIELD Date \@ “mmm d, yy (ddd)”} |
–
2. Using Formulas in Excel
Here is how you can format date to uppercase month using formulas in Excel and merge to a word document.
1 Open the Excel file that is the source of the data.
2 Enter [ Format Date ] in cell F1 to add a new filed.
3 In cell F2, enter formula [ =UPPER(TEXT(E2, “mmm d, yyyy”)) ].
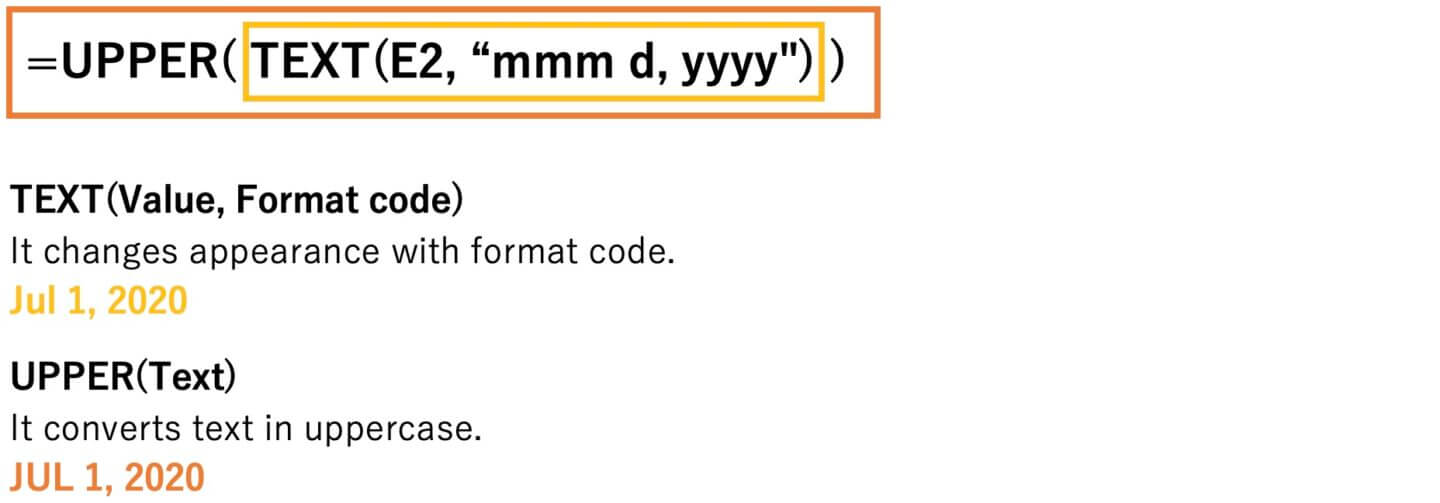
4 Copy cell F2 and paste it to all formatted dates.
5 Save and close the excel file.
6 Open a document and select the Mailings tab.
7 Move the cursor after the merge field of date and press the [ Delete ] key to delete it.
8 Move the cursor after [ Date: ] and under the Write & Insert Fields group, click on the down arrow in Insert Merge Filed and select Format Date. The merge filed for Format Date is entered.
9 Under the Preview Results group in the Mailings tab, click Preview Results to see the date has been applied as your format.
Sample of format
| 7/1/2020 | =TEXT(E2, ” m/d/yyyy “) |
| 07/01/2020 | =TEXT(E2, “mm/dd/yyyy “) |
| July 1, 2020 (Wednesday) | =TEXT(E2, “mmmm d, yyyy (dddd)”) |
| Jul 1, 20 (Wed) | =TEXT(E2, ” mmm d, yy (ddd)”) |
Enter a value as text
To enter a number or date as text in Excel, type apostrophe [ ‘ ] before the date or number, such as [ ‘ 2020/7/1 ].
Related Articles
The EMAIL MAKER tool allows you to insert the recipient’s name and messages into an email like the mail merge feature of Word, and send them to several email addresses at once.
–


