EMAIL MAKER is an Excel-based tool that allows you to compose emails automatically and send them all at once. It enables you to create the body of an email in Word, manage the email creation in Excel, and send emails through Outlook. With a simple design and user-friendly operations, such as typing and clicking buttons, it is easy to compose emails.
This tool has two functions for composing emails: SINGLE MAIL and ONE to ONE MAIL. The ONE to ONE MAIL feature enables you to compose up to 100 personalized emails, each containing the recipient’s name and a customized message in the body. This personalization enhances engagement and response rates, making it perfect for targeted marketing campaigns and personalized customer communications. This guide shows you the ONE to ONE MAIL feature.
Language: English Japanese
–
1. The flow for composing and sending emails
Here are the steps for composing and sending emails.
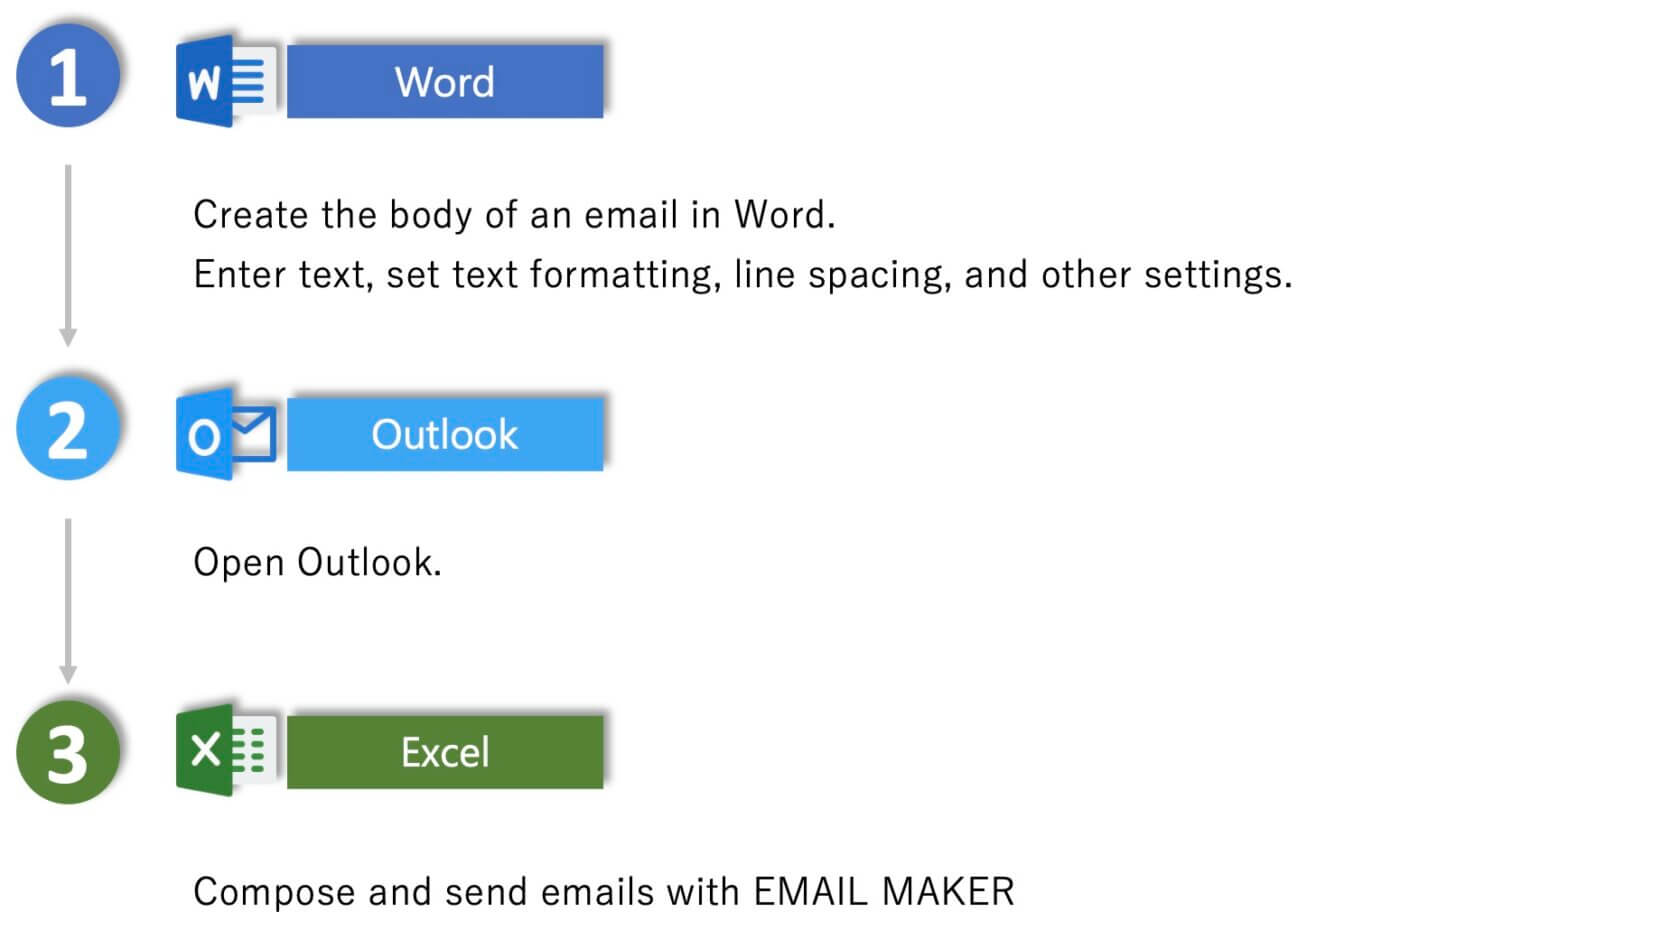
2. Creating templates
This tool allows you to write the body of an email in Word and use it as a template. You can set detailed settings such as text color, font, and line spacing. You can also insert tables and images to create a well-designed email.
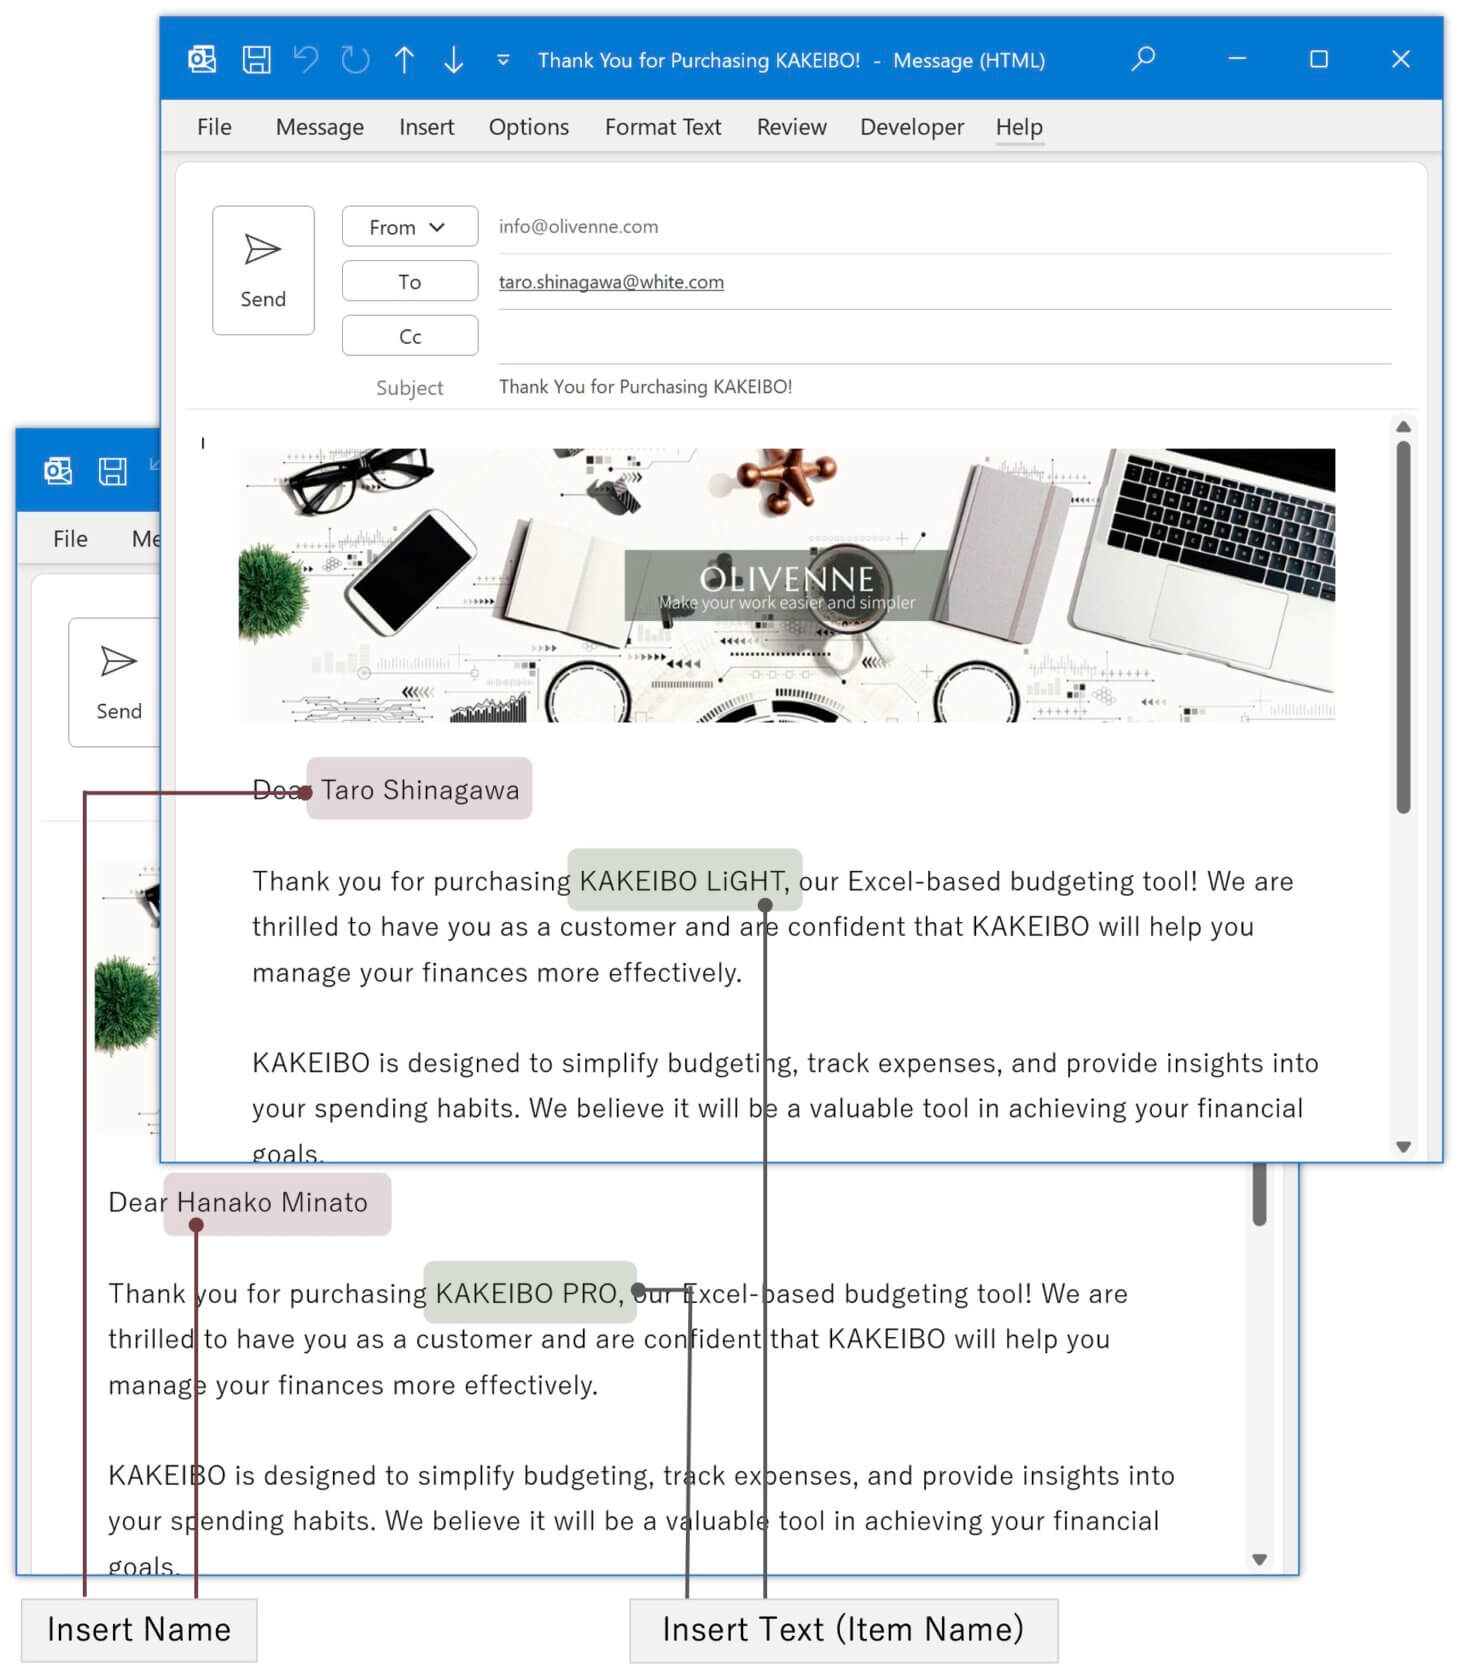
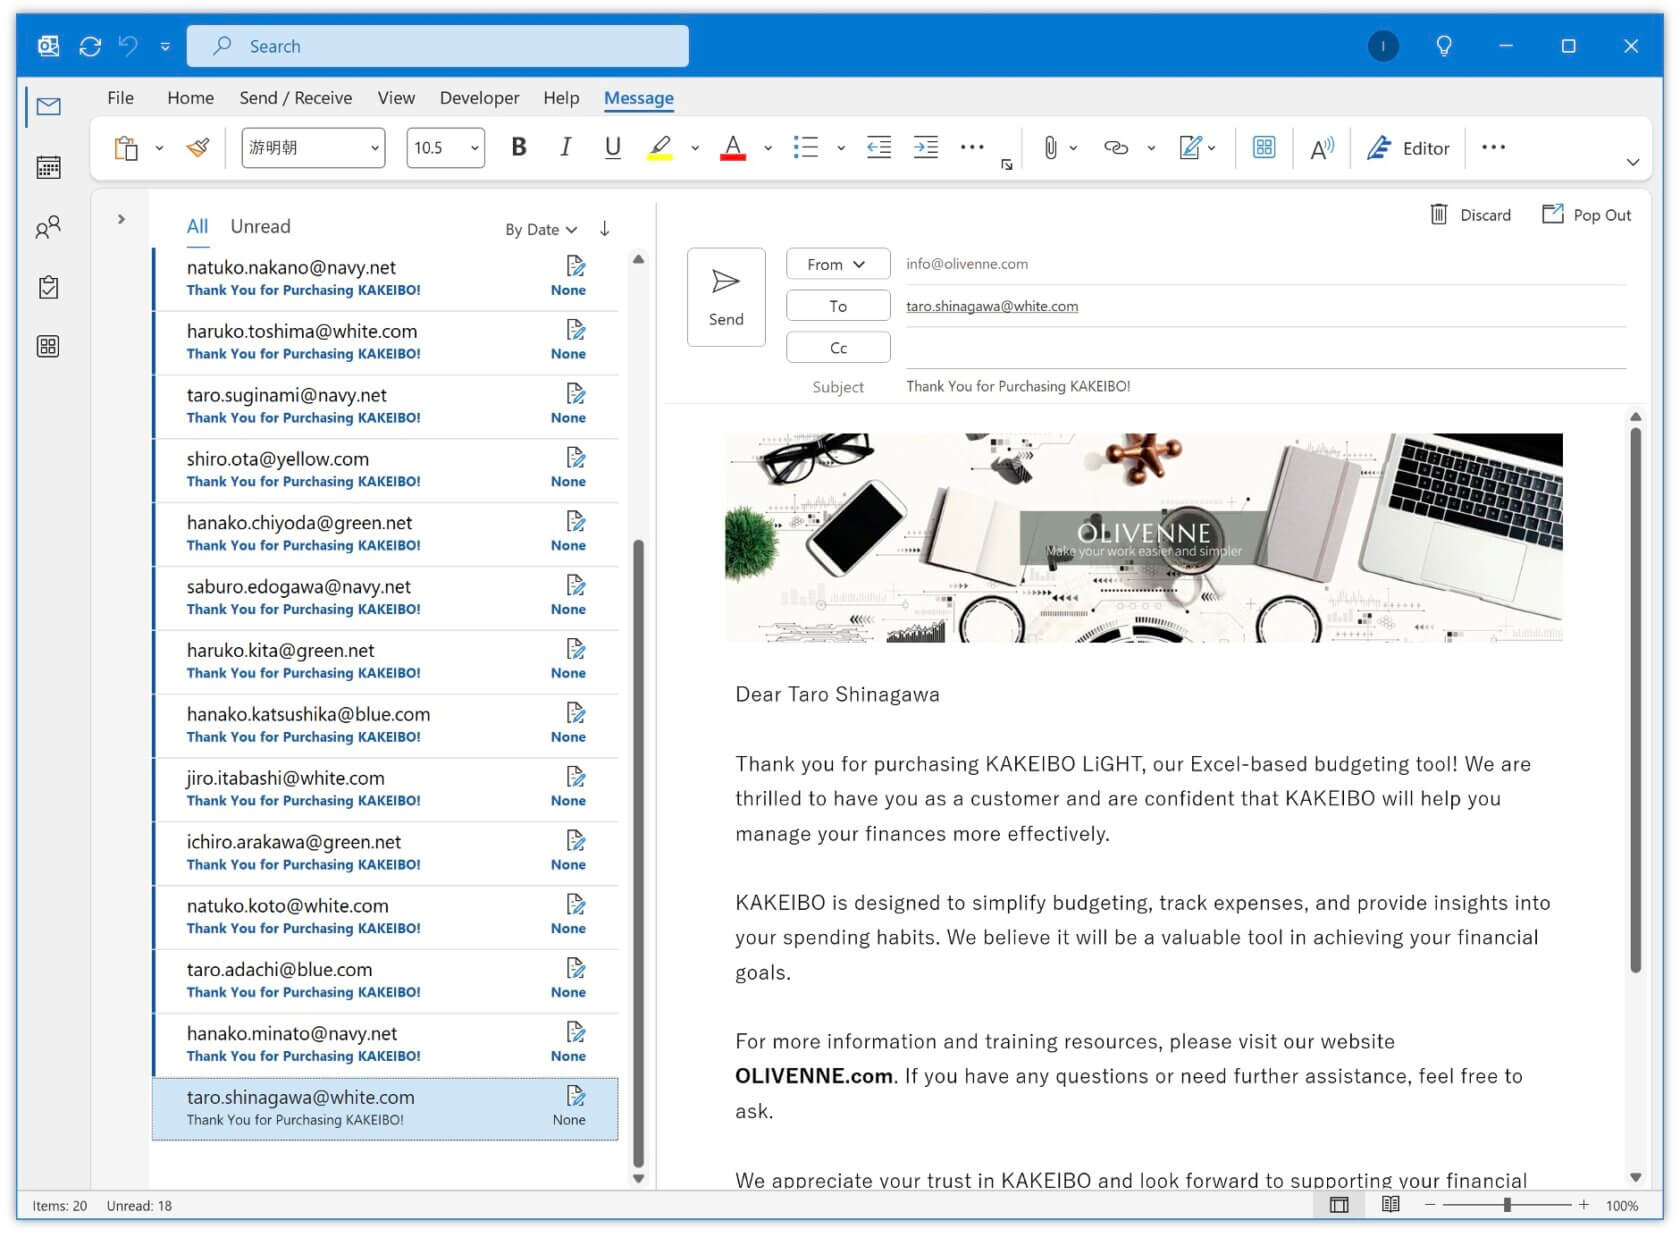
The ONE to ONE MAIL function allows you to insert your recipient’s name and two text messages into the body of an email. If you want to put the merge fields in the email, type the characters shown below in lowercase letters where you want the information. It is case-sensitive.
| Insert the data entered in the Name column | <name> |
| Insert the data entered in the Text 1 column | <text1> |
| Insert the data entered in the Text 2 column | <text2> |
Enter <name> and <text1> where you want to insert your recipient’s name and text message, as shown below.
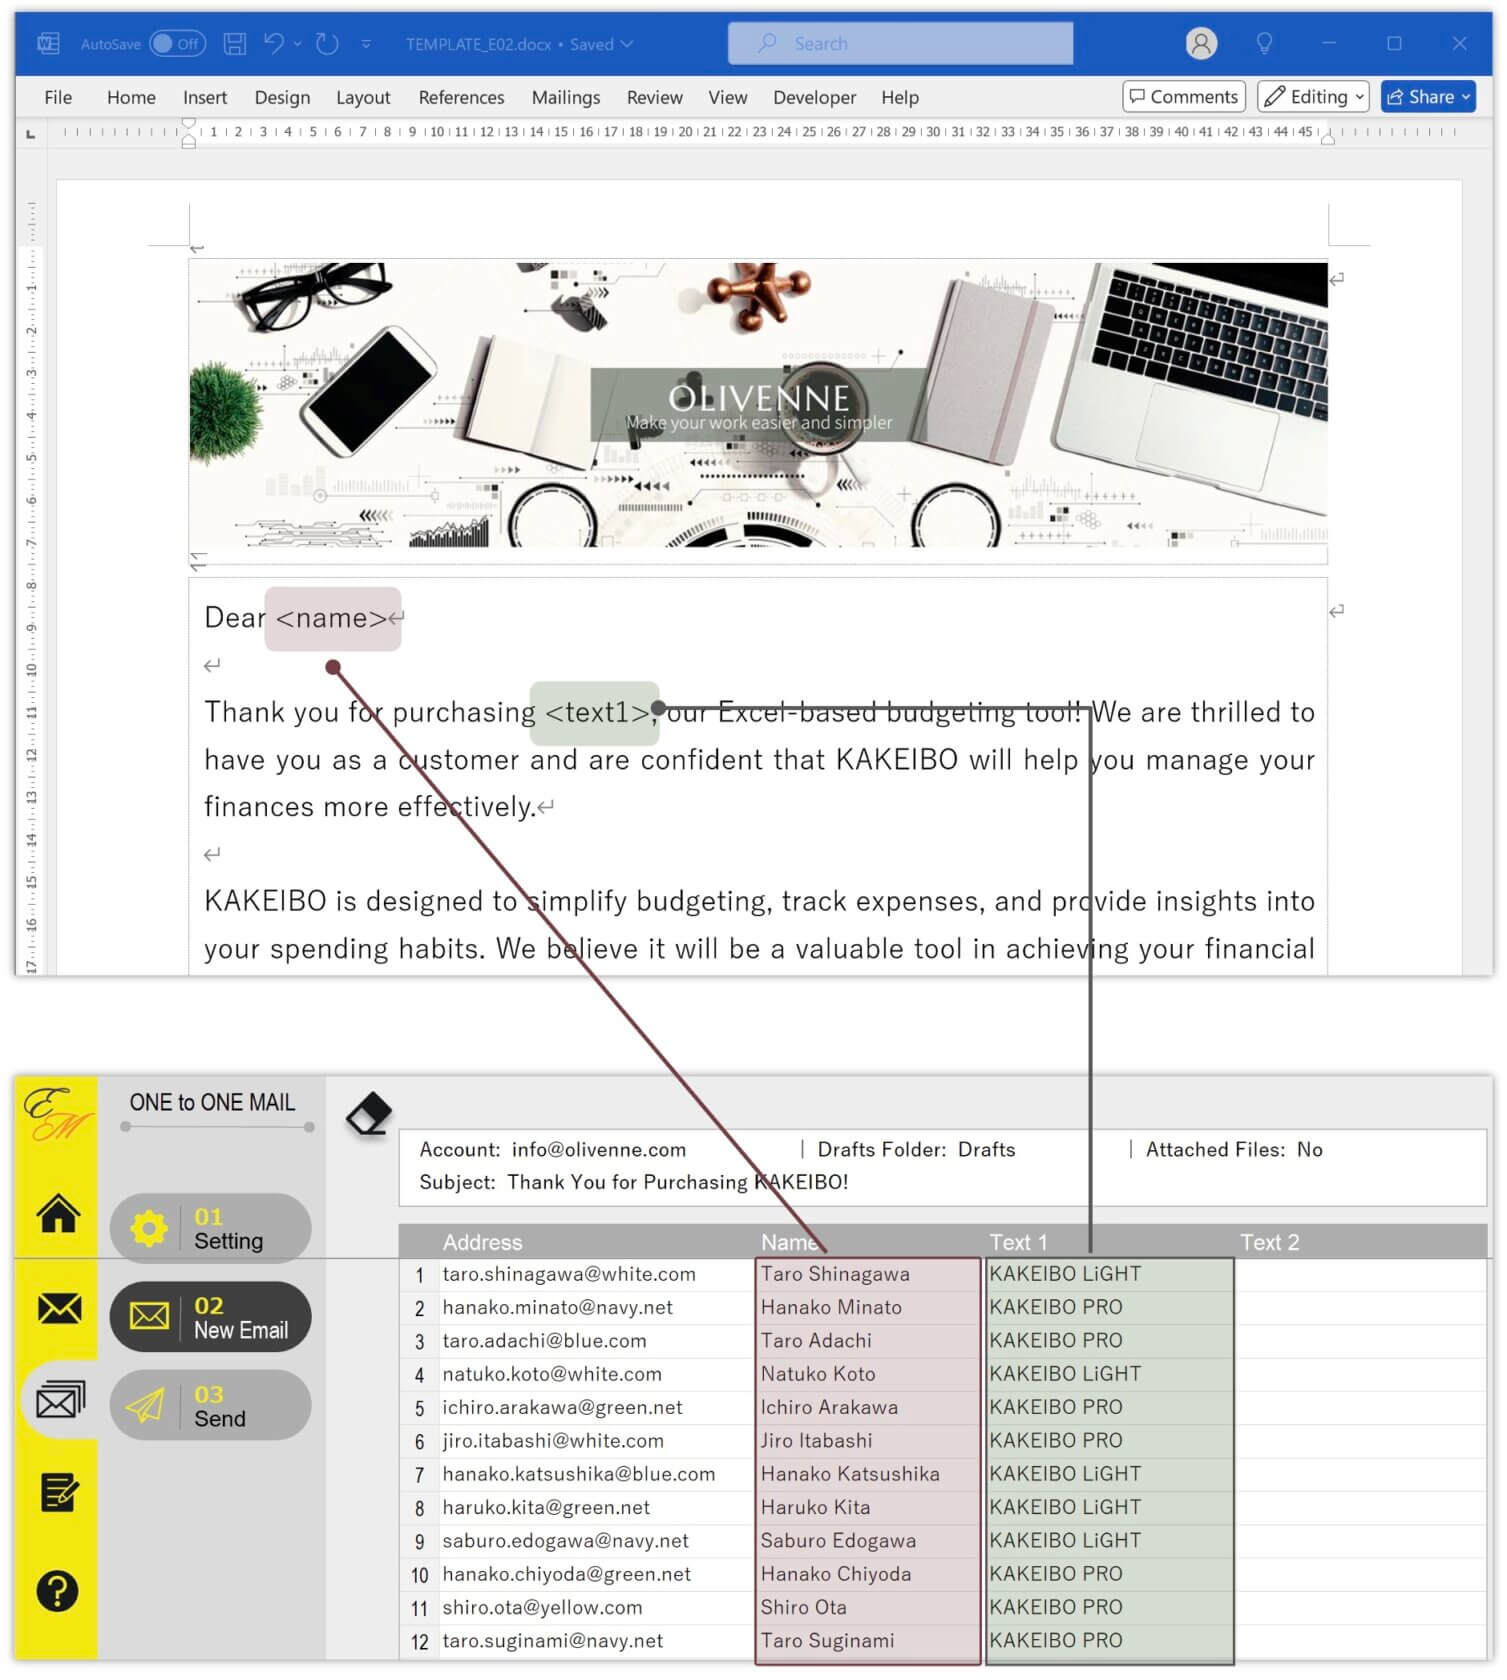
It will insert the data entered in the Name, Text1, and Text2 columns on the 02 New Email sheet into the body of the email.
Note for placing the merge fields
When composing ONE to ONE MAIL, if you set the merge fields after multiple hyperlinks, the data might not be inserted correctly. If there are many hyperlinks in the document, place the merge fields before the hyperlinks.
Textboxes cannot be inserted
If your Word template contains textboxes, you will encounter an error when composing an email. Please ensure that the Word template does not contain any textboxes.
3. Composing and sending emails
Open Outlook and this tool. This tool contains macros to automate processes. If you open it for the first time, follow the steps below to enable macro execution.
When you open the tool, the homepage will appear first. Click ONE to ONE MAIL on the screen to start composing emails.
Before using this tool
If you use this tool while an Excel file containing macros is open, a system error may occur. Before using this tool, please check that no other Excel files containing macros are open.
STEP1: Setting
It allows you to set information such as your email account, subject, and template to send emails on the 01 Setting sheet.
1 Click ONE to ONE MAIL on the Homepage or the 01 Setting button in the left side of screen.
2 The email setting screen will appear.
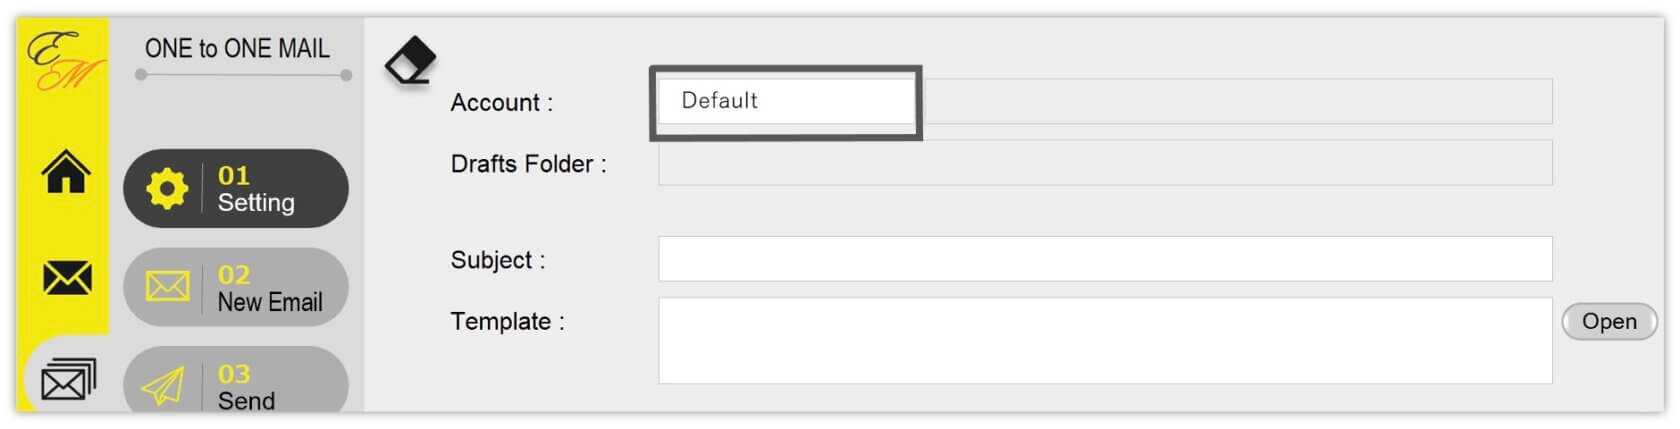
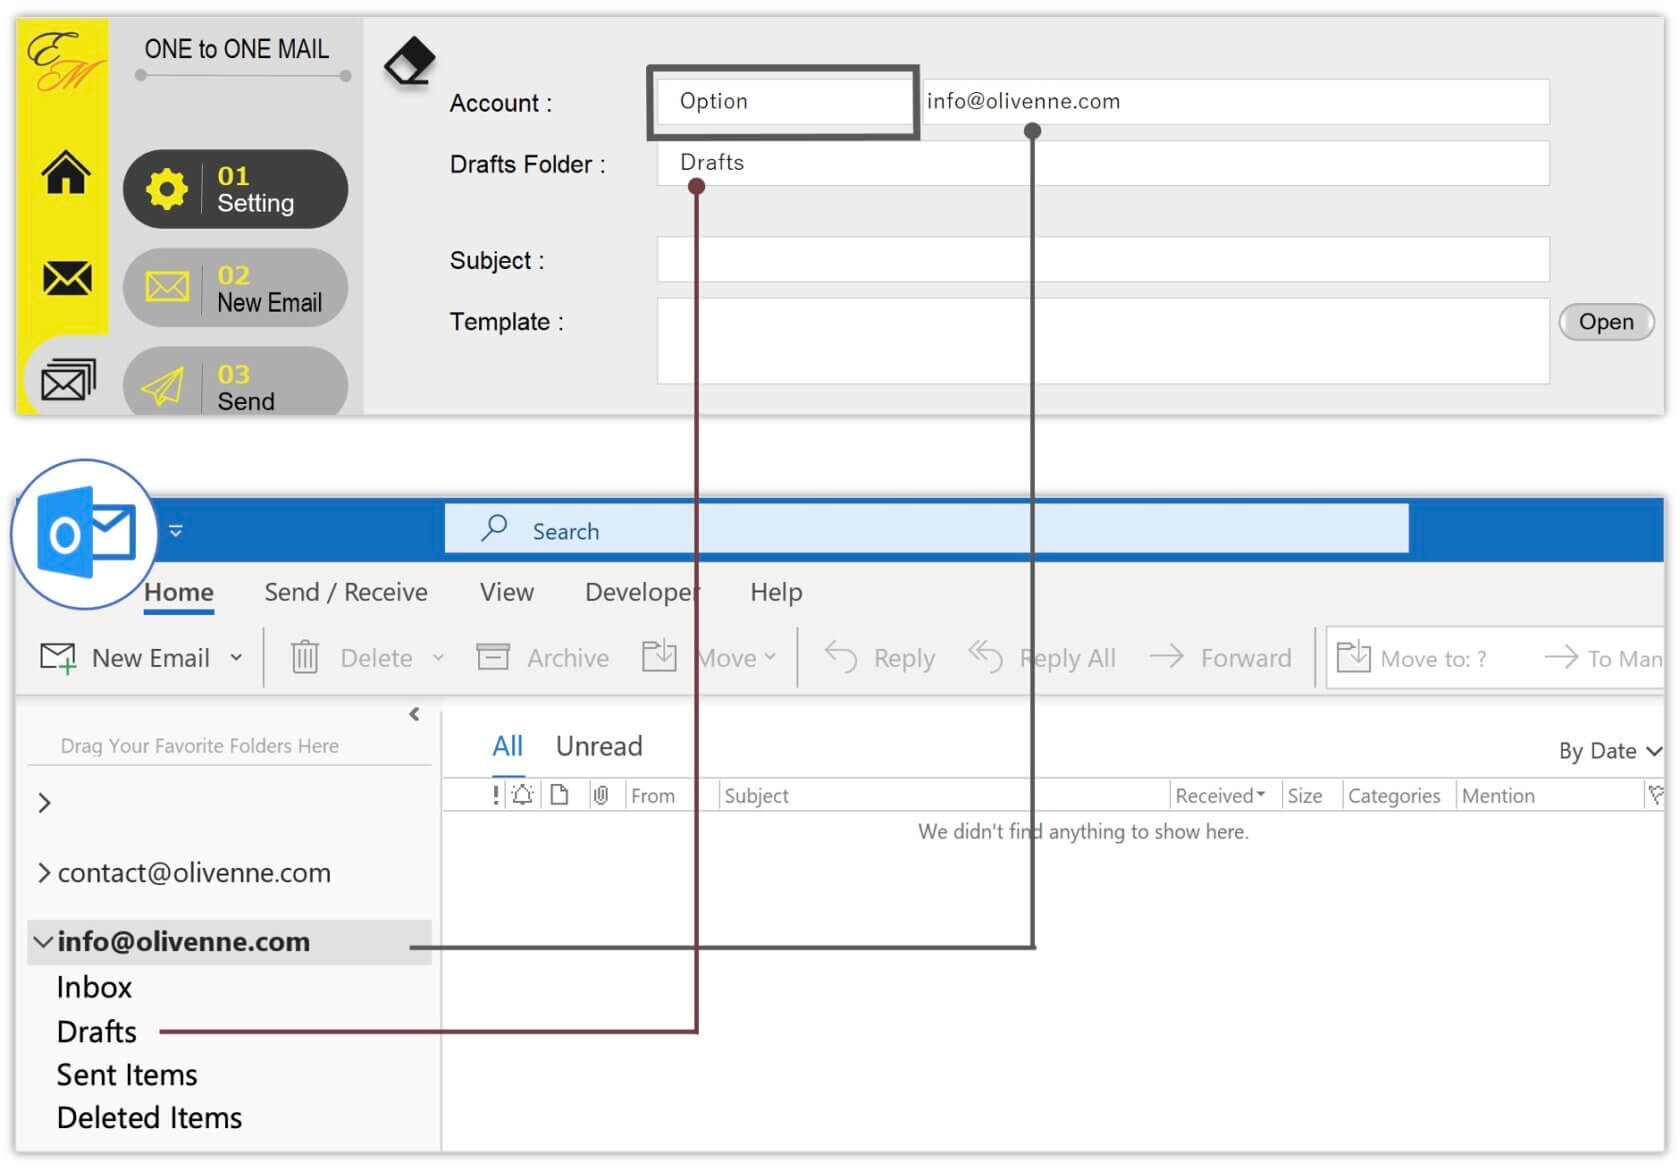
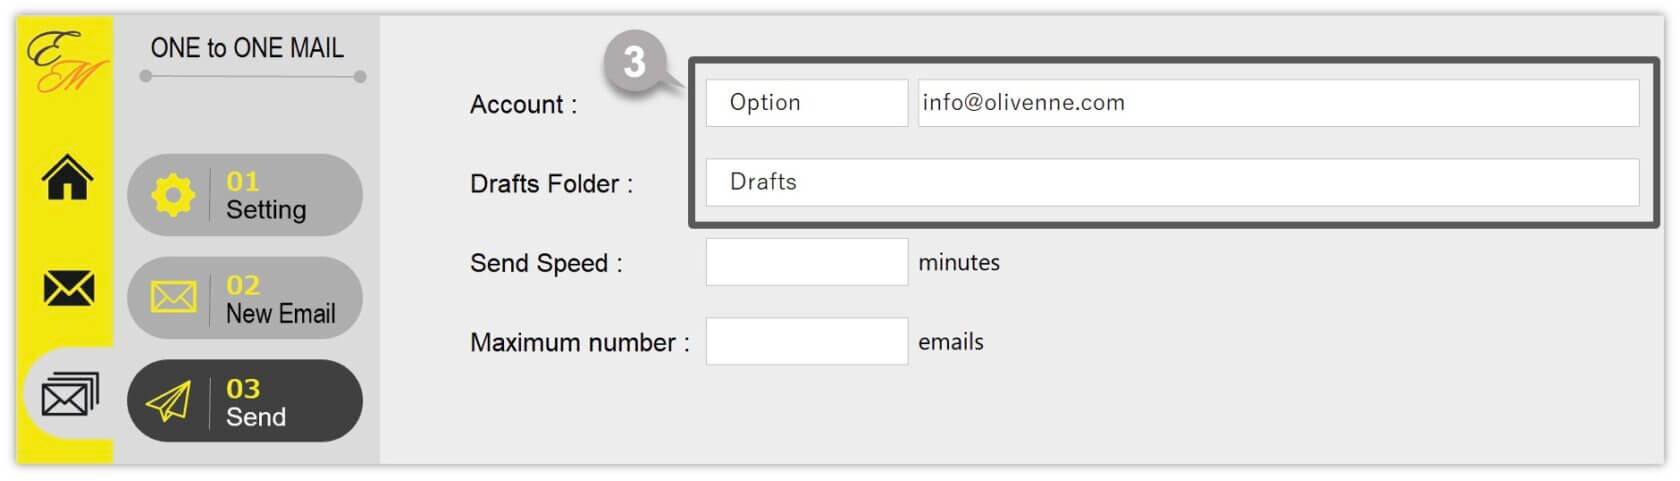
3 Specify the email account that you want to use for sending emails.
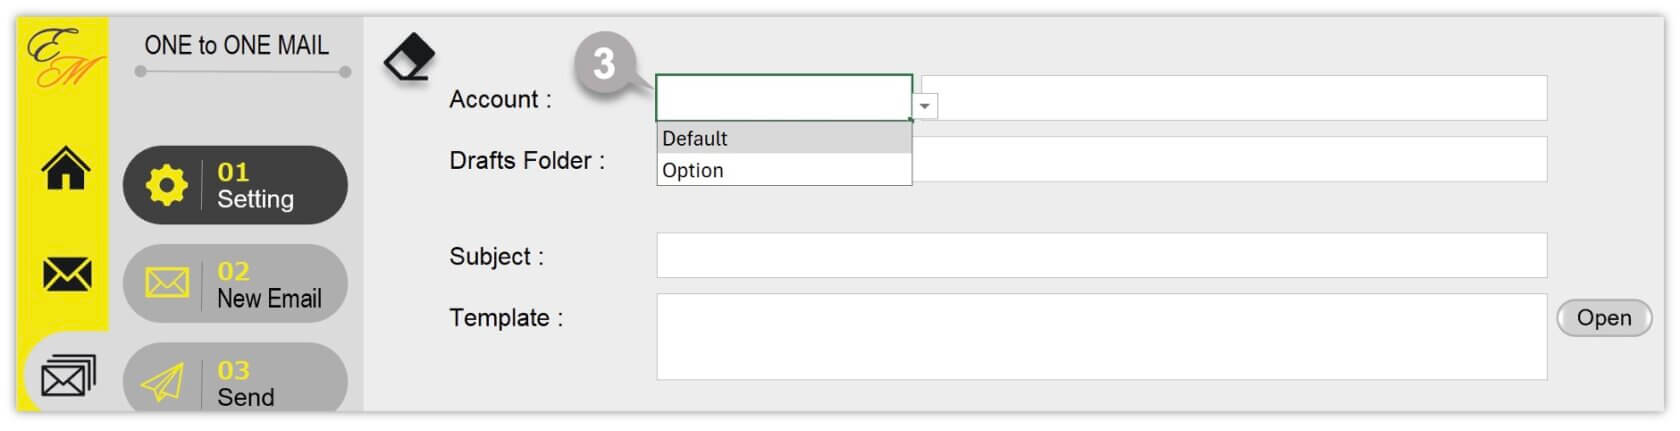
Your regular email account
If you want to use your regular email account for sending emails, select Default from the dropdown list.
An optional email account
If you want to use another email account for sending emails, select Option from the dropdown list, then type the email account name and the drafts folder name.
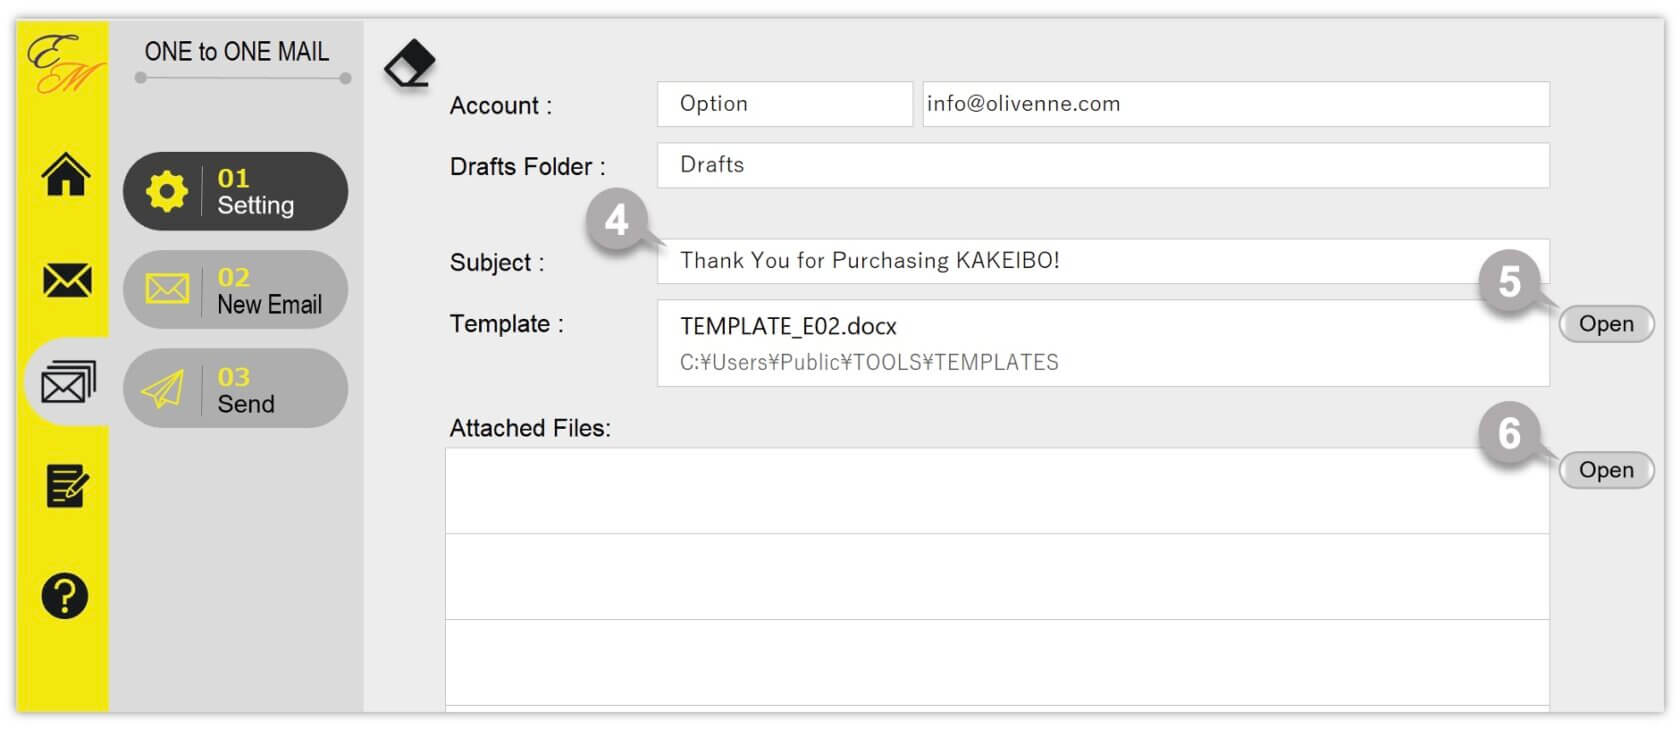
4 Enter a subject for the email.
5 Specify a template file for the body of the email. Click the Open button to open the dialog box and select the relevant file.
6 To attach files, click the Open button to open the dialog box and select the relevant file. You can attach up to 10 files.
STEP2: Composing new emails
It allows you to compose emails by entering the recipients’ email addresses and data to be inserted into the body of the email on the 02 New Email sheet.
1 Click the 02 New Email button in the left side of screen.
2 The new email composing screen will appear.
3 Enter the recipients’ email addresses in the Address column. If you want to insert information, enter data in the Name, Text1, and Text2 columns.
4 Click the Create button.
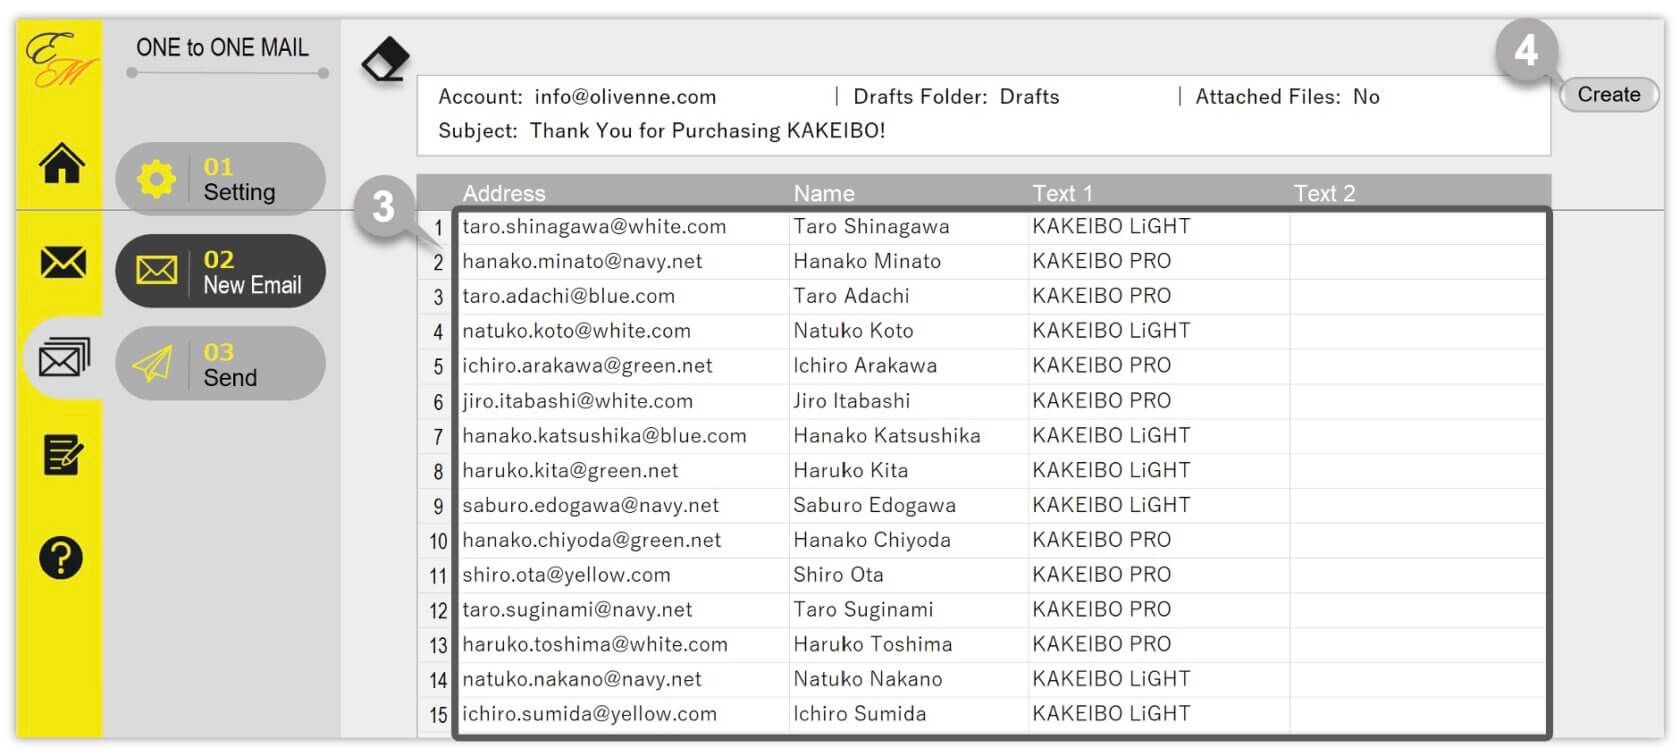
5 The confirmation message will appear. Click the OK button.
6 It will create the emails and save them in the Outlook drafts folder.
7 When the process is done, a completion message will appear.
While processing
If you do any other work while the process is running, it will not run correctly. Please wait until the processing is complete without doing any other work.
Before composing emails
When composing emails, if a Word template is still open, an Excel system error may occur. Before creating emails, please ensure that the Word template is closed.
STEP3: Sending Emails
It allows you to enter the information for sending emails and send them all at once on the 03 Send sheet.
1 Click the 03 Send button in the left side of screen.
2 The email sending screen will appear.
3 Make sure the email account you specified on the 01 Setting sheet is selected.
4 Enter the number for sending speed. For example, if you enter 3, it will send emails every 3 minutes automatically.
5 Enter the maximum number of emails to send.
6 Click the Send button.
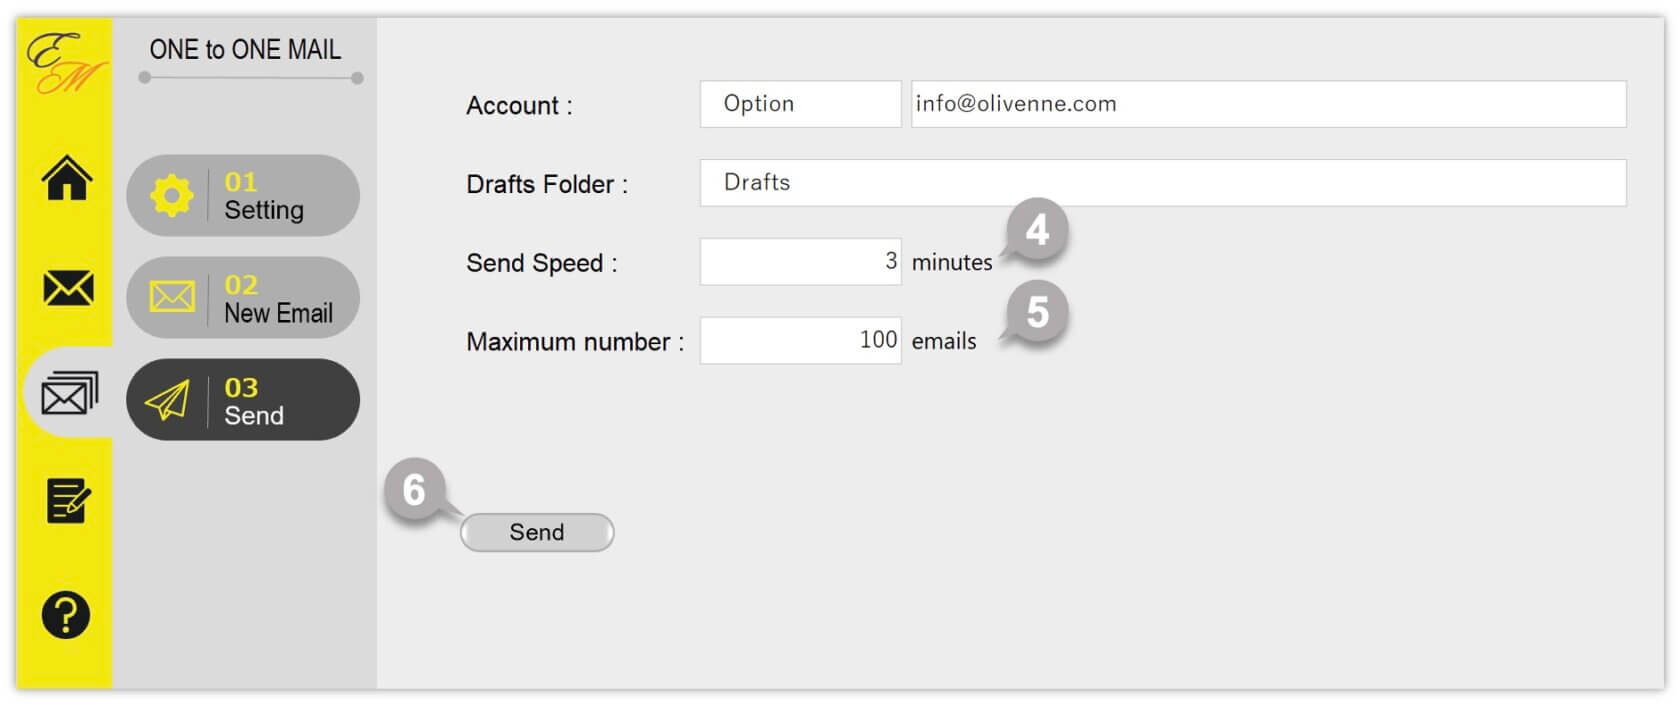
7 A confirmation message will appear. Click the OK button.
8 It will send the emails at the specified intervals.
9 When the process is done, a completion message will appear.
While processing
If you do any other work while the process is running, it will not run correctly. Please wait until the processing is complete without doing any other work. If you send out many emails, it is better to execute this function when you’re not working on the computer, such as during lunch or a meeting.
The intervals for sending
If you send a large number of emails in a short period, it may overload the mail server, causing it to go down, or it may be judged as ‘spam’ by internet providers or carriers, resulting in emails not being delivered or delayed. To prevent these problems, send emails at certain intervals.
4. Using for various purposes
With the ONE to ONE MAIL function, you can compose emails with the recipient’s name and message, allowing for email personalization.
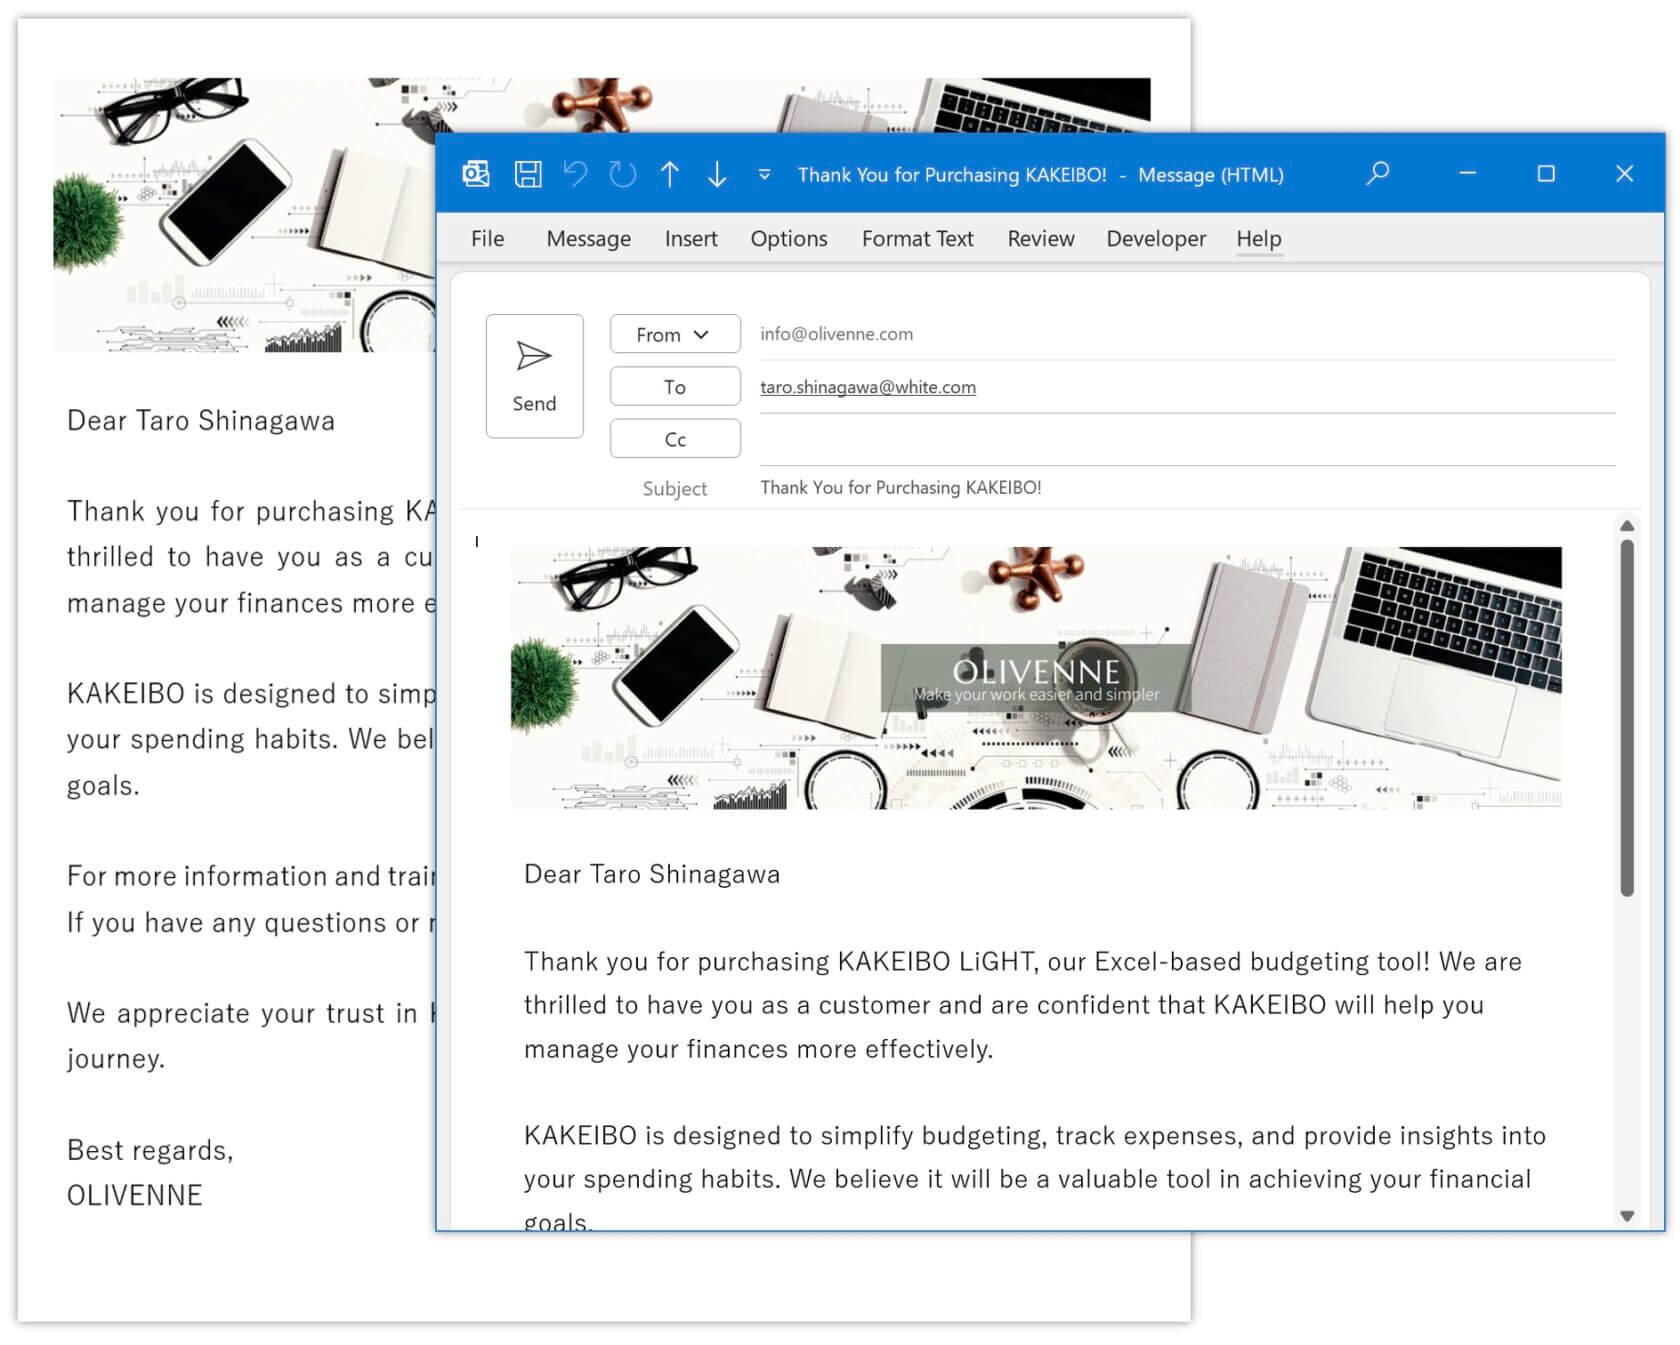
Personalized Marketing to Customers
It is ideal for sending emails to customers, such as notifications of new products, greetings, and announcements. The ONE to ONE MAIL feature allows for easy personalized marketing to customers. For instance, you can send a thank-you email after a product purchase, inserting the customer’s name and messages about the purchased product, adding a warm personal touch.
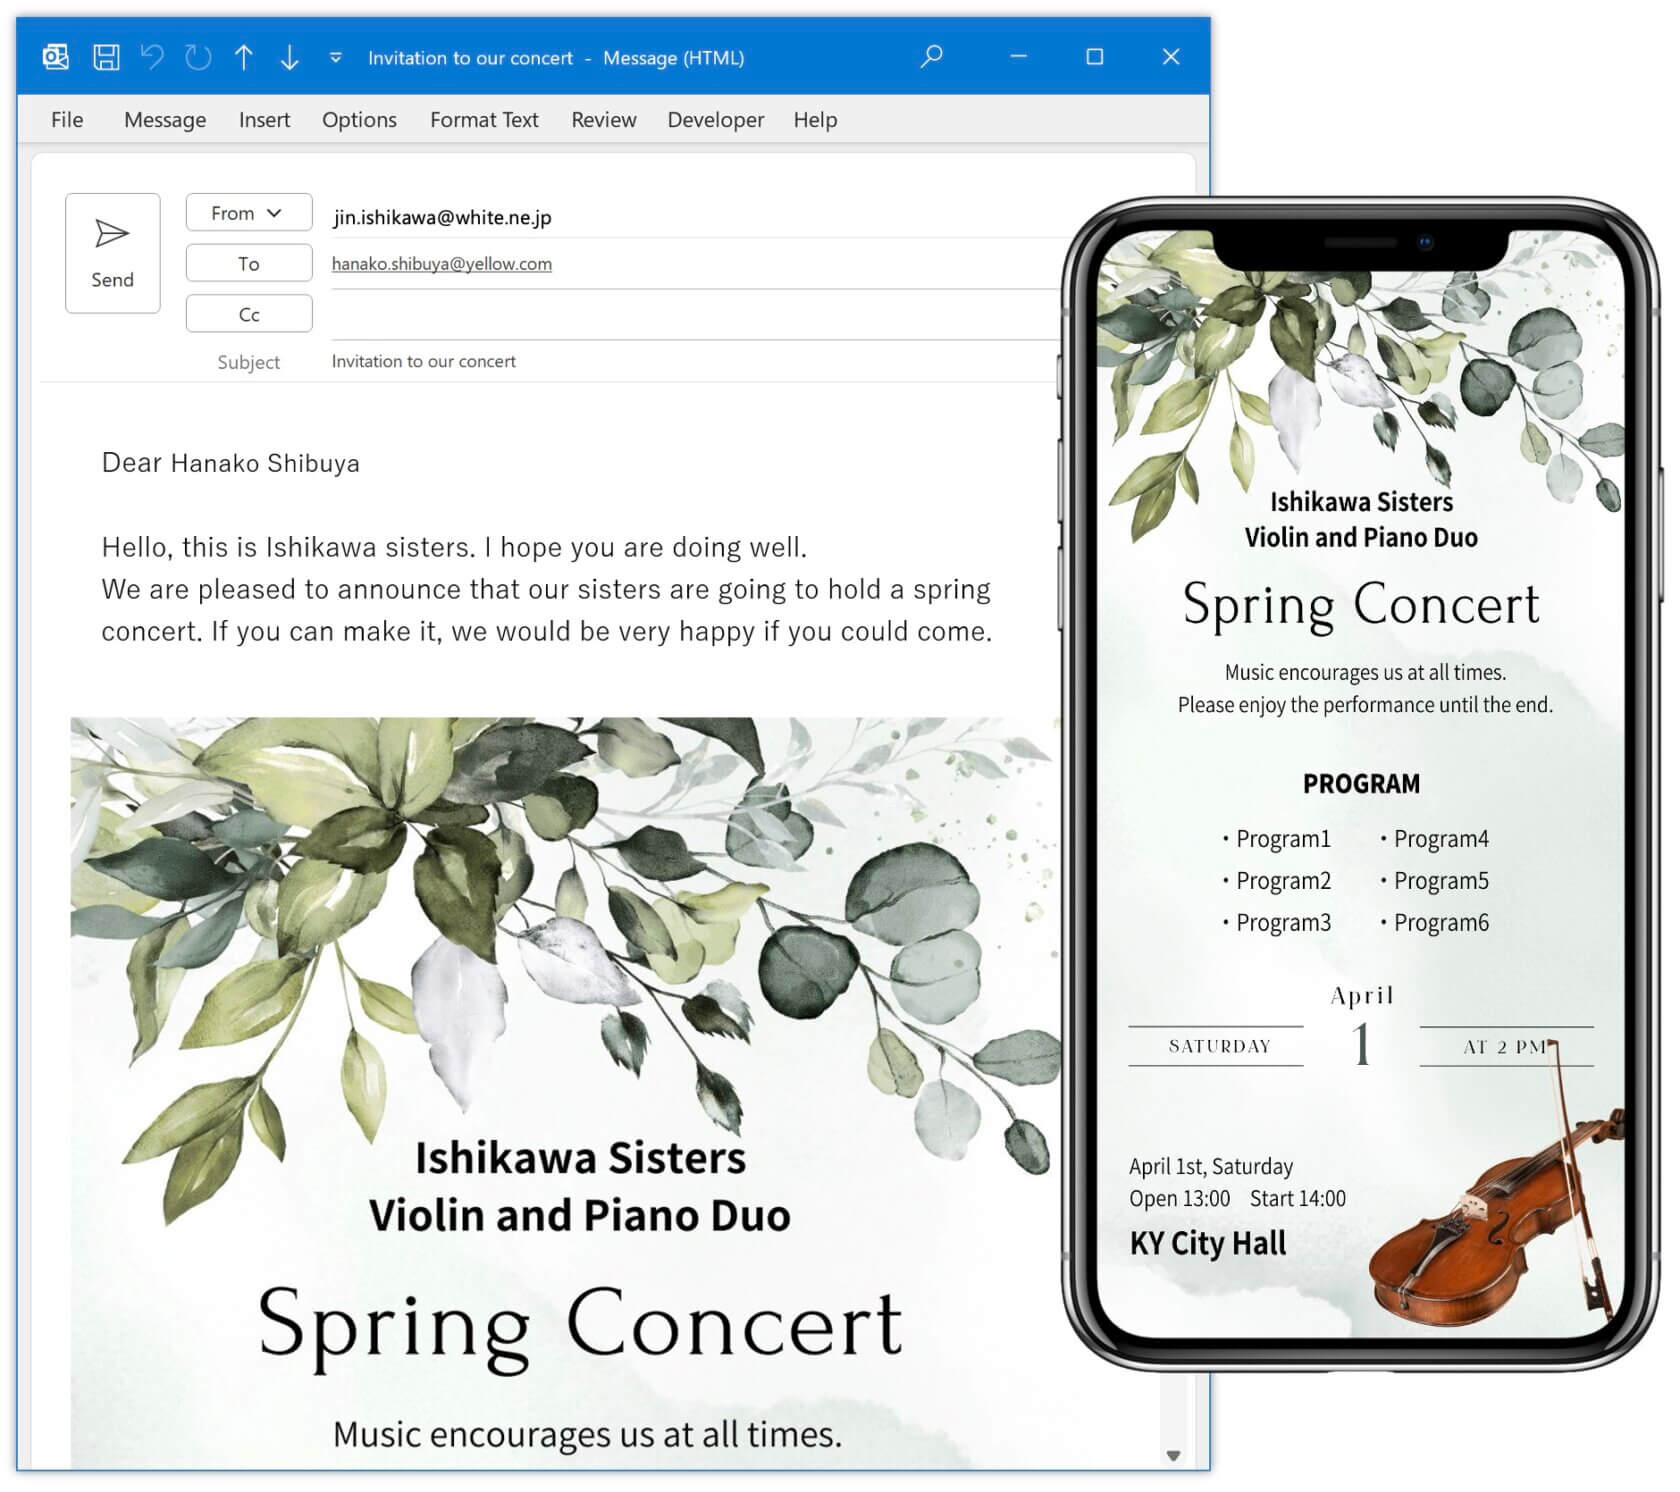
Invitations to Events and Seminars
It can also be used for inviting people to events such as concerts, dance recitals, and parties. By using invitation templates designed in Word, you can include necessary information and registration links. Utilizing Word’s design features, such as inserting images, allows you to easily create highly designed emails.
User’s Guide

